
Home >System Tutorial >Windows Series >Win11 installation wsl tutorial
Win11 installation wsl tutorial

- PHPzforward
- 2023-12-27 13:45:342069browse
Nowadays, many users like to install the wsl subsystem in the win11 system, so that their computers can have multiple operating systems at the same time. However, many friends do not know how to install it. In fact, as long as it is installed in the app store Can be downloaded and installed.
How to install wsl in win11:
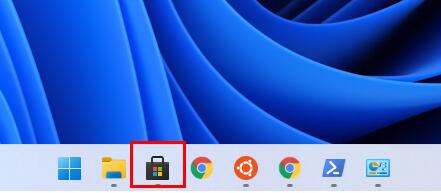
1. First, we click on "App Store" in the taskbar (if not, open it in the start menu)
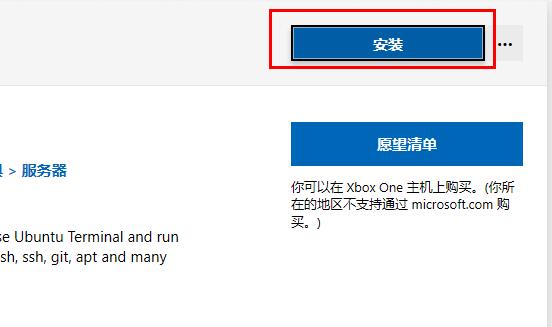
2. After entering, search for "ubuntu" and click on the application in the search results.

3. After entering the details page, click "Install" in the upper right corner
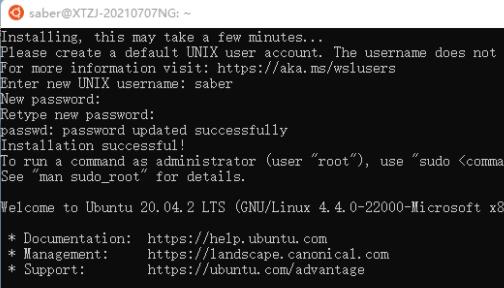
4. Wait for the software to automatically download and install. After the installation is completed, the dialog box as shown in the figure will pop up.
5. Enter our account and password to use the Linux subsystem in win11.
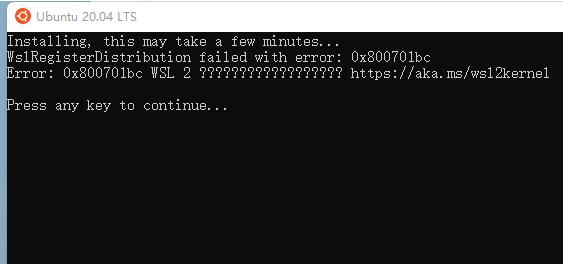
6. If an error code occurs during installation, open powershell and enter the following code to solve the problem:
“Enable-WindowsOptionalFeature -Online -FeatureName Microsoft-Windows-Subsystem-Linux”
The above is the detailed content of Win11 installation wsl tutorial. For more information, please follow other related articles on the PHP Chinese website!
Related articles
See more- The latest 10 thinkphp video tutorial recommendations in 2023
- In which folder are the desktop files of win7 system located in the c drive?
- How to solve the problem of missing Bluetooth switch in win10
- How to create a WeChat avatar - Tutorial on how to activate a WeChat avatar
- Enter the ASUS motherboard bios settings graphic tutorial