Home >Database >Mysql Tutorial >How to install mysql database and configure Java project in linux
How to install mysql database and configure Java project in linux
- 王林forward
- 2023-05-30 18:55:061463browse
1. Install the mysql database
①Download and unzip it and upload it to the /opt/soft directory (the soft directory is created by yourself)
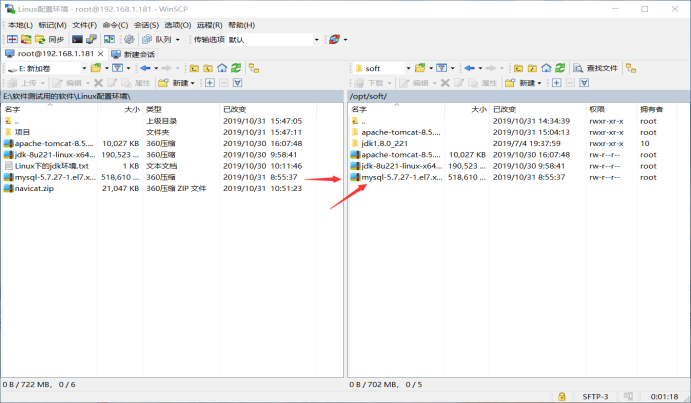
②Extract: tar -xvf mysql-5.7.27-1.el7.x86_64.rpm-bundle.tar

 ##rpm -qa | grep mariadb
 2. Uninstall the existing database: (Uninstalling will also uninstall the dependent packages of this package)
yum -y remove mariadb-libs.x86_64
## ④Install the mysql community edition service package: 
Found that 5 dependency packages are needed, so install the dependency package first (needed dependency) 
Found that this package depends on: mysql-community-libs, so install mysql-community- first libs package. 
3. Then install mysql-community-cient-5.7.27-1.el7.x86_64.rpm
4. Install mysql-community-common Dependency package: 
⑥Verify whether mysql is installed successfully (no error at startup indicates successful installation) 
 2. Find the temporary password and modify it
① Find the file that stores the temporary password:
find / -name mysql*log ② View the temporary password: 
(Password is c_xmovu7jjcw)
④In the environment of mysql database: 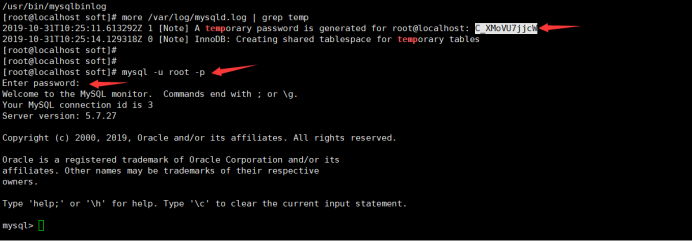
2. Set the length of mysql password: 
4. Exit: quit; Or ctrl z
3. View and create remote connection users
① Check whether the user can connect remotely:
1. Log in: mysql -u root -p; enter the password to log in (123456)
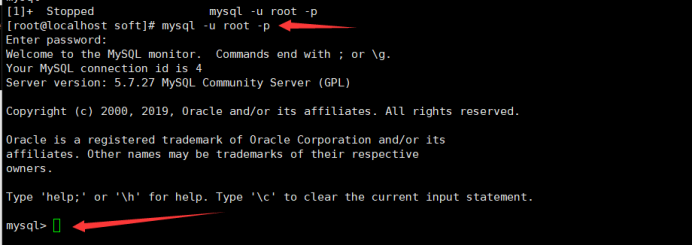
2. Enter: use mysql;

3. View: select host,user,authentication_string from user;

②Create remote user
1. Create user: create user 'myroot'@'%' identified by '123456';

2. Grant all privileges on *.* to 'myroot'@'%';


4. Use the navicat tool to log in remotely
①Close the firewall: systemctl stop firewalld.service②Connect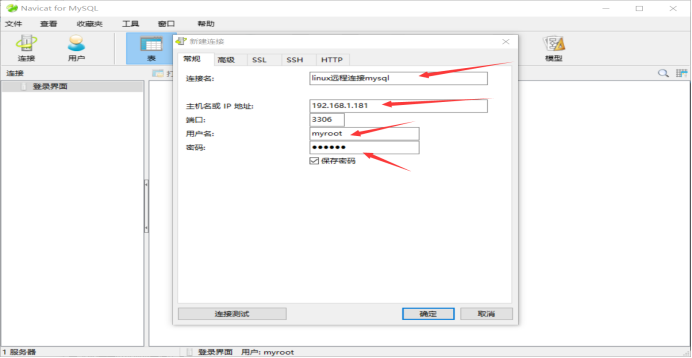

The project includes: program package (.war) data package (.sql)
①Upload the .war and program package to the wbapps directory under tomcat (in /opt/soft/apach-tomcat -8.5.47 directory)
# ② Import the .sql data package into navicat (after connecting, left-click, and then click to run the sql file) 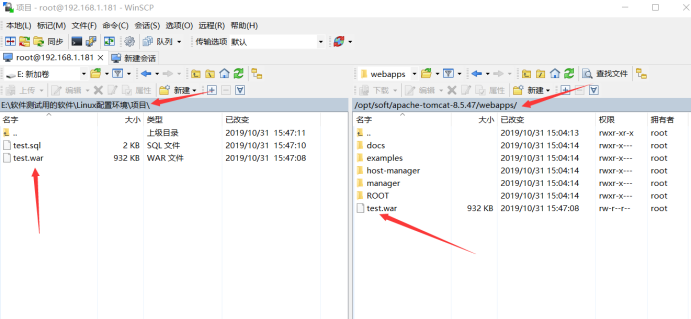
③Start the tomcat service: (To be started in the bin directory under the apache-tomcat-8.5.47 directory) 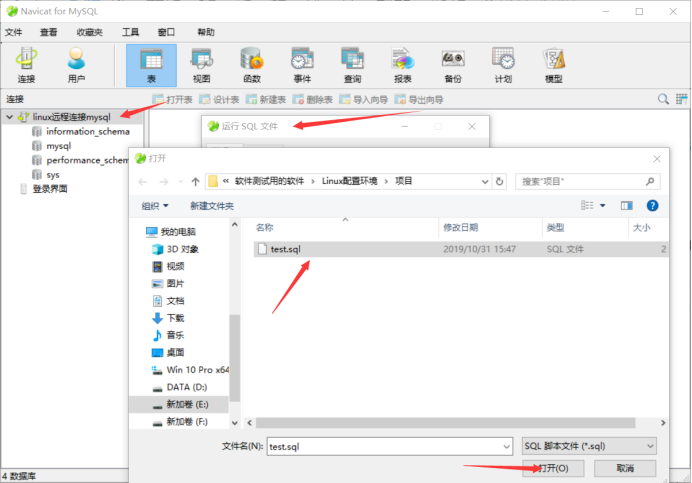
④Modify the file connecting the project to the database so that the project can connect to the database 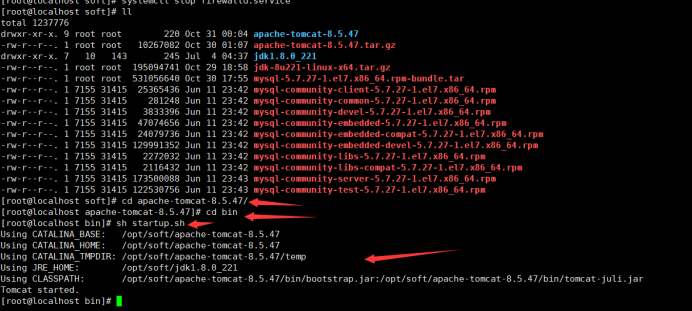
Modification: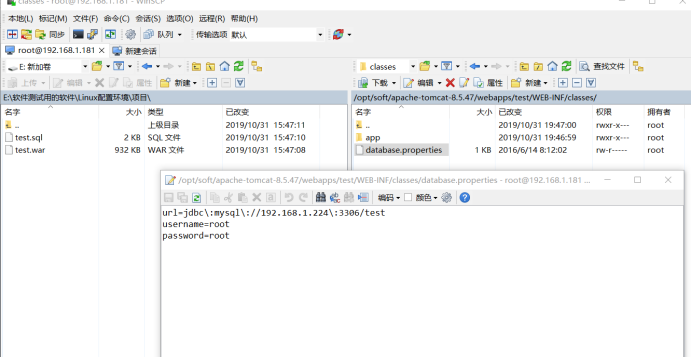
⑥ Turn off the firewall:
systemctl stop firewalld.service
⑦Open the web page: enter 192.168.1.181:8080/test 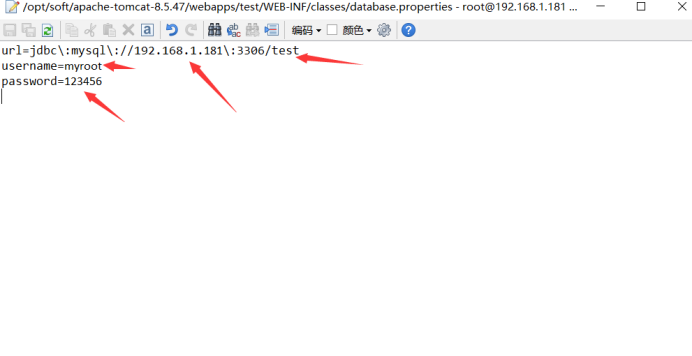
⑧Enter user name and password to test login
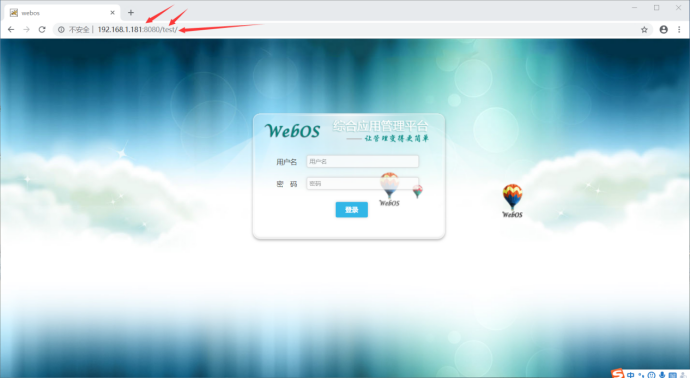 ⑨Login
The above is the detailed content of How to install mysql database and configure Java project in linux. For more information, please follow other related articles on the PHP Chinese website!

