1. Connect to mysql
Take IntelliJ IDEA, which is commonly used in java development, as an example. Mysql can also be used in IDE development tools.
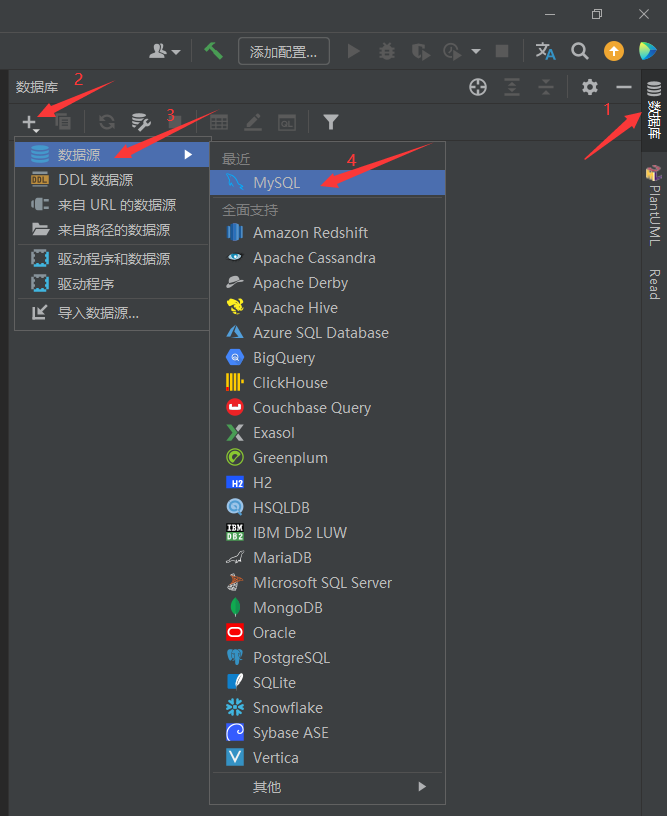
1. Open idea. There is a database sidebar in the upper right corner. Open the sidebar and click the plus sign -> Data Source. You can see that many databases are supported. Select mysql.
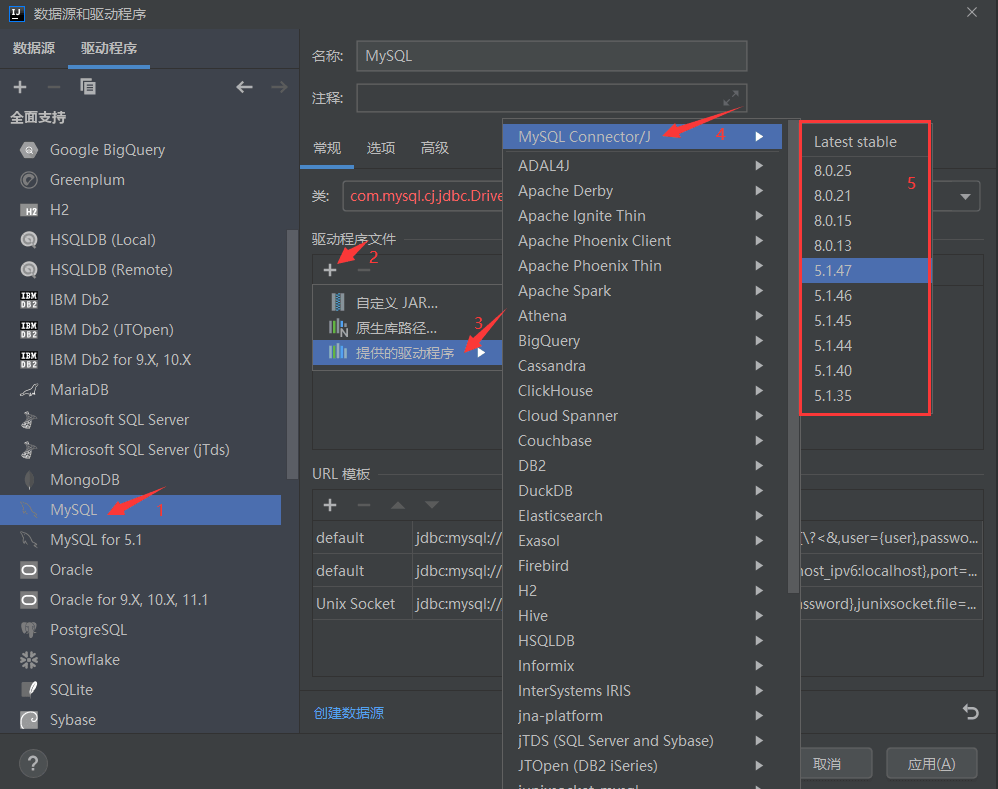
#2. You need to download the driver for the first time, otherwise an error will be reported when connecting to the database. Find mysql, click the plus sign under the driver file, click the provided driver, select the mysql driver (mysql connector/J), and then select the driver version. For users who have MySQL 5 version installed, they can download any version of the driver; however, if they have MySQL 8 version installed, they need to download the corresponding version driver.
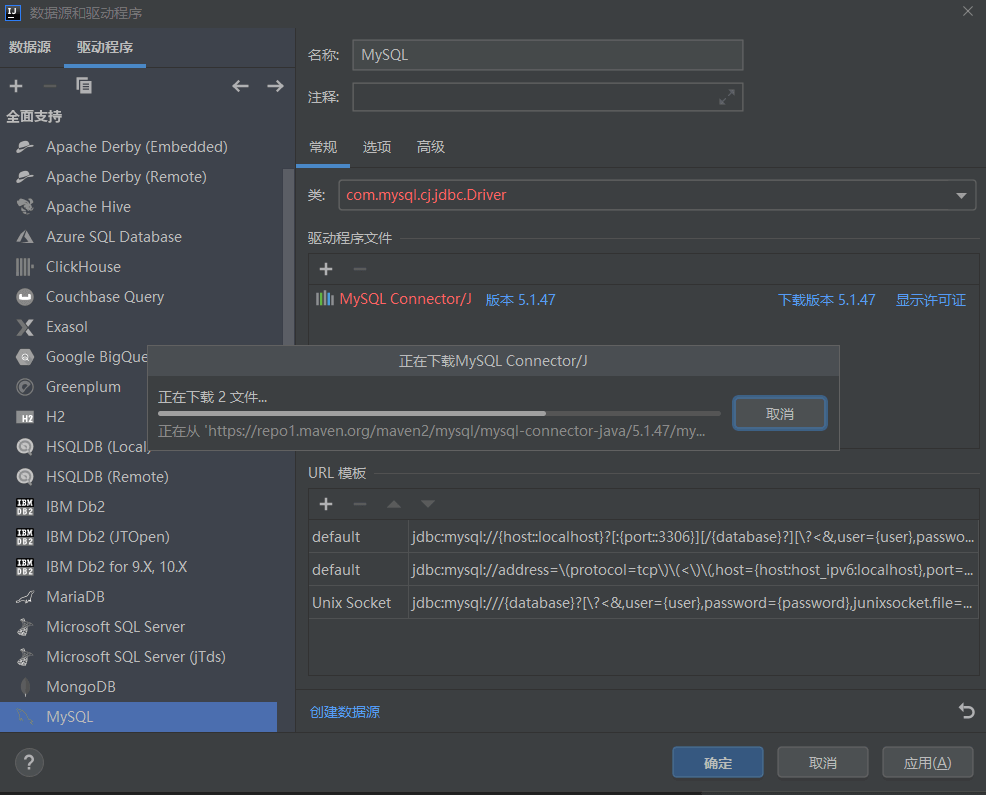
3. After the driver download is completed, select the class. For version 5 mysql, select the class com.mysql.jdbc.Driver in the picture. .
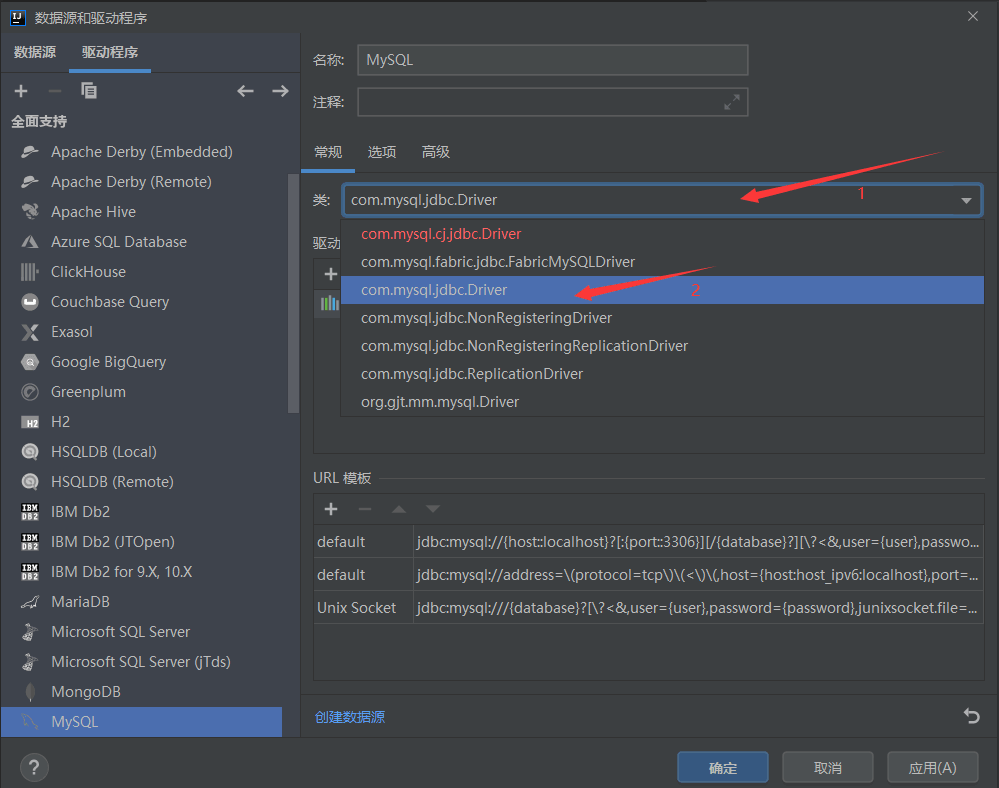
4. If mysql is version 8, download the version 8 driver and select com.mysql.cj.jdbc.Driver.
## in the picture. 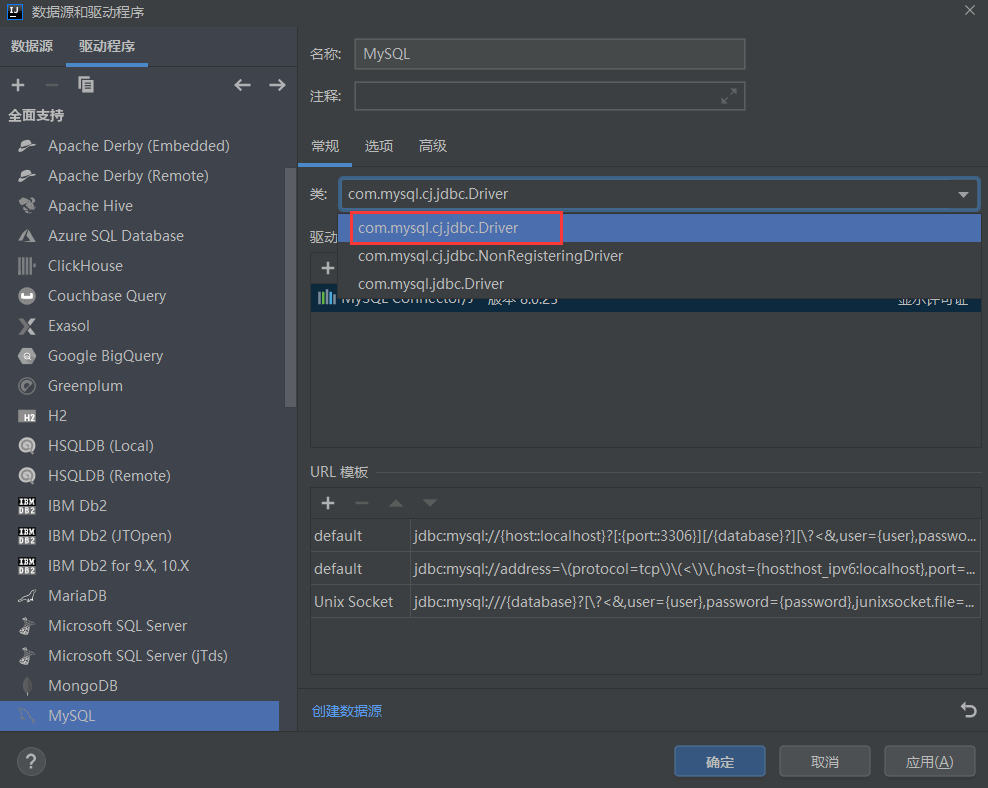
#Enter the host, port, user, and password and click Test Connection. If the connection is successful, you can continue to press OK. If you cannot connect, check the input information to ensure that the MySQL version and driver version are compatible.
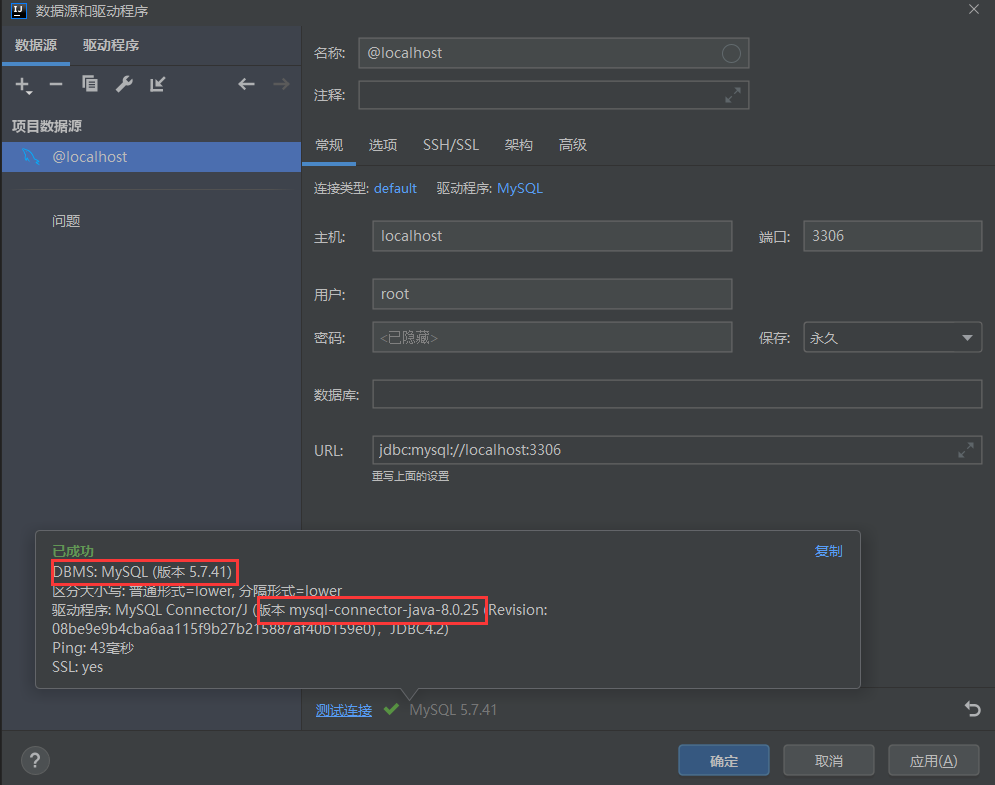
#6. After the connection is successful, only the default schema (that is, the database) will be displayed, and you can switch the database to be displayed.
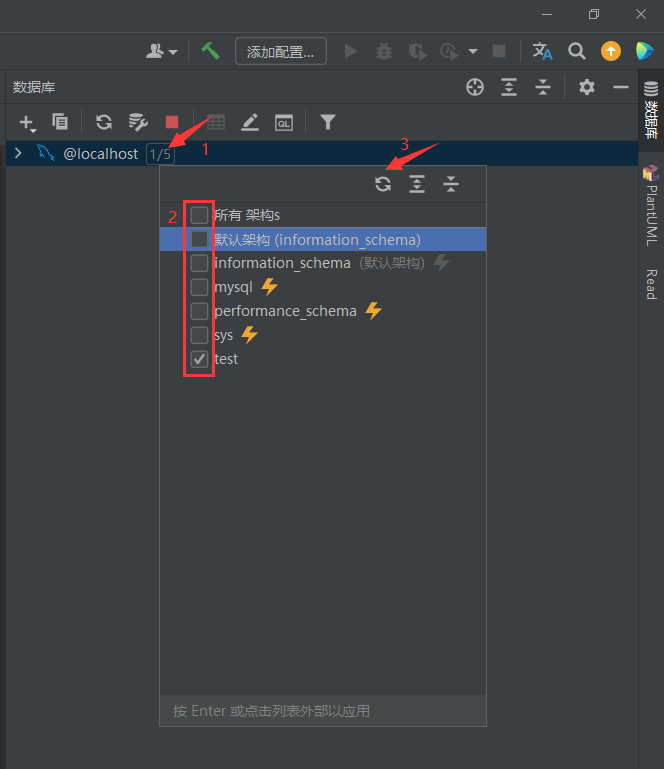
2. Using mysql
, you can right-click the database or table to bring up the function bar and select "Jump Query Console", and then SQL can be written and executed within the console tab. You also need to select the database in the console tab. Click on the drop-down box at the test position in the figure to choose to switch the database. In tx automatically, you can select the transaction submission method and transaction isolation level.
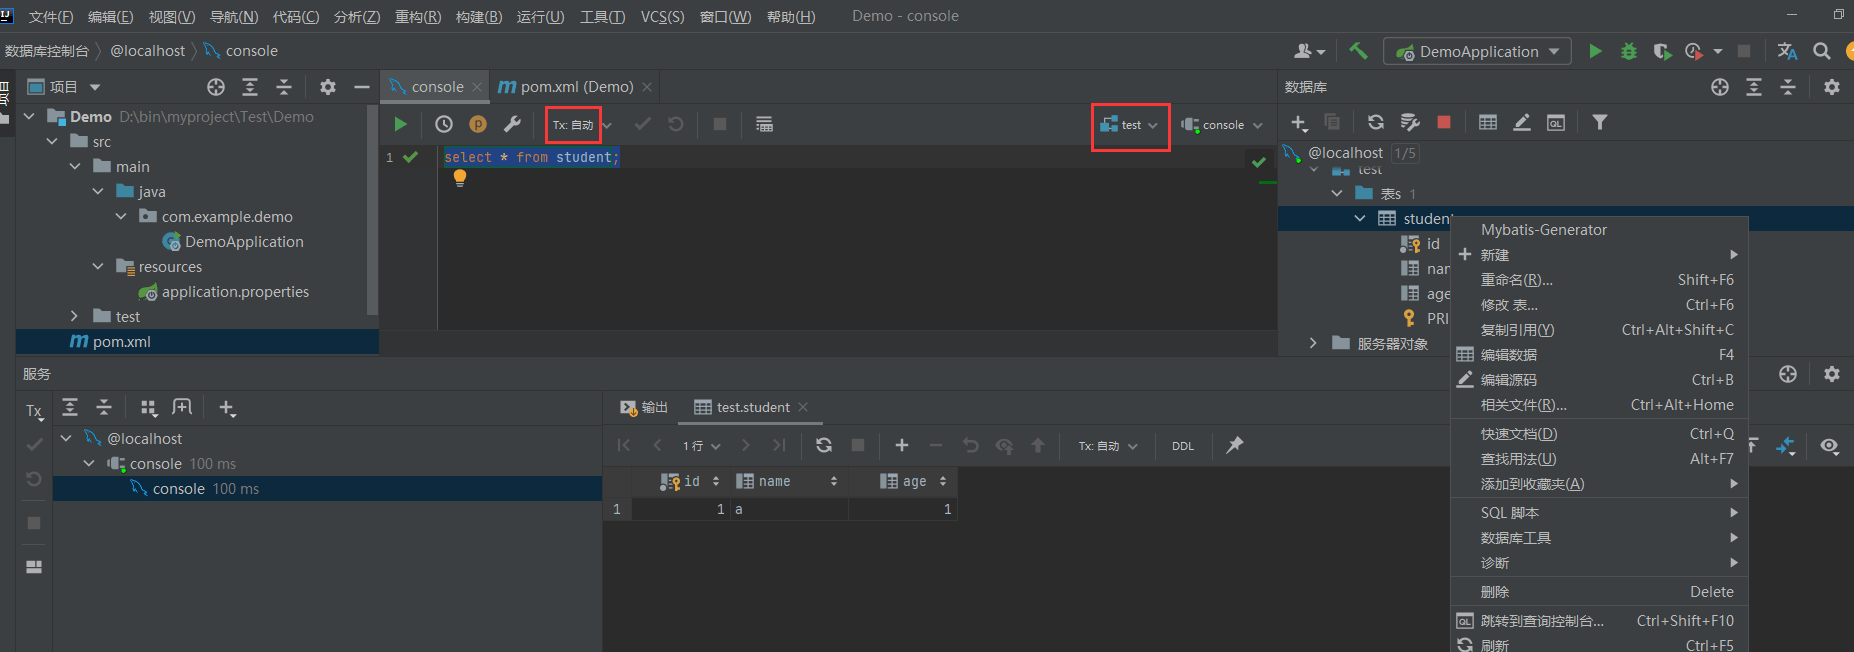
3. Quickly generate entities, interfaces, and SQL files
This not only provides MySQL operation functions, but also supports the rapid generation of entities, interfaces, and SQL files, which is convenient Do Java development. As shown in the figure, a new springboot module is created. Select one or more tables in the function bar and click the Mybatis-Generator pop-up window to edit the generated information here. The process of setting the model is called model setting, where file represents the entity name and package represents the package name. dao setting is the setting mapping interface, and the SQL file information is set in the xml mapper setting. After setting, click OK.
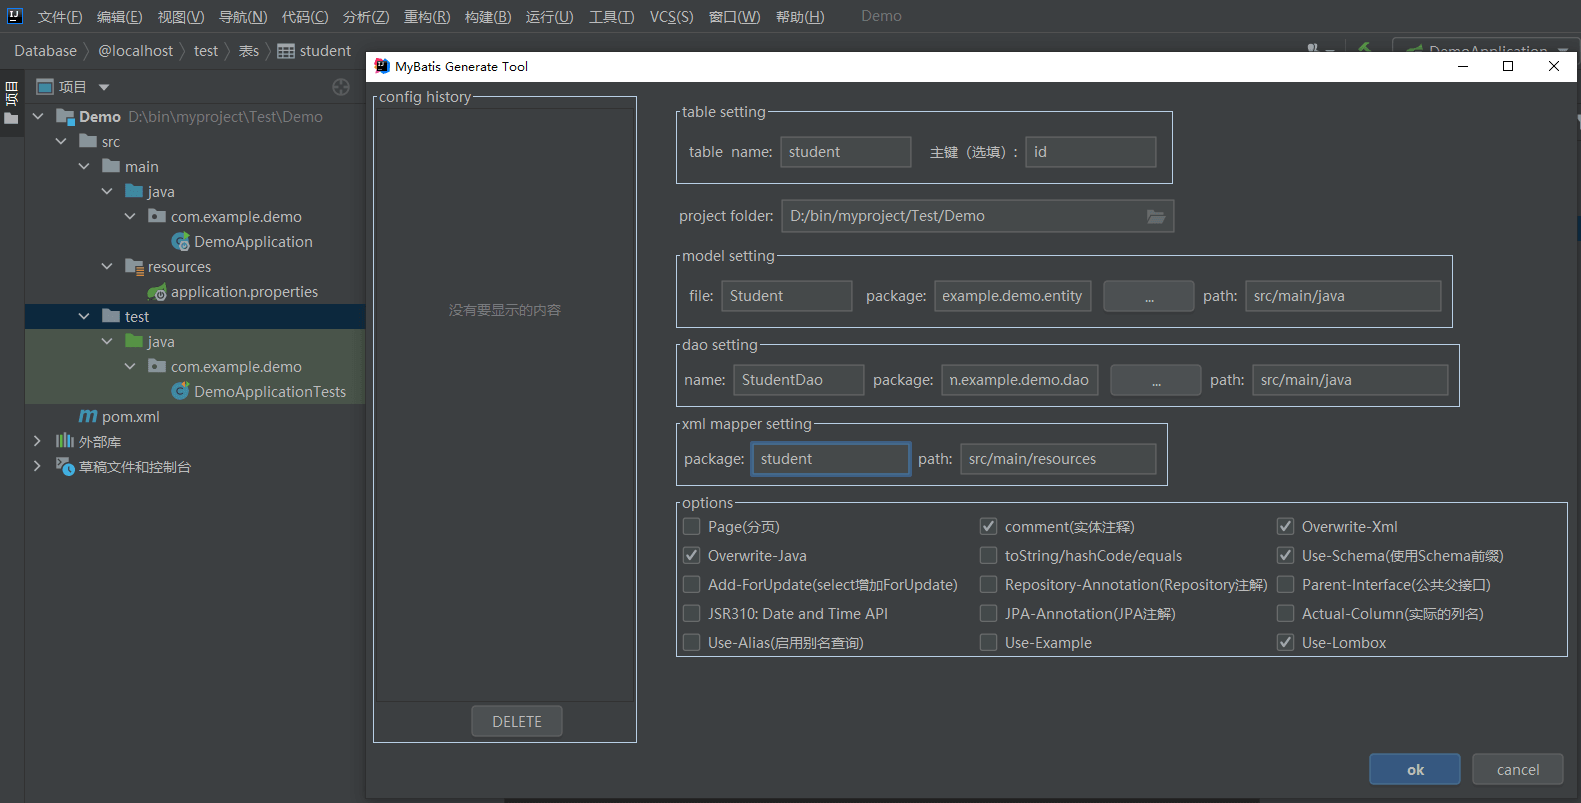
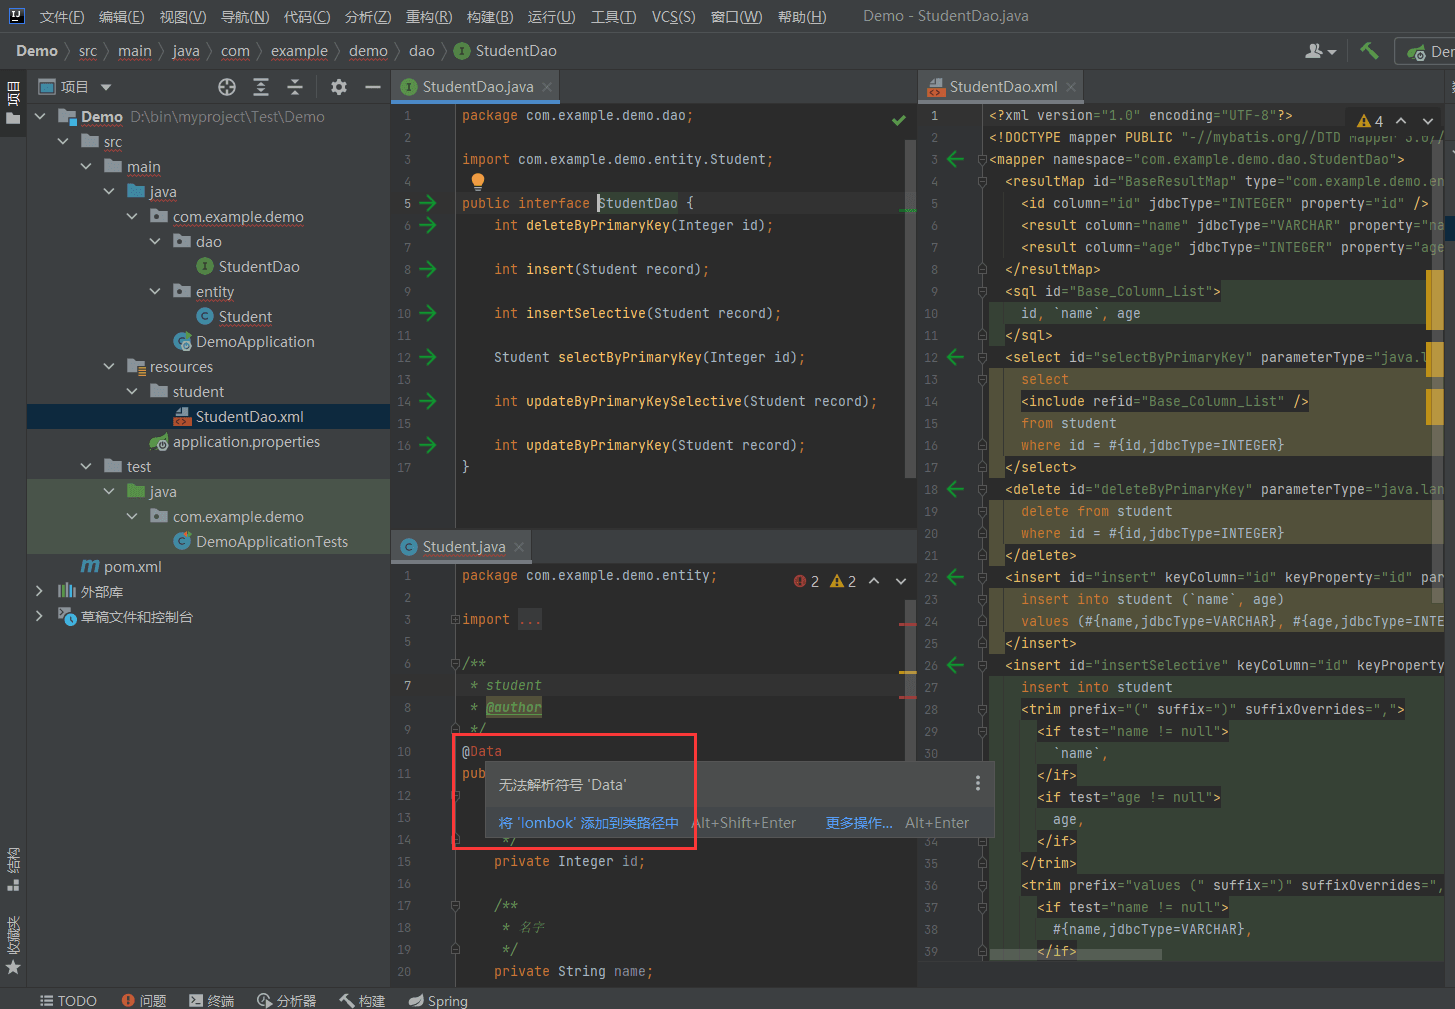
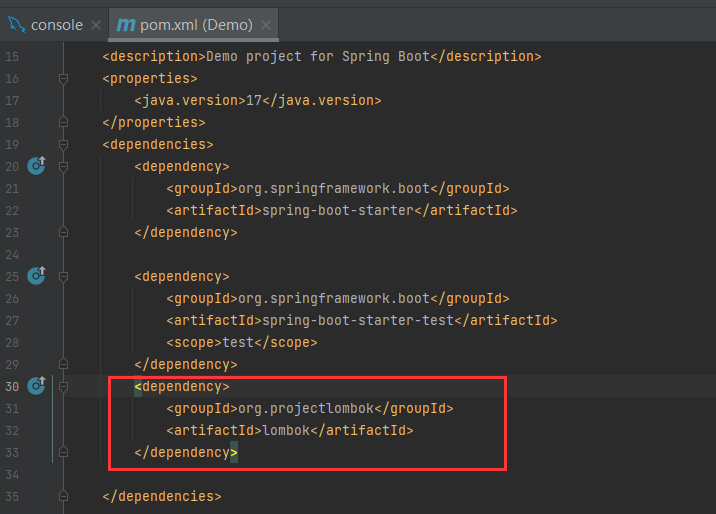
#2. As shown in the figure, the generated entities, interfaces, and SQL files are generated. You can see that the @Data annotation on the entity reports an error. This is because this annotation is provided by lombok's jar package to generate get, set, toString, etc. methods for entity attributes, and this jar package is not available in the project at this time. , so an error was reported. You can directly click "Add lombok to classpath", which will automatically add lombok coordinates to the pom file, or you can manually add lombok coordinates to the pom.
If you don’t want to use lombok, you can delete the @Data annotation directly, or you can uncheck Use-Lombox in options when editing the generated information in step 8. Handwrite get, set, and toString methods instead of using lombok.
The above is the detailed content of How to use mysql in idea. For more information, please follow other related articles on the PHP Chinese website!


