Home >Operation and Maintenance >Nginx >How to configure the multi-site function of WordPress in Nginx environment
How to configure the multi-site function of WordPress in Nginx environment
- WBOYWBOYWBOYWBOYWBOYWBOYWBOYWBOYWBOYWBOYWBOYWBOYWBforward
- 2023-05-12 09:58:152230browse
The multi-site function of wordpress allows multiple sites to be implemented by installing a wordpress program (that is, a set of programs can be bound to multiple domain names or sub-domain names).
Each site has independent themes, plug-ins, articles and pages.
This can greatly reduce the trouble of maintaining and updating multiple wordpress installation programs,
and each site can be independent of each other without affecting each other.
Wordpress multisite has two methods: subdirectory and subdomain name. Here we mainly introduce the subdomain name method.
That is to say, based on the main domain name, we will create a subdomain name, for example: http://shop.jb51.com.
At the same time, we can map this subdomain name to a first-level domain name such as: http://shop.com,
For visitors, they access an independent first-level domain name.
1. Preparation
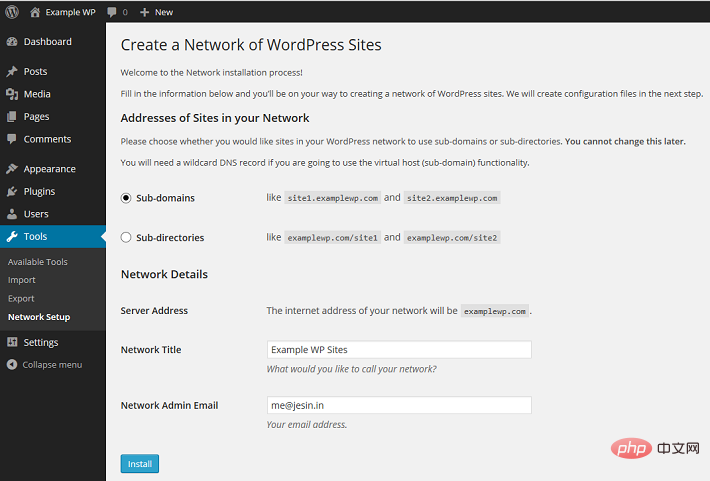
wordpress introduces its multi-site function page: site network management page
Next, we prepare several domain names, as follows:
site One: www.jb51.com (primary domain name), this is the domain name used when installing wordpress
Site two: blog.jb51.com, secondary domain name
Site three: news.com, mapped secondary domain name news.jb51.com
Site 4: shop.com, mapped second-level domain name shop.jb51.com
Note: After WordPress is installed, please do not modify the domain name in the background without authorization, even if you change the www to no www , or vice versa, may cause redirected you too many times. Error
Then, log in to the domain name service provider's resolution page, and set all a records of the above domain names to the server IP of WordPress installation.
You can also test on a local computer. You can directly modify the hosts file and add the following line:
127.0.0.1 www.jb51.com blog.jb51.com news.com shop.com
2. nginx configuration
Create a new configuration file in the nginx configuration directory, as follows :
$ sudo vi /etc/nginx/conf.d/jb51.conf
The content is:
server {
listen 80;
server_name www.jb51.com blog.jb51.com news.com shop.com;

root /usr/share/nginx/wordpress;
index index.php;

location / {
try_files $uri $uri/ /index.php?$args ;
}

location ~ /favicon.ico {
access_log off;
log_not_found off;
}

location ~ \.php$ {
try_files $uri /index.php;
include fastcgi_params;
fastcgi_pass 127.0.0.1:9000;
fastcgi_index index.php;
fastcgi_param script_filename $document_root$fastcgi_script_name;
}

access_log /var/log/nginx/$host-access.log;
error_log /var/log/nginx/wpms-error.log;
}
Here we use the $host variable to allow nginx to generate independent access logs for each domain name,
such as: news. com-access.log and shop.com-access.log.
But the error log cannot use the $host variable, so all errors will be recorded in a file.
Restart the nginx server:
$ nginx -s reload
3. Install wordpress
Follow the normal installation steps of wordpress to install wordpress.
4. Enable multi-site function
Open the wp-config.php file with a text editor and comment: "/* OK! Please do not continue editing. . Please save this file. Happy using it! */" before adding the following line:
/* multisite settings */
define( 'wp_allow_multisite', true );
We will edit this file a few times.
After saving, log in to the WordPress backend, click: Tools > Network Settings, select the subdomain name, network title and network administrator’s email address and enter them as desired.
Then install the terminal.

After waiting for a while, two code blocks will appear on the interface, prompting you to add wp-config.php and .htaccesss files respectively.
We are using nginx here, so we don’t need to worry about the .htaccess part.
Open the wp-config.php file and add the following lines before commenting: "/* Okay! Please do not continue editing. Please save this file. Happy using! */":
define('multisite', true);
define('subdomain_install', true);
define('domain_current_site', 'www.jb51.com');
define('path_current_site', '/');
define('site_id_current_site', 1);
define('blog_id_current_site', 1);
log out of the wordpress admin panel, and log in again.
Log out of the WordPress backend and log in again.
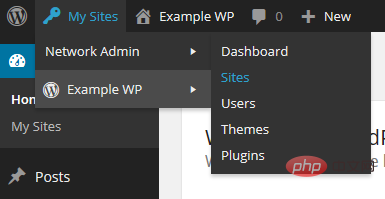
Open My Site > Network Management > Site in the upper left corner of the panel.

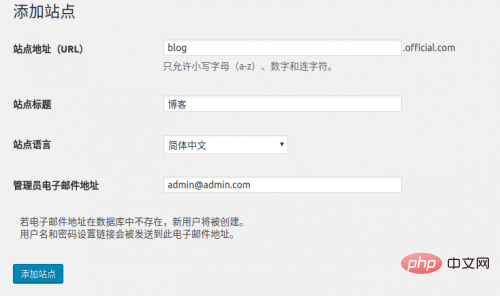
Click the Add New button to open the add new site form and add three subdomains: blog, news, and shop.

After the addition is completed, select all sites and edit the two subdomains of news.jb51.com and shop.jb51.com. The site titles are News and Mall respectively,
Change the site addresses (url) to: news.com and shop.com respectively.
After this step is completed, we can access blog.jb51.com. It is already an independent site with independent resources.
But to access news.com and shop.com, you need to continue reading.
5. Set up domain name mapping
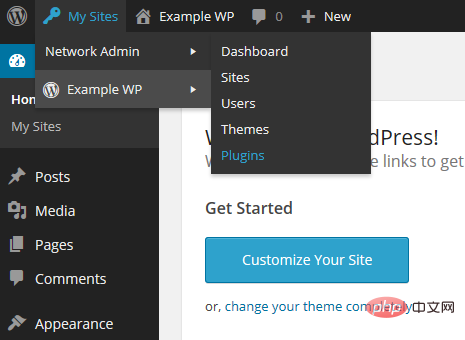
Open My Site > Network Management > Plug-in in the upper left corner of the panel.

Install the wordpress mu domain mapping plug-in here. You can directly search or download and install it, and then enable it.
Then copy the sunrise.php file in the plug-in directory (directory wp-content/plugins/wordpress-mu-domain-mapping) to the wp-content directory.
Open the wp-config.php file and add the following line before the comment: "/* Okay! Please do not continue editing. Please save this file. Happy using! */":
define('sunrise', 'on');
Save, then return to the browser, open My Site > Network Management > Settings in the upper left corner of the panel in the background.
Then select domain mapping and modify the domain options as shown below:

然后保存。
这里的配置的功能是:重定向所有二级域名(如 news.jb51.com )到各自的外部域名(如 news.com),包括管理页面(/wp-admin)。
接下来,我们要映射一级域名到各个站点id。
默认在后台不显示站点id,所以我们用一个最简单的方法让后台直接显示站点id。
这个方法就是用wordpress的 must-use plugin。
在 wp-content 目录下创建一个 mu-plugins 目录,再在新建的目录下创建一个名为 wpms_blogid.php 的文件,
这个php文件的内容为:
<?php
add_filter( 'wpmu_blogs_columns', 'do_get_id' );
add_action( 'manage_sites_custom_column', 'do_add_columns', 10, 2 );
add_action( 'manage_blogs_custom_column', 'do_add_columns', 10, 2 );
function do_add_columns( $column_name, $blog_id ) {
if ( 'blog_id' === $column_name )
echo $blog_id;
return $column_name;
}
function do_get_id( $columns ) {
$columns['blog_id'] = 'id';
return $columns;
}保存后再访问后台的 站点 > 所有站点,在站点列表中就会多一列id,下一步就会用到。
后台控制面板切换到 设置 > domains,加入两个域名:
site id:3(以自己实际为主)
domian:news.com
primary:√
以及:
site id:4(以自己实际为主)
domian:shop.com
primary:√
如果域名是有www的,一样的操作方式。
The above is the detailed content of How to configure the multi-site function of WordPress in Nginx environment. For more information, please follow other related articles on the PHP Chinese website!

