Home >Common Problem >What's the fix for missing WiFi icon in Windows 11?
What's the fix for missing WiFi icon in Windows 11?
- 王林forward
- 2023-05-09 22:22:065909browse
Some users have reported that the Wi-Fi option or icon is missing on their Windows 11 PCs. Missing or corrupt network drivers or Windows operating system or hardware issues can be some of the reasons why this issue pops up on Windows 11 PC.
If you are unable to find the WiFi icon in the system tray on your PC, then we have listed some methods that can help you solve this problem and get back the missing Wi-Fi icon. Go ahead and try the fixes mentioned in this article one by one in the order mentioned below. Before trying to fix it, check if there are any buttons/physical switches with a WiFi icon on your laptop. If there are any such switches, press them once to enable the WiFi option.
Fix 1 – Restart Windows Explorer
Step 1. Right-click the Windows Start button to open the context menu.
Step 2. Click Task Manager in the menu.

Processes tab, look for "Windows Explorer" in the list of processes running on the computer.
Step 4. SelectWindows Explorer and click Restart Task in the upper right corner of Task Manager.
Step 5. After Explorer restarts, check to see if your missing Wi-Fi icon issue has been fixed.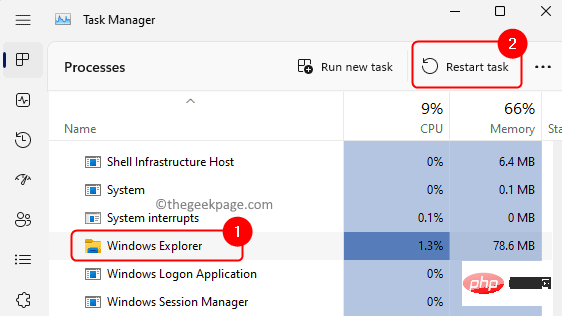
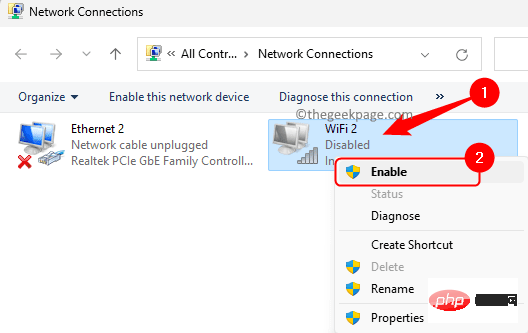
Windows R to open the "Run" dialog box.
Step 2. Typencpa.cpl and press Enter to open the network connection.

Enable.
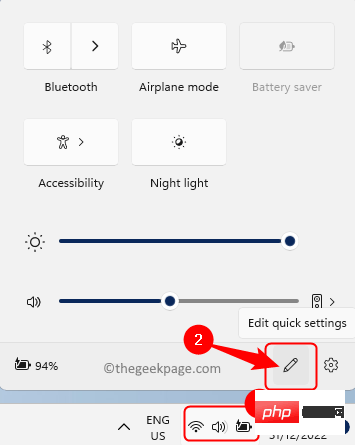
speaker icon in the system tray.
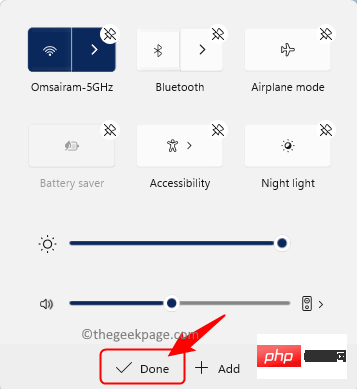
Step 2. You will see a notification or action area. Check if there is a WiFi icon in this area. Step 3. If the WiFi icon doesn't appear here, click theEdit Quick Settings icon at the bottom of this action area.
Add and select Wi-Fi in the options.
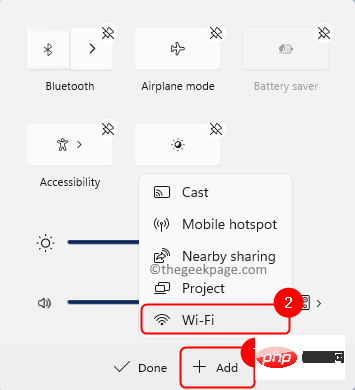
WiFi icon added. The position of this icon can be changed by dragging and dropping it wherever you want it.
Then, clickFinish.
Windows key on your keyboard and type Services in the search box.
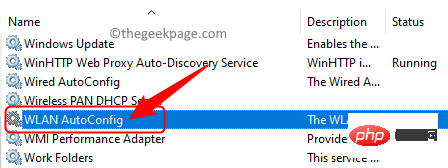
Step 2. Select the"Service" application in the search results.

WLAN Auto-Configuration in the list of services.
Double-click it to open theproperties.
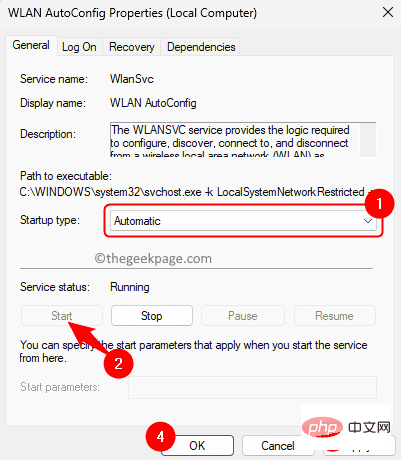
"Properties ", make sure "Startup Type" is set to "Automatic".
Step 5. If the service is not running, click the"Start" button to start the service.
Finally, click "Apply" and then "OK" to save the changes.
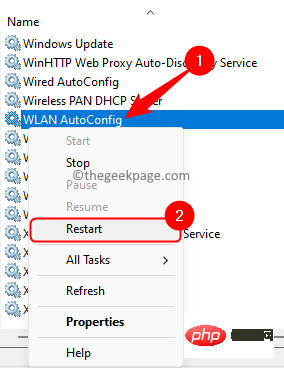
"Services" window, right-click WLAN Auto-Configuration and select "Restart".
Step 7.Restart the computer and check if the problem is resolved.
Fix 5 – Disable and enable network adapter in Device Manager
Step 1. Press the Windows X key at the same time to open the Start button context menu.
Step 2. Click Device Manager here.

Step 3. Expand the Network Adapters section by clicking the small arrow next to it.
Step 4. Right-click Wireless Network Adapters in the list and select Disable Device.
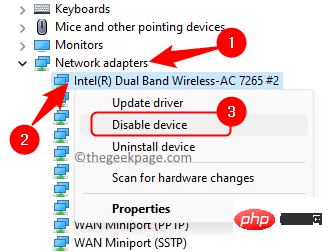
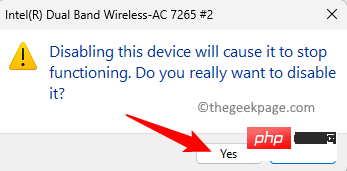
Click "Yes" on the confirmation prompt to disable the device.
Step 5. After disabling the adapter, right-click on it again and select Enable Device.
Step 6. Now, check if the missing WiFi icon has reappeared in the system tray.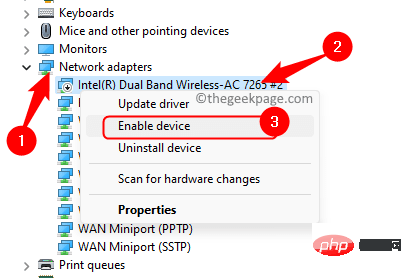
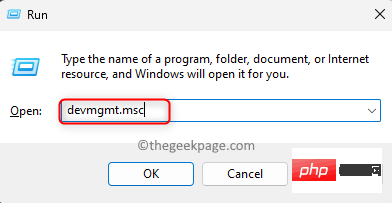
Windows R to open "Run".
Step 2. Typedevmgmt.msc and press the Enter key to open the Device Manager.
Network Adapters to expand it.
Step 4. Right-click on the problematicWi-Fi device and select Update Driver.
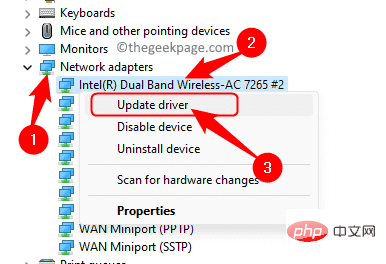
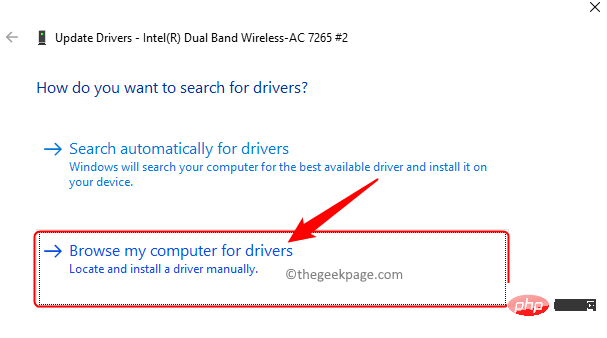
Update Driver" window, click "Browse my computer for driver".
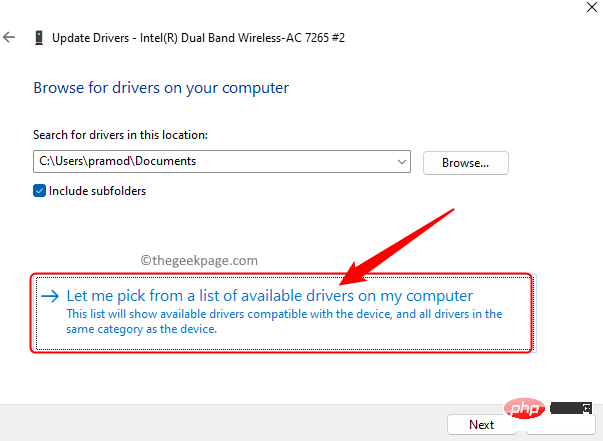
select from a list of available drivers on your computer.
for your WiFi device from the list and click Next.
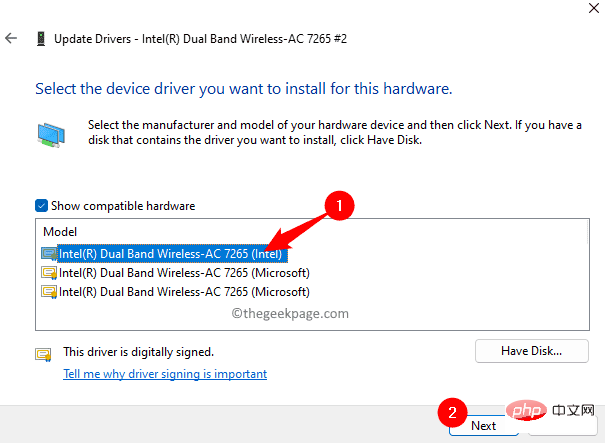
RestartPC after updating drivers.
Check if you are still having issues. Fix 7 – Reinstall Network DriversStep 1. OpenDevice Manager as described in Steps 1 and 2 in Fix 6 above.
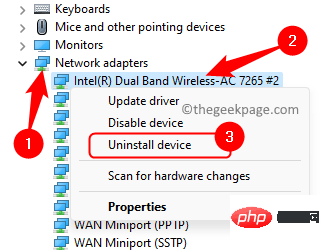
Step 2. Click the arrow next to"Network Adapters" to expand it.
Step 3. Right-click the WiFi network driver and selectUninstallDevice.
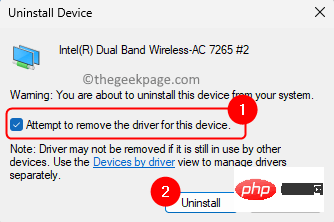
Attempt to remove the driver for this device.
Then, click Uninstall.
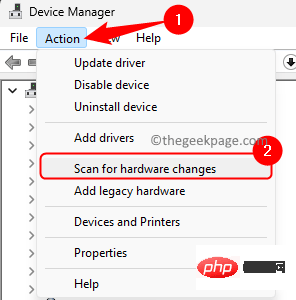
Action menu at the top of Device Manager.
SelectScan for hardware changes.
Restart the system and check if the problem is resolved.
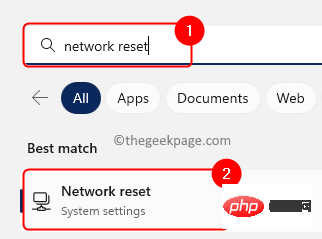
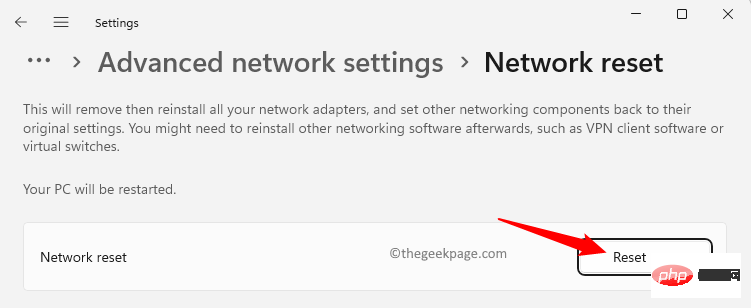
Fix 8 – Perform a Network ResetStep 1. Click theWindows key on your keyboard and type NetworkReset in the search box.
Step 2. ClickNetwork Reset in the search results.
Reset Now" button to remove and reinstall all network adapters.
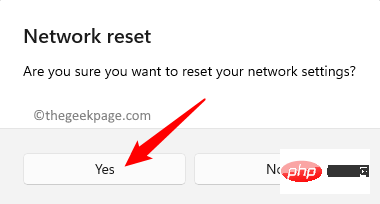
Step 4. Click Yes on the confirmation prompt to continue resetting network settings.
Check whether the problem of missing WiFi icon has been resolved.
Fix 9 – Reset Network Device via Command Prompt
Step 1. Press Windows X and select Terminal (Administrator) in the context menu that opens.
When User Account Control prompts for permissions, click "Yes".

Step 2. Execute the commands given below in the given order.
netsh int ip resetnetsh advfirewall resetnetsh winsock resetipconfig /flushdnsipconfig /releaseipconfig /renew
Step 3. Restart your computer. Check whether the Wifi option is restored after system startup.
Other Fixes
1. Check for Windows Updates
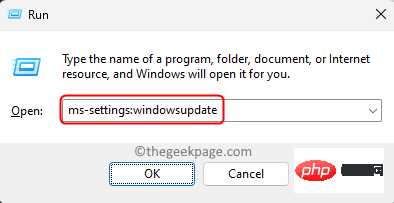
Step 1. Press Windows R to open "Run".
Type ms-settings:windowsupdate and press Enter.
Step 2. Click Check for Updates.

Step 3. Wait for Windows to check for updates. If any updates are found, they will be downloaded and installed.
After updateRestartPC and check if the WiFi icon has been restored.
2. Run the troubleshooter
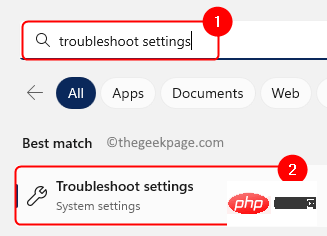
Step 1. Hit the Windows key and type Troubleshooting Settings in the search box.
Step 2. Click Troubleshooting Settings.
Step 3. Then, select Other troubleshooters.

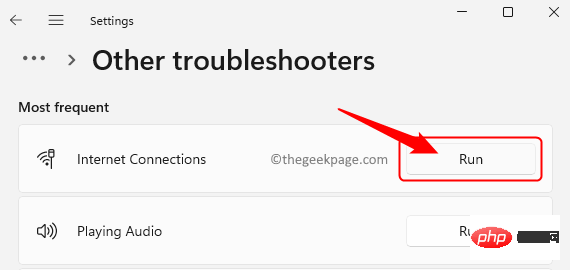
Step 4. Click the Run button associated with your Internet connection.
Windows will begin checking for any problems and display them to you along with fixes that can be applied.
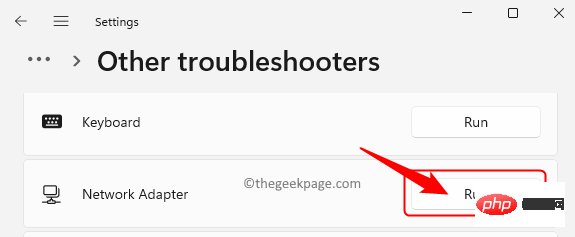
Step 5. If the problem persists, run the Network Adapter troubleshooter.
The above is the detailed content of What's the fix for missing WiFi icon in Windows 11?. For more information, please follow other related articles on the PHP Chinese website!

