Home >Common Problem >How to change the default save file location in Nearby Shares in Windows 11
How to change the default save file location in Nearby Shares in Windows 11
- PHPzforward
- 2023-05-01 12:25:062827browse
The Nearby Sharing feature on Windows systems makes it easier for users to share files without having to transfer files through a USB device like in the past. When any user wants to share any file from their system to another Windows system via Bluetooth or Wi-Fi, they just need to enable this Nearby Sharing feature and send the file.
Files received on other windows systems are saved in the download folder location set by the system by default. Sometimes, users do not want to save many files in the Downloads folder to avoid ambiguity with other files downloaded from other places.
So in this article, we will guide users on how to change or set the default save file location in Nearby Sharing option in Windows system. Read on to learn more.
How to change the default save file location in Nearby Sharing in Windows 11
Changing the default path for save files in Nearby Sharing settings on Windows is not difficult and can be done using the Settings app , the steps described below.
Step 1: Open the "Settings" application window on your system. To do this, you need to press the Windows I keys simultaneously on your keyboard.
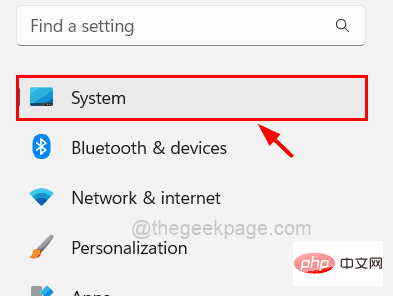
Step 2: Make sure you are on the System page of the Settings window, click on it on the left as shown below.
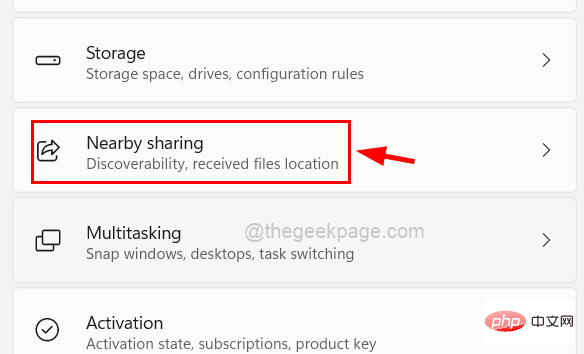
Step 3: Next, you should select the Nearby Sharing option from the list on the right side of the Settings window as shown below.
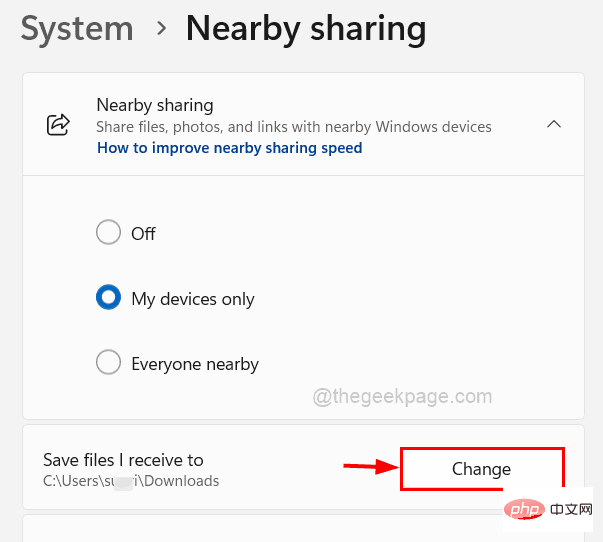
Step 4: Then, you can see an option named Save files I received to. But the "Change" button is grayed out.
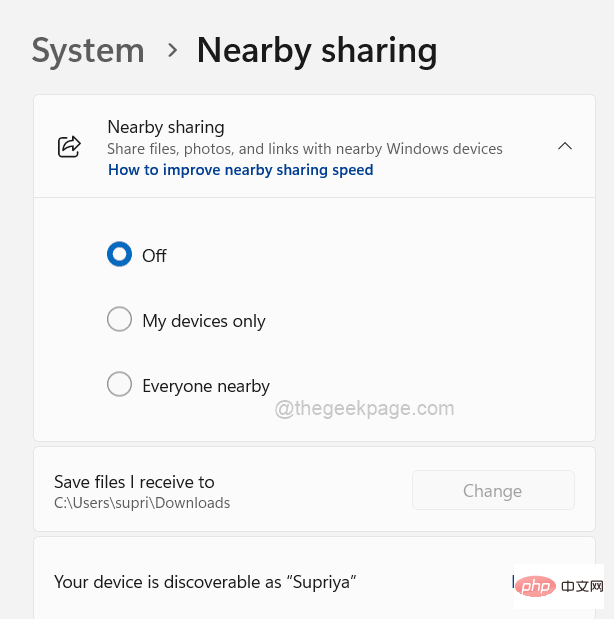
Step 5: To activate the Change button, you need to make sure that Nearby Sharing is turned on.
Step 6: First, select the Only my devices radio button to turn on the Nearby Sharing feature.
NOTE: If you are in a safe environment, you can also select Everyone nearby. (Not some cafes and public places)
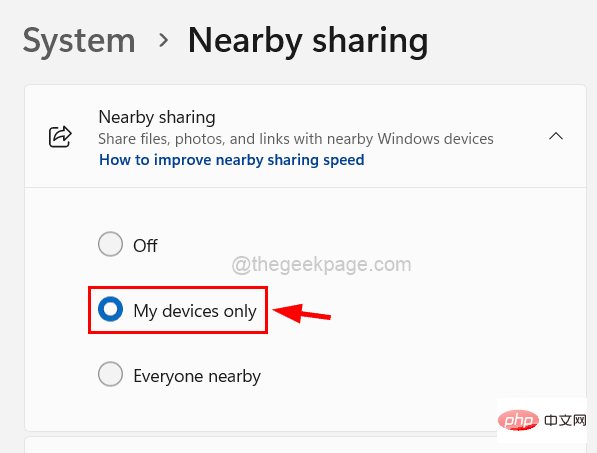
Step 7: Now you can notice that if Bluetooth was turned off earlier and the "Change" button was activated, the system Bluetooth will also be turned on automatically.
Step 8: Click Change to browse for the location where you want to save files received from nearby sharing.
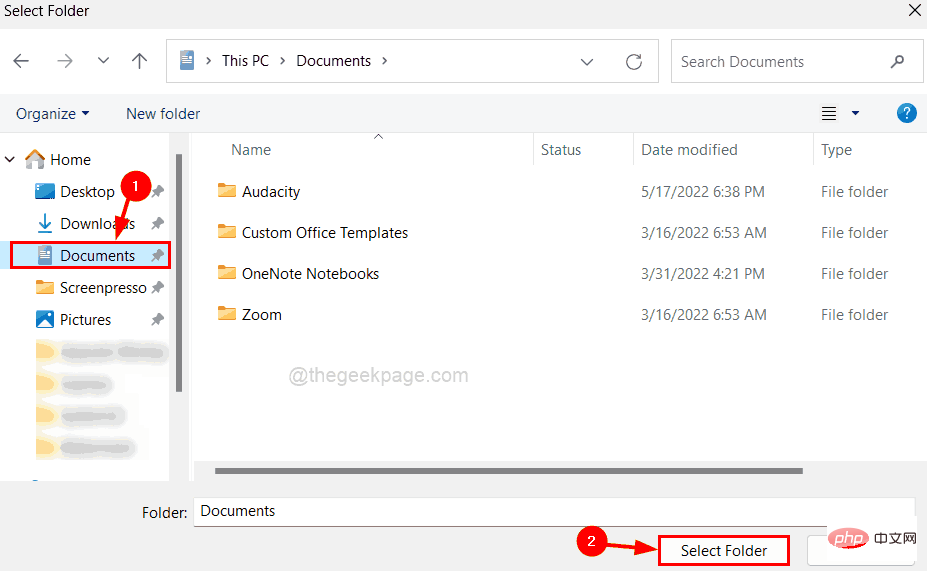
Step 9: A Select Folder window will appear on the screen.
Step 10: Please browse to the folder on your computer where you want to select the save location.
Step 11: After selecting the folder, click the "Select Folder" button in the window, as shown in the figure below.
# Step 12: Now you can see that the path save location under Save my received files to option has changed.
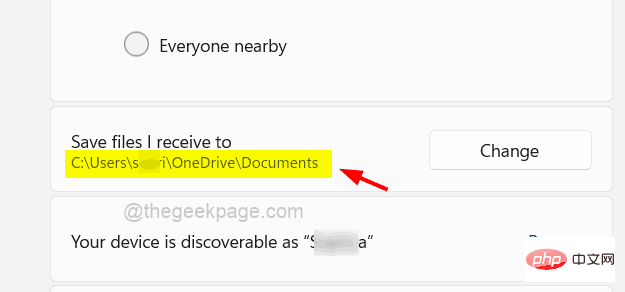
Step 13: Once this is done, you can close the Settings page.
The above is the detailed content of How to change the default save file location in Nearby Shares in Windows 11. For more information, please follow other related articles on the PHP Chinese website!

