Home >Web Front-end >Vue.js >Vue Router routing process is simply sorted out (usage steps)
Vue Router routing process is simply sorted out (usage steps)
- 藏色散人forward
- 2022-08-10 16:27:302405browse
Preface
First install Vue CLI
1. What is routing?
vue-router Chinese official website: https://router.vuejs.org/zh/
Vue Router is the official routing manager of Vue.js. It is deeply integrated with the core of Vue.js, making it easy to build single-page applications. Routing can actually be understood as pointing, that is, when I click a button on the page, I need to jump to the corresponding page. This is the routing jump;
First of all, let’s learn three words (route, routes, router ):
route: First of all, it is a singular number, translated as route, that is, we can understand it as a single route or a certain route;
routes: It is a plural number, indicating that a collection of multiple Plural number; that is, we can understand it as a collection of multiple routes. The only two forms of collections representing multiple different states in JS are arrays and objects. In fact, the official definition of routes is an array; so we remember that routes represents multiple A collection of arrays;
router: translated as router, the above are all routes, this is a router, we can understand it as a container containing the above two or it is a manager, responsible for managing the above two; Example An example of a common scenario: when the user clicks a button on the page, the router will go to routes to find the route, which means that the router will go to the route collection to find the corresponding route; [Related recommendations: vue .js video tutorial】
2. Steps to use
1. Create a project
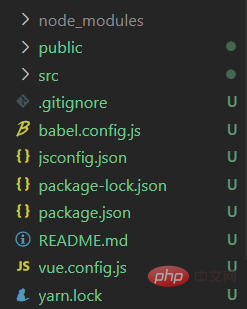
After installing the project, the project directory is as follows:
2. Install routing
Open the package.json file under the project and check the vue version.
The vue version is 2.x. It is recommended that vue-router install the 3.x version.
The vue version is 3.x. It is recommended that vue-router install the 4.x version. 
Then enter the command in the project directory
npm install vue-router@版本号
3. Create files
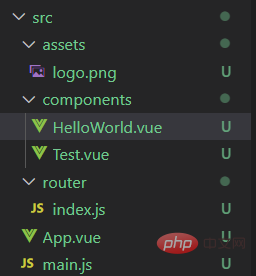
Open the src folder and create the following files (Some are created by default) 
1.HelloWorld.vue file
This file is created by default. For the convenience of demonstration, redundant code is deleted
<template>
<div class="hello">
<h1>HelloWorld</h1>
</div>
</template>
<script>
export default {
name: 'HelloWorld',
props: {
msg: String
}
}
</script>
<!-- Add "scoped" attribute to limit CSS to this component only -->
<style scoped>
h3 {
margin: 40px 0 0;
}
ul {
list-style-type: none;
padding: 0;
}
li {
display: inline-block;
margin: 0 10px;
}
a {
color: #42b983;
}
</style>2.Test.vue file
<template>
<div>
<h2>Test</h2>
</div>
</template>
<script>
// 导出
export default {
name: 'TestItem'
}
</script>
<style>
</style>3.index.js file
// 引入vue
import Vue from 'vue';
// 引入vue-router
import VueRouter from 'vue-router';
// 注册 第三方库需要use一下才能用
Vue.use(VueRouter)
// 引入HelloWorld页面
import HelloWorld from '../components/HelloWorld.vue'
// 引入Test页面
import Test from '../components/Test.vue'

// 定义routes路由的集合,数组类型
const routes=[
    //单个路由均为对象类型,path代表的是路径,component代表组件
    {path:'/hw',component:HelloWorld},
    {path:"/test",component:Test}
]

// 实例化VueRouter并将routes添加进去
const router = new VueRouter({
// ES6简写,等于routes:routes
    routes
});

// 抛出这个这个实例对象方便外部读取以及访问
export default router
4.main.js file
import Vue from 'vue'
import App from './App.vue'
import router from './router/index.js'
// 阻止vue在启动时生成的生产提示
Vue.config.productionTip = false

new Vue({
  	router: router,
	render: h => h(App),
}).$mount('#app')
5.App.vue file
<template>
<div id="app">
<!--使用 router-link 组件进行导航 -->
<!--通过传递 `to` 来指定链接 -->
<!--`<router-link>` 将呈现一个带有正确 `href` 属性的 `<a>` 标签-->
<router-link to="/hw">HelloWorld</router-link>
<router-link to="/test">Test</router-link>
<hr>
<!-- 路由出口 -->
<!-- 路由匹配到的组件将渲染在这里 -->
<router-view></router-view>
</div>
</template>
<script>
export default {
name: 'App',
}
</script>
<style>
#app {
font-family: Avenir, Helvetica, Arial, sans-serif;
-webkit-font-smoothing: antialiased;
-moz-osx-font-smoothing: grayscale;
text-align: center;
color: #2c3e50;
margin-top: 60px;
}
</style>3. Run the project
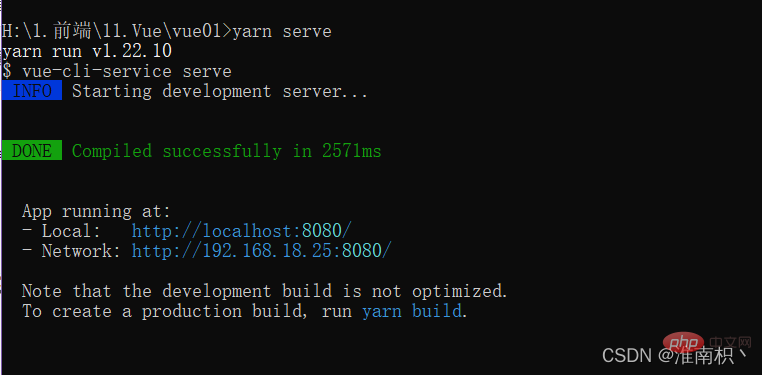
1. Open cmd under the project file and enter yarn serve

2. Open the browser and visit http://localhost:8080/

3. Click HelloWorld, the page does not need to be refreshed and jumps to http: //localhost:8080/#/hw

4. Click Test, the page does not need to be refreshed, jump to http://localhost:8080/ #/test

The above is the detailed content of Vue Router routing process is simply sorted out (usage steps). For more information, please follow other related articles on the PHP Chinese website!

