Home >Web Front-end >Vue.js >Take you step by step to develop a simple CRUD application using Vue + Laravel
Take you step by step to develop a simple CRUD application using Vue + Laravel
- 青灯夜游forward
- 2022-04-15 20:55:343901browse
This article will share with you a Vue Laravel development tutorial and introduce how to use Vue.js and Laravel to build a simple CRUD application. I hope it will be helpful to everyone!

CURD (add, delete, modify, query) is a basic operation of data storage, and it is also one of the first things you need to learn as a Laravel developer
However, if What issues should we pay attention to when combining applications with Vue.js as the front end? First, since the current operation does not refresh the page, you need an asynchronous CURD. Therefore, you need to ensure data consistency on both the front and back ends. (Learning video sharing: vuejs tutorial)
In this tutorial, I will demonstrate how to develop a complete Laravel&Vue.js application and each CURD example. AJAX is the key to connecting the front and back ends, so I will use Axios as the HTTP client. I'll also show you some ways to deal with the user experience pitfalls of this architecture.
You can view the complete project in GitHub.
https://github.com/anthonygore/vue-laravel-crud
Demo app
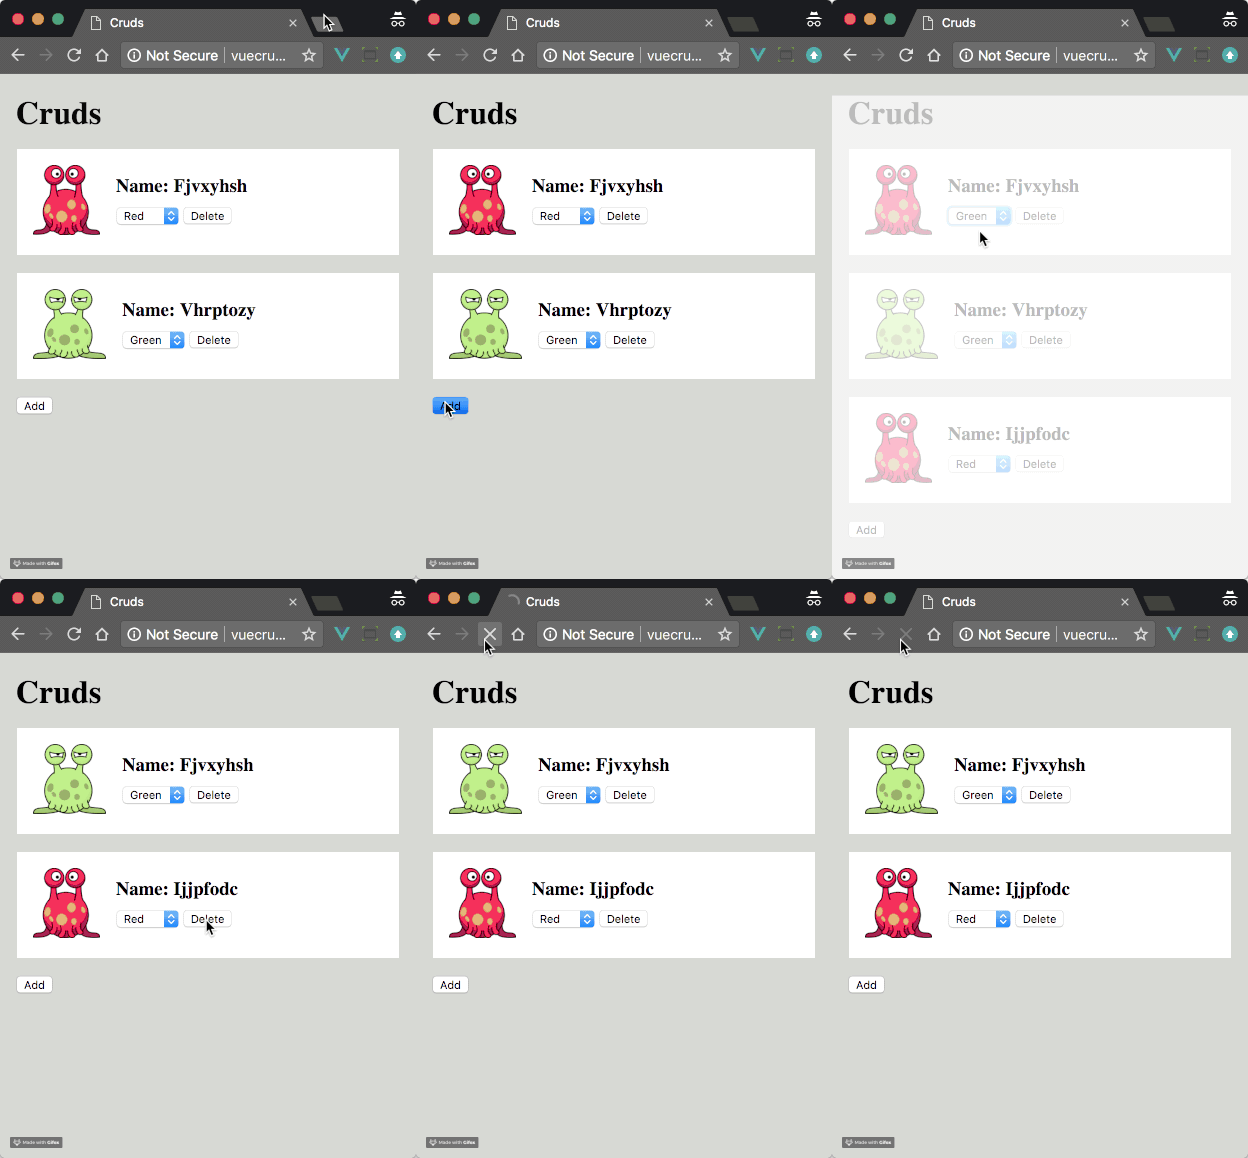
This is a demo app for users Create a full-stack application of "Cruds". When I enter this application, it will create a lot of incredible things. Aliens have unique names and can be freely converted in red, green and black.
The Cruds application is displayed on the homepage. You can add Cruds through the add button, delete them through the delete button, or update their color.

CRUD with Laravel backend
We will start this tutorial using Laravel backend to complete CRUD operations. I'll keep this section short because CRUD with Laravel is a topic covered extensively elsewhere.
In summary, we complete the following
- Setting up the database
- Through resources Controller to write a RESTful API route
- Define methods in the controller to complete CRUD operations
Database
The first is Migration, our Cruds have two properties: name and color, which we set to text type
2018_02_02_081739_create_cruds_table.php
<?php ...
class CreateCrudsTable extends Migration
{
public function up()
{
Schema::create('cruds', function (Blueprint $table) {
$table->increments('id');
$table->text('name');
$table->text('color');
$table->timestamps();
});
}
...
}
...
API
Now let's set up the RESTful API route. This resource method will automatically create all the operations we need. However, we don't need edit, show and store are the routes, so we need to exclude them.
routes/api.php
<?php Route::resource('/cruds', 'CrudsController', [ 'except' => ['edit', 'show', 'store'] ]);
With these, We can now use the following routes in the API:
| Address | Method | Route Name | |
|---|---|---|---|
| /api/cruds | index | cruds.index | |
| /api/cruds/create | create | cruds.create | |
| /api/cruds/{id} | update | cruds.update | |
| /api/ cruds/{id} | destroy | cruds.destroy |
| Verb | Path | Action | Route Name |
|---|---|---|---|
| GET | /api/cruds | index | cruds.index |
| GET | /api/cruds/create | create | cruds.create |
| PUT | /api/cruds/{id} | update | cruds.update |
| DELETE | /api/cruds/{id} | destroy | cruds.destroy |
Read
首先来看 read 方法。这个方法是负责在前端发起 Cruds 请求的,对应后端的处理在是控制器里的 index 方法,因此使用 GET 请求 /api/cruds。
由于 Laravel 前端默认把 Axios 设置为 window 的一个属性, 因此我们可以使用 window.axios.get 来发起一个 GET 请求。
对于像 get, post 等 Axios 方法的返回结果,我们可以再继续链式调用 then 方法,在 then 方法里可以获取到 AJAX 响应数据的主体 data 属性。
resources/assets/js/components/App.vue
...

methods() {
  read() {
    window.axios.get('/api/cruds').then(({ data }) => {
      // console.log(data)
    });
  },
  ...
}

/*
Sample response:

[
  {
    "id": 0,
    "name": "ijjpfodc",
    "color": "green",
    "created_at": "2018-02-02 09:15:24",
    "updated_at": "2018-02-02 09:24:12"
  },
  {
    "id": 1,
    "name": "wjwxecrf",
    "color": "red",
    "created_at": "2018-02-03 09:26:31",
    "updated_at": "2018-02-03 09:26:31"
  }
]
*/
从上面的返回结果可以看出,返回的结果是 JSON 数组。Axios 会自动将其解析并转成 JavaScript 对象返给我们。这样方便我们在回调函数里对结果进行遍历,并通过 Crud 工厂方法创建新的 Cruds,并存到 data 属性的 cruds 数组中,例如 this.cruds.push(...)。
resources/assets/js/components/App.vue
...

methods() {
  read() {
    window.axios.get('/api/cruds').then(({ data }) => {
      data.forEach(crud => {
        this.cruds.push(new Crud(crud));
      });
    });
  },
},
...
created() {
  this.read();
}
注意:我们通过
created方法,可以使程序在刚一加载时就触发read方法,但这并非最佳实践。最好方案应该是直接去掉read方法,当程序第一次加载的时候,就把应用的初始状态都包含在文档投中。
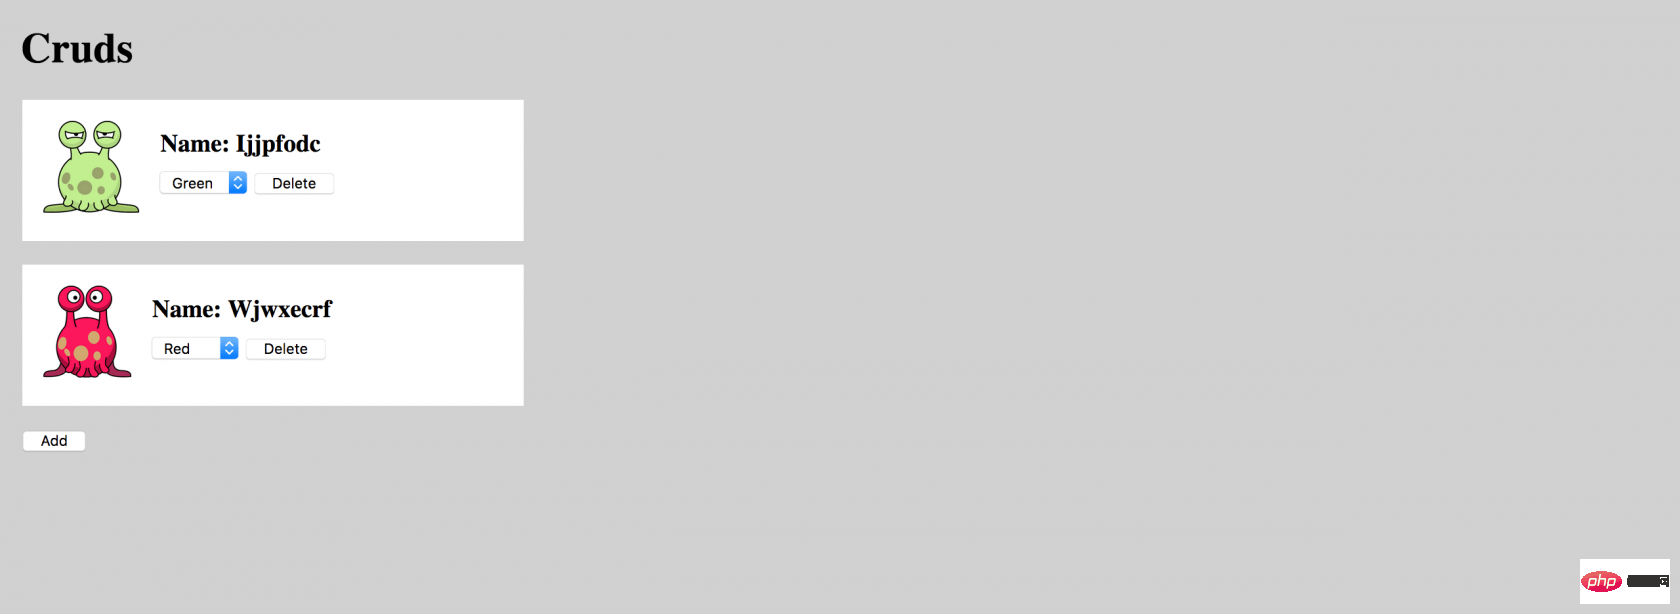
通过上面的步骤,我们就能看到 Cruds 展示在界面上了:

更新 (以及状态同步)
执行 update 方法需要发送表单数据,比如 color,这样控制器才知道要更新哪些数据。Crud 的 ID 是从服务端获取的。
还记得我在本文开篇就提到关于前后端数据一致的问题,这里就是一个很好的例子。
当需要执行 update 方法时,我们可以不用等待服务器返回结果,就在前端更新 Crud 对象,因为我们很清楚更新后应该是什么状态。
但是,我们不应该这么做。为什么?因为有很多原因可能会导致更新数据的请求失败,比如网络突然中断,或者更新的值被数据库拒绝等。
所以等待服务器返回更新成功的信息后,再刷新前端的状态是非常重要的,这样我们才能确保前后端数据的一致。
resources/assets/js/components/App.vue
methods: {
  read() {
    ...
  },
  update(id, color) {
    window.axios.put(`/api/cruds/${id}`, { color }).then(() => {
      // 一旦请求成功,就更新 Crud 的颜色
      this.cruds.find(crud => crud.id === id).color = color;
    });
  },
  ...
}
你可能会说这样非必要的等待会影响用户体验,但是我想说,我们在不确定的情况下更新状态,误导用户,这应该会造成更差的用户体验。
创建和删除
现在你已经明白整个架构的关键点了,剩下两个方法,不需要我解释,你也应该能够理解其中的逻辑了:
resources/assets/js/components/App.vue
methods: {
  read() {
    ...
  },
  update(id, color) {
    ...
  },
  create() {
    window.axios.get('/api/cruds/create').then(({ data }) => {
      this.cruds.push(new Crud(data));
    });
  },
  del(id) {
    window.axios.delete(`/api/cruds/${id}`).then(() => {
      let index = this.cruds.findIndex(crud => crud.id === id);
      this.cruds.splice(index, 1);
    });
  }
}
加载界面 和 禁止互动
你应该知道,我们这个项目VUE前端的CRUD操作都是异步方式的,所以前端AJAX请求服务器并等待服务器响应返回响应,总会有一点延迟。因为用户不知道网站在做什么,此空档期用户的体验不是很好,这学问关联到UX。
为了改善这UX问题,因此最好添加上一些加载界面并在等待当前操作解决时禁用任何交互。这可以让用户知道网站在做了什么,而且可以确保数据的状态。
Vuejs有很多很好的插件能完成这个功能,但是在此为了让学者更好的理解,做一些简单的快速的逻辑来完成这个功能,我将创建一个半透明的p,在AJAX操作过程中覆盖整个屏幕,这个逻辑能完成两个功能:加载界面和禁止互动。一石两鸟,完美~
resources/views/index.blade.php
<p></p>
<p></p>
<script></script>
当进行 AJAX 请求的时候,就把 mute 的值从 false 改为 true, 通过这个值的变化,控制半透明 p 的显示或隐藏。
resources/assets/js/components/App.vue
export default {
  data() {
    return {
      cruds: [],
      mute: false
    }
  },
  ...
}
下面就是在 update 方法中切换 mute 值的过程。当执行 update 方法时,mute 值被设为 true。当请求成功,再把 mute 值设为 false, 这样用户就可以继续操作应用了。
resources/assets/js/components/App.vue
update(id, color) {
  this.mute = true;
  window.axios.put(`/api/cruds/${id}`, { color }).then(() => {
    this.cruds.find(crud => crud.id === id).color = color;
    this.mute = false;
  });
},
在 CRUDE 的每个方法里都要有这样的操作,在此,为了节约篇幅,我就不一一写明了。
为了保证大家不会忘记这个重要的操作,我们直接在 <p id="app"></p> 元素上方增加了 <p id="mute"></p> 元素。
从下面的代码可以看到,当 <p id="mute"></p> 元素被加上 class on 后,它将以灰色调完全覆盖整个应用,并阻止所有的点击事件:
resources/views/index.blade.php
nbsp;html> getLocale() }}">Cruds <p></p> <p></p> <script></script>
最后一个问题是对于 on class 的管理,我们可以在 mute 的值上加一个 watch,每当 mute 的值发生改变的时候,就加上或删除 on class:
export default {
  ...
  watch: {
    mute(val) {
      document.getElementById('mute').className = val ? "on" : "";
    }
  }
}
完成上面所有的步骤,你就可以拥有一个带有加载指示器的全栈Vue / Laravel CRUD 的应用程序了。再来看下完整效果吧:

你可以从 GitHub 获取代码,如果有任何问题或者想法,欢迎给我留言!
英文原文地址:https://vuejsdevelopers.com/2018/02/05/vue-laravel-crud/
译文地址:https://learnku.com/vuejs/t/24724
The above is the detailed content of Take you step by step to develop a simple CRUD application using Vue + Laravel. For more information, please follow other related articles on the PHP Chinese website!
Related articles
See more- Deep dive into custom events in Vue components
- What is unit testing? How to unit test Vue components?
- Record a process of developing Fimga plug-in using Vue 3
- How to run vue components in react project? Method introduction
- How to optimize performance in Vue.js? 9 tips to share
- How are Vue3 computed properties implemented? Let's talk about implementation principles


