
Home >Web Front-end >JS Tutorial >jQuery HTML5 beauty waterfall flow layout implementation method_jquery
jQuery HTML5 beauty waterfall flow layout implementation method_jquery

- WBOYWBOYWBOYWBOYWBOYWBOYWBOYWBOYWBOYWBOYWBOYWBOYWBOriginal
- 2016-05-16 15:38:371855browse
The example in this article describes the implementation method of jQuery HTML5 beauty waterfall flow layout. Share it with everyone for your reference. The details are as follows:
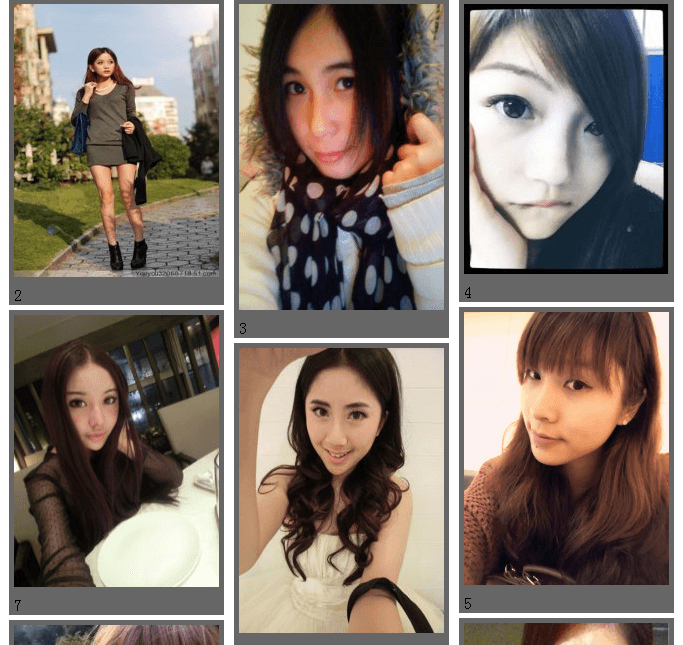
This is a JavaScript and HTML5 implementation of a beauty waterfall flow layout. This method is to write the path of the image in a JS array, but the focus seems not to be here, but on how to automatically arrange the images. You can After running this example, click the "Load Waterfall Layout" button to see the waterfall arrangement effect of the images. This is very popular now. I hope you can find some inspiration from this code.
The screenshot of the running effect is as follows:
The online demo address is as follows:
http://demo.jb51.net/js/2015/js-html5-mn-pb-style-codes/
The specific code is as follows:
<!DOCTYPE HTML>
<html>
<head>
<title>美女瀑布流</title>
<style type="text/css">
*{margin:0;padding:0}
div.section{overflow:hidden}
div.aside{width:225px;float:left;display:inline}
div.aside div.content{margin:5px;background:#666}
div.aside div.content img{width:205px;margin:5px;}
div.aside div.content div.imgcaption{margin:0 5px;line-height:20px}
</style>
</head>
<body>
<div class="section">
 <div class="aside"></div>
 <div class="aside"></div>
 <div class="aside"></div>
 <div class="aside"></div>
</div>
<button>加载瀑布流布局</button>
</body>
<script type="text/javascript" src="jquery-1.6.2.min.js"></script>
<script type="text/javascript">
var json=[
 {"text":"1","src":"images/1.jpg","height":"273"},
 {"text":"2","src":"images/2.jpg","height":"273"},
 {"text":"3","src":"images/3.jpg","height":"306"},
 {"text":"4","src":"images/4.jpg","height":"270"},
 {"text":"5","src":"images/5.jpg","height":"273"},
 {"text":"6","src":"images/6.jpg","height":"307"},
 {"text":"7","src":"images/7.jpg","height":"272"},
 {"text":"8","src":"images/8.jpg","height":"285"},
 {"text":"9","src":"images/9.jpg","height":"303"},
 {"text":"10","src":"images/10.jpg","height":"272"},
 {"text":"11","src":"images/5.jpg","height":"273"},
 {"text":"12","src":"images/7.jpg","height":"273"},
 {"text":"13","src":"images/3.jpg","height":"280"}
]
function getSmallDiv(wrap,oD){
 var len=oD.length;
 var h=Infinity;
 var getD;
 for(var i=0;i<len;i++){
  if(oD.eq(i).height()<h){
   h=oD.eq(i).height();
   getD=oD.eq(i);
  }
 }
 return getD;
}
$("button").click(function(){
 for(var i=0;i<json.length;i++){
  var str;
  str="<div class=\"content\">";
  str+="<img src="+json[i].src+" height="+json[i].height+" alt=\"\" />";
  str+="<div class=\"imgcaption\">"+json[i].text+"</div>";
  str+="</div>";
  getSmallDiv($(".section"),$(".aside")).append(str);
 }
});
</script>
</html>
I hope this article will be helpful to everyone’s jQuery programming.
Related articles
See more- An in-depth analysis of the Bootstrap list group component
- Detailed explanation of JavaScript function currying
- Complete example of JS password generation and strength detection (with demo source code download)
- Angularjs integrates WeChat UI (weui)
- How to quickly switch between Traditional Chinese and Simplified Chinese with JavaScript and the trick for websites to support switching between Simplified and Traditional Chinese_javascript skills