
Home >Development Tools >phpstorm >PhpStorm installs the IdeaVim plug-in (detailed graphic and text explanation)
PhpStorm installs the IdeaVim plug-in (detailed graphic and text explanation)

- 藏色散人forward
- 2021-02-18 17:17:043035browse
The tutorial column of phpstorm below will introduce to you how to install the IdeaVim plug-in in PhpStorm. I hope it will be helpful to friends in need!

1: Download the IdeaVim plug-in.
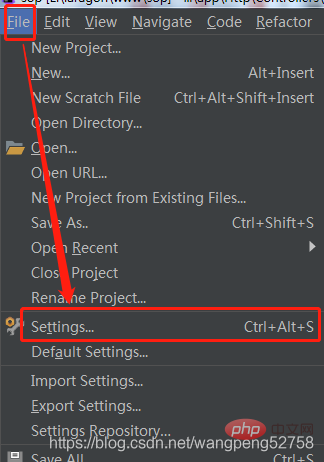
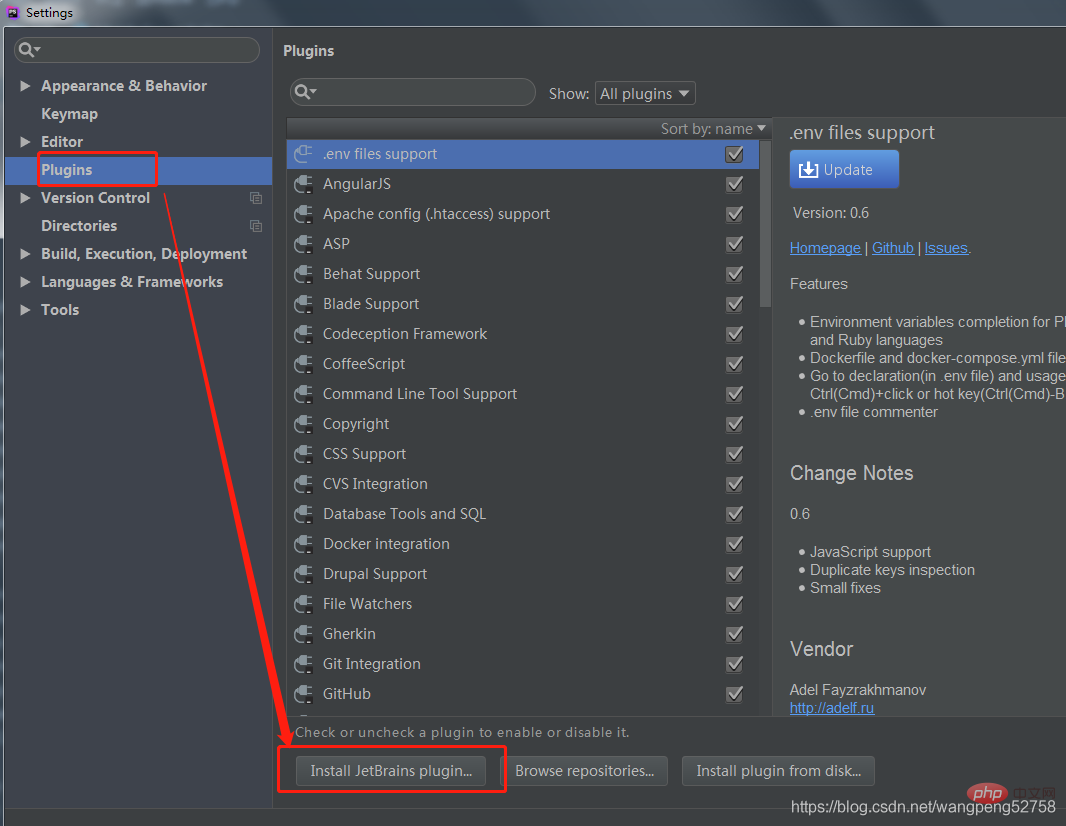
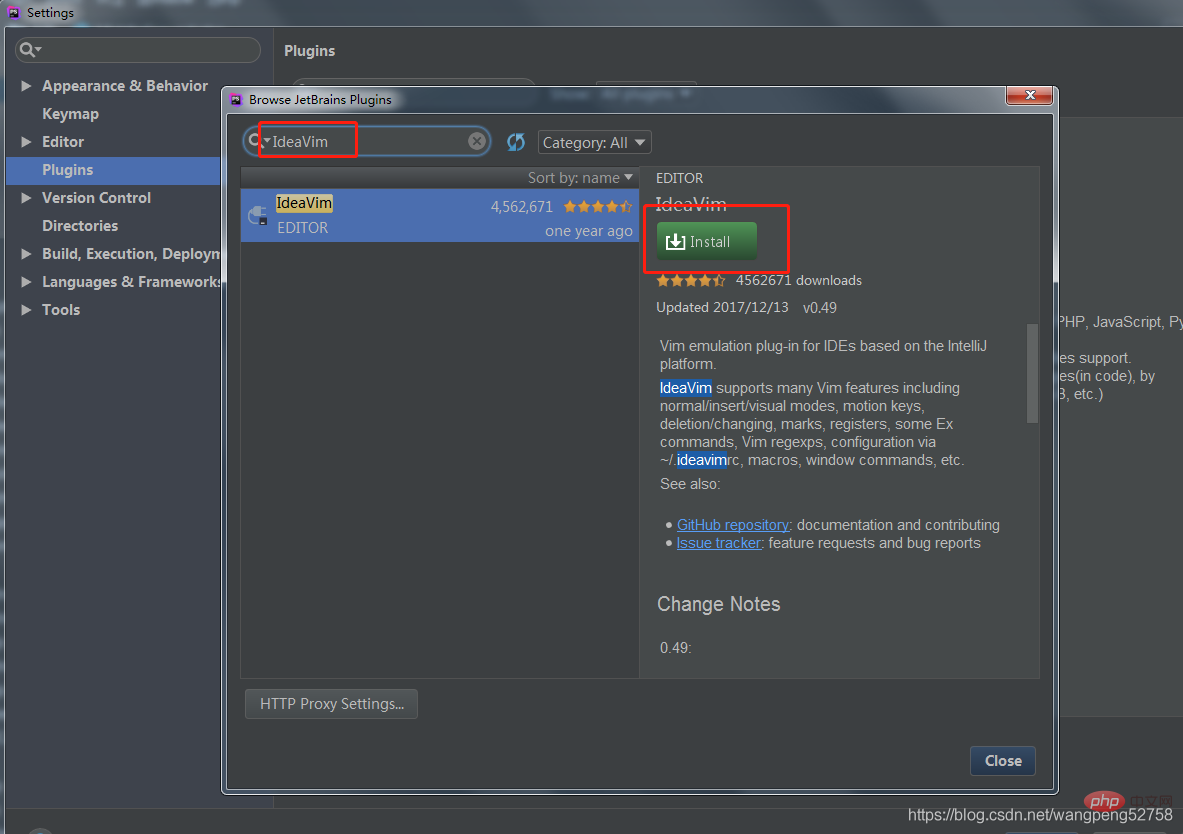
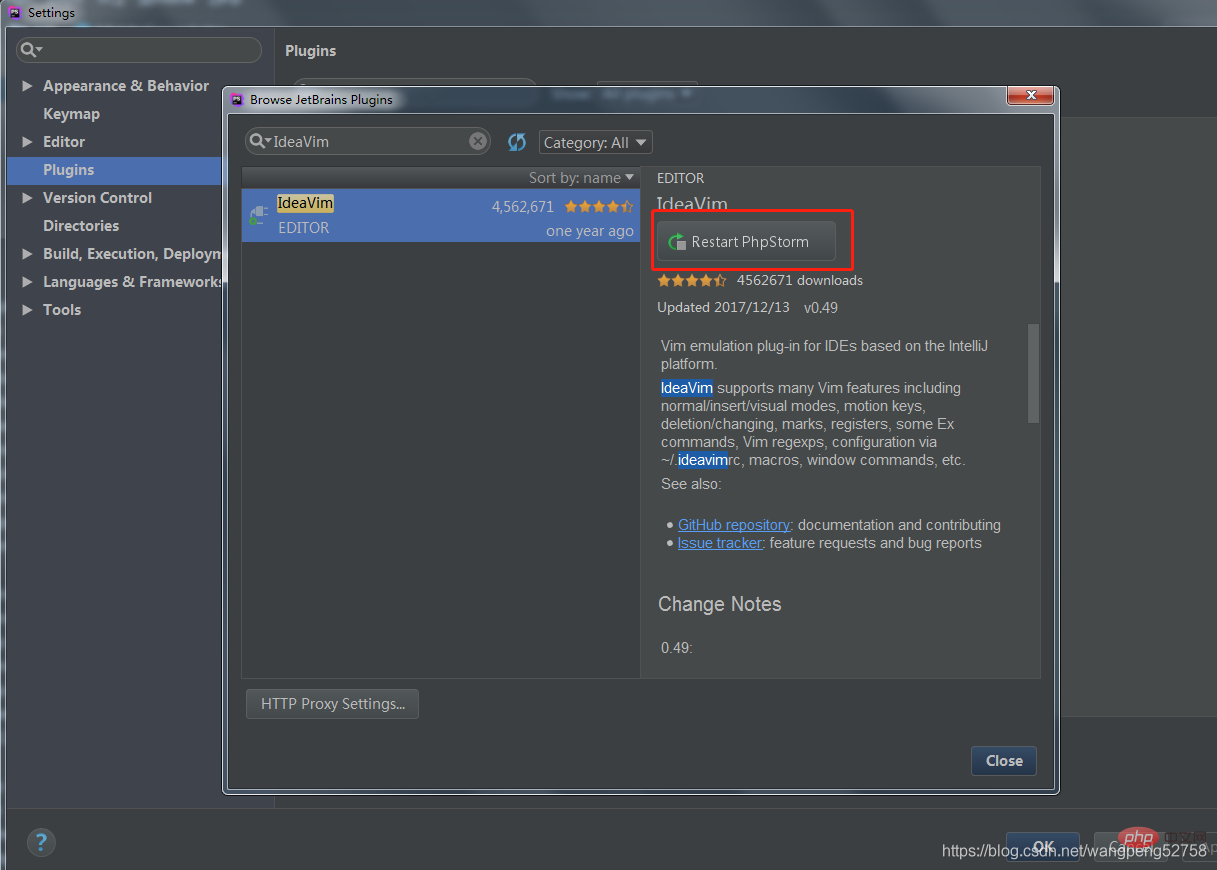
Click "File>Settings>Plugins" in the upper left corner of PhpStorm, click the "Browse JetBrains Plugins" button at the bottom of the dialog box, enter "IdeaVim" in the search box above, and after searching, click "Install ".
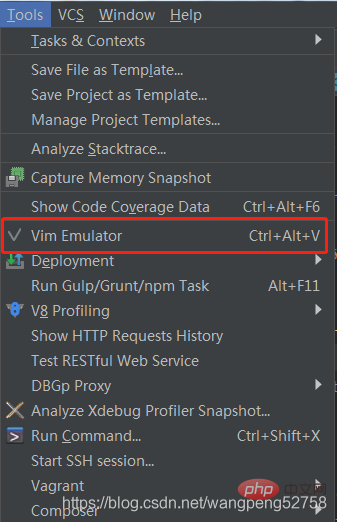
2: Restart PhpStorm, click "Tools" in the toolbar, you should be able to find "Vim Emulator", as shown below, it means the installation is successful. Congratulations on entering Vim mode. If you want to exit Vim mode, you can click "Vim Emulator" and you will enter the normal editing mode. At the same time, you will find that the "√" on the left side of "Vim Emulator" is missing.
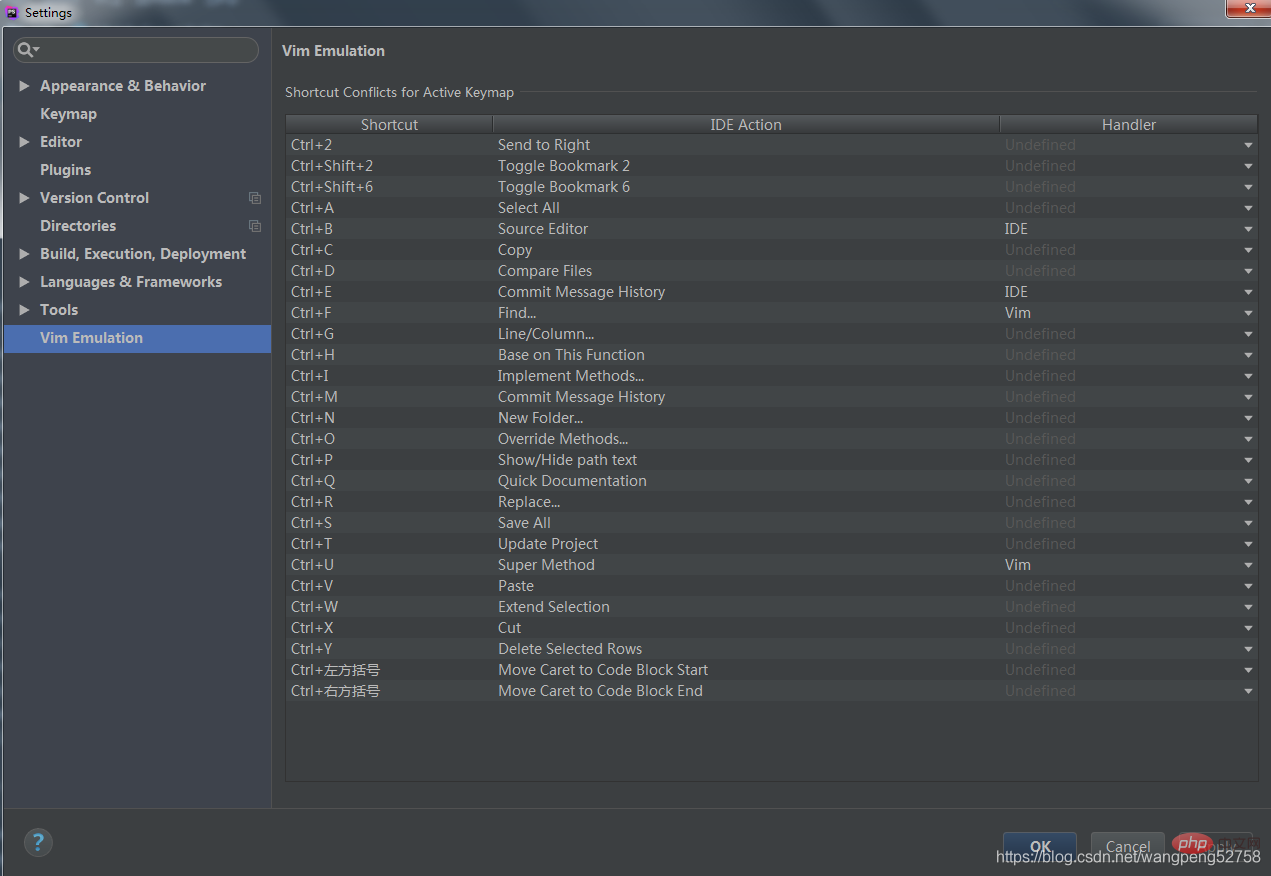
3: Configure shortcut keys
Click "File>Settings>Vim Emulator", you can edit the shortcut keys according to your own needs.
The above is the detailed content of PhpStorm installs the IdeaVim plug-in (detailed graphic and text explanation). For more information, please follow other related articles on the PHP Chinese website!
Related articles
See more- Permanently activated your artifact (phpstorm)
- Solving the error when writing a command in Terminal in PHPStorm. php is not an internal or external command, nor is it an operable program or batch file.
- Solve the problem of phpstorm Unhandled exceptions when calling certain classes after PhpStorm upgrade
- View the yaf framework source code in phpstorm
- PHPstorm sets line number and file encoding format