


I am learning webpack recently, and I am following the course to create a single-page application. I will record it here. This part mainly talks about how to configure the webpack environment and the configuration of webpack dev. The record is rough and will be updated later. This article mainly introduces you to the basic configuration tutorial of the Vue+webpack project. Friends who need it can refer to it. I hope it can help you.
1. Development environment: vscode, node.js, vue.js, webpack
If you want to install node.js yourself, you can refer to the novice tutorial
The IDE used is VScode
2. Project initialization
Shortcut key ctrl+` to open the vscode console

vscode interface
2.1 Install webpack vue vue-loader
npm init
npm i webpack vue vue-loader
npm warns you that you need dependencies, follow the prompts to install

warn
Install the corresponding loader
npm i css-loader vue-template-compiler
2.2 Configure webpack to load app.vue File
First create the src folder, and create app.vue as the main code file under it, and index.js as the entry file.

Basic file
The content of the app.vue file is as follows:
<template>
<p id="text">{{text}}</p>
</template>
<script>
export default{
data(){
return {
text: 'abc'
}
}
}
</script>
<style>
#test{
color: red;
}
</style>In
Create the webpack.config.js file in the same directory as src, configure the entry, and output the output

Create the package.json file and webpack .config.js file
//webpack.config.js
const path = require('path')
module.exports = {
 entry: path.join(__dirname,'src/index.js'), //调用Index.js作为入口文件
 output: { //打包完的js文件会在bundle.js中,这个文件待会会自动生成的
 filename: 'bundle.js',
 path: path.join(__dirname,'dist') //用来存放bundle.js文件的地址,自己定义
 },
 module: {
 rules: [{
  test: /.vue$/,
  loader: 'vue-loader'
 }]
 }
}
index.js file as the entry
//index.js
import Vue from 'vue'
import App from './app.vue'
const root = document.createElement('p')
document.body.appendChild(root)
new Vue({
 render: (h) => h(App)
}).$mount(root)
Configuration package.json file scripts command, add build
"scripts": {
 "test": "echo \"Error: no test specified\" && exit 1",
 "build": "webpack --config webpack.config.js"
 },
Enter the npm run build command in the console to package, as shown in the figure after successful packaging
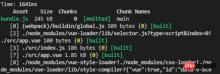
After webpack packaging is completed
2.3 Configure webpack to load non-Js files
Webpack.config.js file specific configuration
Module in webpack.config.js: Add rules:[] in the {} module to set the file types that webpack needs to recognize. The vue file type has been set before, so you need to add css/images.
//webpack.config.js
module: {
 rules: [
 {
 test: /.vue$/,
 loader: 'vue-loader'
 },
 {
 test: /.css$/,
 use:[
 'style-loader',
 'css-loader'
 ]
 },
 {
 test: /\.(gif|jpg|png|svg)$/,
 use: [{
  loader: 'url-loader',
  options: {
  limit: 1024,
  name:'[name].[ext]'
  }
 }]
 }
]
}
Execute the command in the console and install the corresponding loader
##
npm i style-loader css-loader url-loader file-loaderTest the packaging effect of non-js type filesGoal: Import the contents of these non-js type files in js codeCreate the test file test.css in the src subdirectory. And put jpg pictures in images instead (one is enough, emmm, I put too many so I won’t delete them yet)

Import these non-js files in Index.js.
//index.js
import Vue from 'vue'
import App from './app.vue'
import './assets/styles/test.css' //import css文件
import './assets/images/0.jpg' //import 图片
const root = document.createElement('p')
document.body.appendChild(root)
new Vue({
 render: (h) => h(App)
}).$mount(root)
Finally execute npm run build on the console to test the results.
//webpack.config.js
  {
  test:/.styl$/,
  use: [
   'style-loader',
   'css-loader',
   'stylus-loader'
  ]
  }
Then install the loader file required for stylus on the console
npm i style-loader stylus-loaderFinally execute
npm run build on the console to test the results.
npm i webpack-dev-serverThen, modify the package.json file and add dev configuration under build


因为在windows和mac环境下的命令会不同,这里安装cross-env 包,使得在不同开发环境下命令相同。
npm i cross-env
再次修改package.json文件,在“build:”和“dev:"行添加dev命令
cross-env NODE_ENV=development 后面不变

package.json文件build
然后,在webpack.config.js文件中进行判断。
首先,配置config.devServer
webpack2之后就可以直接用config.devServer进行配置了。
更改文件头部几行代码

在文件的最后加上如下代码

config.devServer
注意:
host:'0.0.0.0'不要直接写localhost,这样别人的电脑就访问不了了;port不要被占用,不然会打不开
最后.安装html-webpack-plugin插件使得html可以作为入口,自动包含JS
npm i html-webpack-plugin
修改webpack.config.js文件

config.js

config.js
至此,dev配置基本完成
控制台执行 npm run dev
npm run dev
打包成功的话就可以在浏览器中查看效果了,
如果出现错误,根据提示修改,注意端口是否占用。我的8000端口占用了,后来用了8080端口就好了
浏览器访问:localhost:8080,可以查看渲染效果。恩,背景图0.jpg是我爱豆23333。笔芯。注意左上角有红色的abc。

浏览器效果
2.6最后还有一些东西要加在config.js中
最后还要加一些东西
1) historyFallback:{}
因为我们做的是单页应用,所以要加一下地址映射到入口index.html,这个先忽略
2) 热加载功能。
hot功能,可以实现局部渲染:比如你改了一个组件的代码,页面只重新渲染这个组件而不是整个页面进行渲染,不需要进行刷新操作。
3) 一些插件
webpack.HotModuleReplacementPlugin()启动hot功能
webpack.NoEmitOnErrorsPlugin()去除一些不必要的信息
4) 浏览器调试代码功能的工具
在浏览器中调试的时候,代码不会转码。
config.devtool = “#cheap-module-evel-source-map”

最后配置完成后,重新npm run dev一次
npm run dev
成功之后,可以在浏览器中测试热加载效果,修改app.vue文件中的text的内容,就可以看到左上角那个红色的字在变了emmmm
//app.vue
<template>
<p id="text">{{text}}</p>
</template>
<script>
export default{
data(){
return {
text: 'abc' //打开浏览器,然后直接改这里就可以实时看到文字变化效果了。
}
}
}
</script>
<style>
#test{
color: red;
}
</style>相关推荐:
The above is the detailed content of Vue+webpack basic configuration sharing. For more information, please follow other related articles on the PHP Chinese website!

 C and JavaScript: The Connection ExplainedApr 23, 2025 am 12:07 AM
C and JavaScript achieve interoperability through WebAssembly. 1) C code is compiled into WebAssembly module and introduced into JavaScript environment to enhance computing power. 2) In game development, C handles physics engines and graphics rendering, and JavaScript is responsible for game logic and user interface.
 From Websites to Apps: The Diverse Applications of JavaScriptApr 22, 2025 am 12:02 AM
JavaScript is widely used in websites, mobile applications, desktop applications and server-side programming. 1) In website development, JavaScript operates DOM together with HTML and CSS to achieve dynamic effects and supports frameworks such as jQuery and React. 2) Through ReactNative and Ionic, JavaScript is used to develop cross-platform mobile applications. 3) The Electron framework enables JavaScript to build desktop applications. 4) Node.js allows JavaScript to run on the server side and supports high concurrent requests.
 Python vs. JavaScript: Use Cases and Applications ComparedApr 21, 2025 am 12:01 AM
Python is more suitable for data science and automation, while JavaScript is more suitable for front-end and full-stack development. 1. Python performs well in data science and machine learning, using libraries such as NumPy and Pandas for data processing and modeling. 2. Python is concise and efficient in automation and scripting. 3. JavaScript is indispensable in front-end development and is used to build dynamic web pages and single-page applications. 4. JavaScript plays a role in back-end development through Node.js and supports full-stack development.
 The Role of C/C in JavaScript Interpreters and CompilersApr 20, 2025 am 12:01 AM
C and C play a vital role in the JavaScript engine, mainly used to implement interpreters and JIT compilers. 1) C is used to parse JavaScript source code and generate an abstract syntax tree. 2) C is responsible for generating and executing bytecode. 3) C implements the JIT compiler, optimizes and compiles hot-spot code at runtime, and significantly improves the execution efficiency of JavaScript.
 JavaScript in Action: Real-World Examples and ProjectsApr 19, 2025 am 12:13 AM
JavaScript's application in the real world includes front-end and back-end development. 1) Display front-end applications by building a TODO list application, involving DOM operations and event processing. 2) Build RESTfulAPI through Node.js and Express to demonstrate back-end applications.
 JavaScript and the Web: Core Functionality and Use CasesApr 18, 2025 am 12:19 AM
The main uses of JavaScript in web development include client interaction, form verification and asynchronous communication. 1) Dynamic content update and user interaction through DOM operations; 2) Client verification is carried out before the user submits data to improve the user experience; 3) Refreshless communication with the server is achieved through AJAX technology.
 Understanding the JavaScript Engine: Implementation DetailsApr 17, 2025 am 12:05 AM
Understanding how JavaScript engine works internally is important to developers because it helps write more efficient code and understand performance bottlenecks and optimization strategies. 1) The engine's workflow includes three stages: parsing, compiling and execution; 2) During the execution process, the engine will perform dynamic optimization, such as inline cache and hidden classes; 3) Best practices include avoiding global variables, optimizing loops, using const and lets, and avoiding excessive use of closures.
 Python vs. JavaScript: The Learning Curve and Ease of UseApr 16, 2025 am 12:12 AM
Python is more suitable for beginners, with a smooth learning curve and concise syntax; JavaScript is suitable for front-end development, with a steep learning curve and flexible syntax. 1. Python syntax is intuitive and suitable for data science and back-end development. 2. JavaScript is flexible and widely used in front-end and server-side programming.


Hot AI Tools

Undresser.AI Undress
AI-powered app for creating realistic nude photos

AI Clothes Remover
Online AI tool for removing clothes from photos.

Undress AI Tool
Undress images for free

Clothoff.io
AI clothes remover

Video Face Swap
Swap faces in any video effortlessly with our completely free AI face swap tool!

Hot Article
Hot Tools

ZendStudio 13.5.1 Mac
Powerful PHP integrated development environment

mPDF
mPDF is a PHP library that can generate PDF files from UTF-8 encoded HTML. The original author, Ian Back, wrote mPDF to output PDF files "on the fly" from his website and handle different languages. It is slower than original scripts like HTML2FPDF and produces larger files when using Unicode fonts, but supports CSS styles etc. and has a lot of enhancements. Supports almost all languages, including RTL (Arabic and Hebrew) and CJK (Chinese, Japanese and Korean). Supports nested block-level elements (such as P, DIV),

SublimeText3 Mac version
God-level code editing software (SublimeText3)

PhpStorm Mac version
The latest (2018.2.1) professional PHP integrated development tool

Dreamweaver CS6
Visual web development tools

