Home >Database >Mysql Tutorial >Detailed graphic tutorial on installing mysql5.7.19 (tar.gz) under Linux
Detailed graphic tutorial on installing mysql5.7.19 (tar.gz) under Linux
- 黄舟Original
- 2017-07-27 15:32:321577browse
This article mainly introduces the graphic tutorial of mysql5.7.19tar.gz installation under Linux in detail. It has certain reference value. Interested friends can refer to it
First time for beginners Tutorial on installing mysql-5.7.19 version under Linux. If you have already installed it, please read the next article Installing multiple mysql-5.7.19 under Linux
Environment: centos 6.5
1. Download
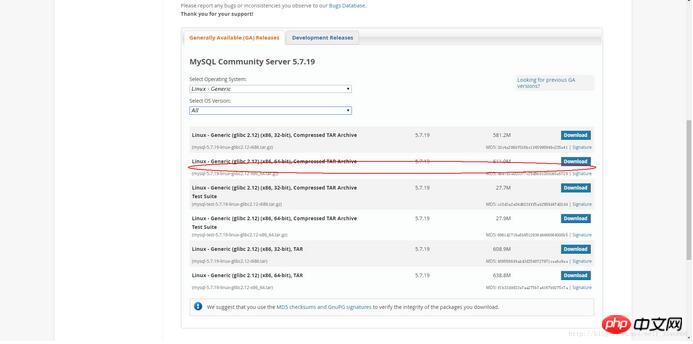
2. Skip login
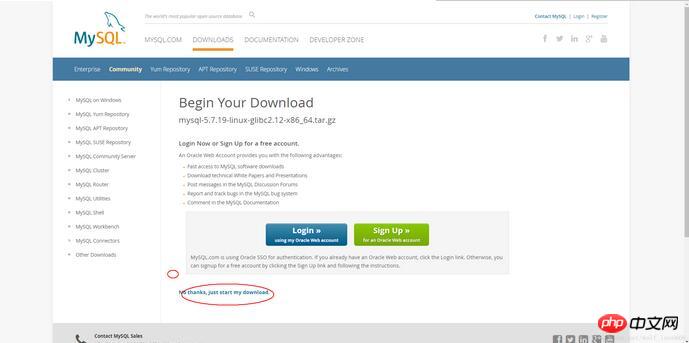
3. Upload and extract to the directory ../usr/local/mysql-5.7.19-3307
Copy code The code is as follows:
tar -zxvf mysql-5.7.19-linux-glibc2.12-x86_64.tar.gz -C ../usr/local/mysql5.7.19-3307
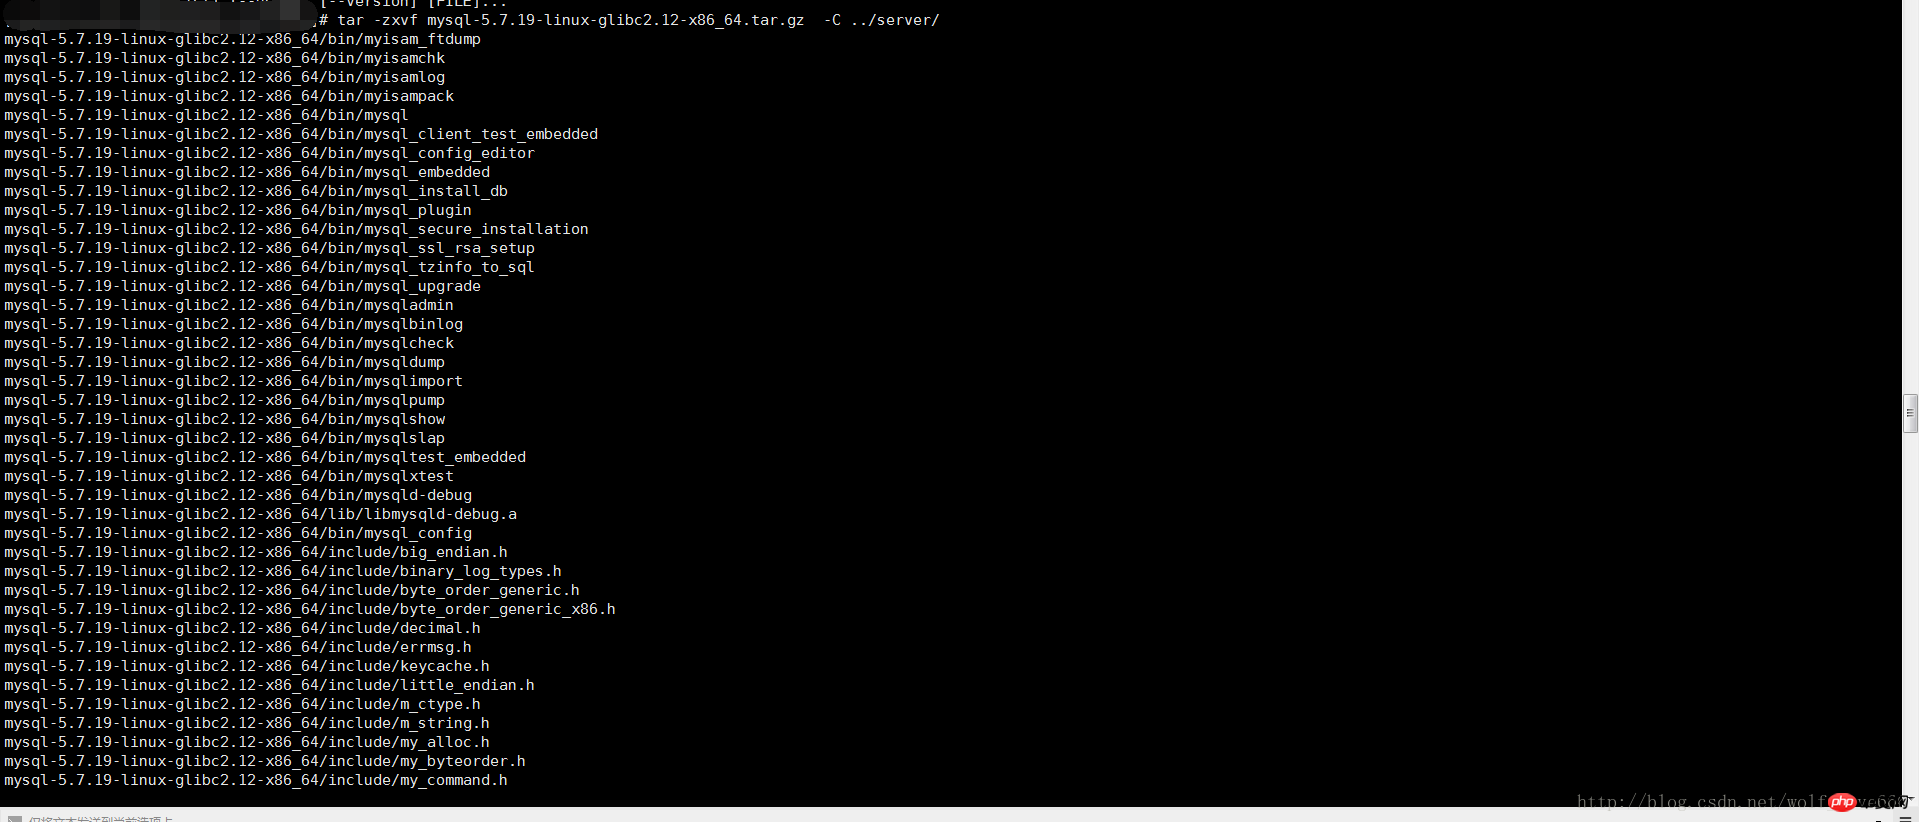
4 , add the system mysql group and mysql user:
Execute command:
groupadd mysqlosf和useradd -r -g mysqlosf mysqlosf

5 , authorize the current directory to the group user mysqlosf
chown -R mysqlosf:mysqlosf .
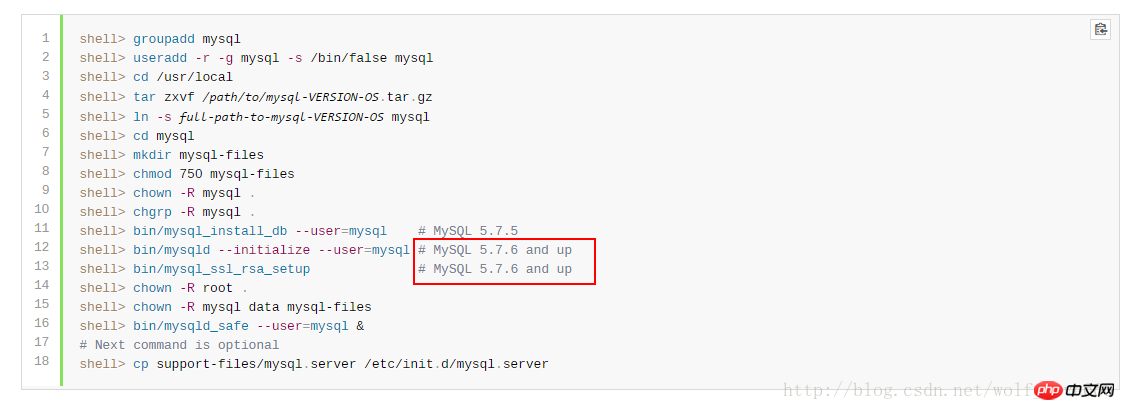
Execute the two commands in the red box and find that neither of them works. Observe the reason for the error. It means that the path cannot be found. The reason here is that the default choice is to install it in usr/lcoal/mysql
Because our system may install multiple databases, one master and multiple slaves or multiple masters and multiple slaves. The same is true here. Because I have a mysql, I will not use its default path and port 3306 when installing, and choose the custom path usr/, then we will find that there will be problems with the new version of mysql.

Then I checked the mysqld execution file, and the result was regrettable. Then I saw that there is a mysql.server under support-files. The red box says very well, so we understand that it is the default configuration file, and then the red box is the description:
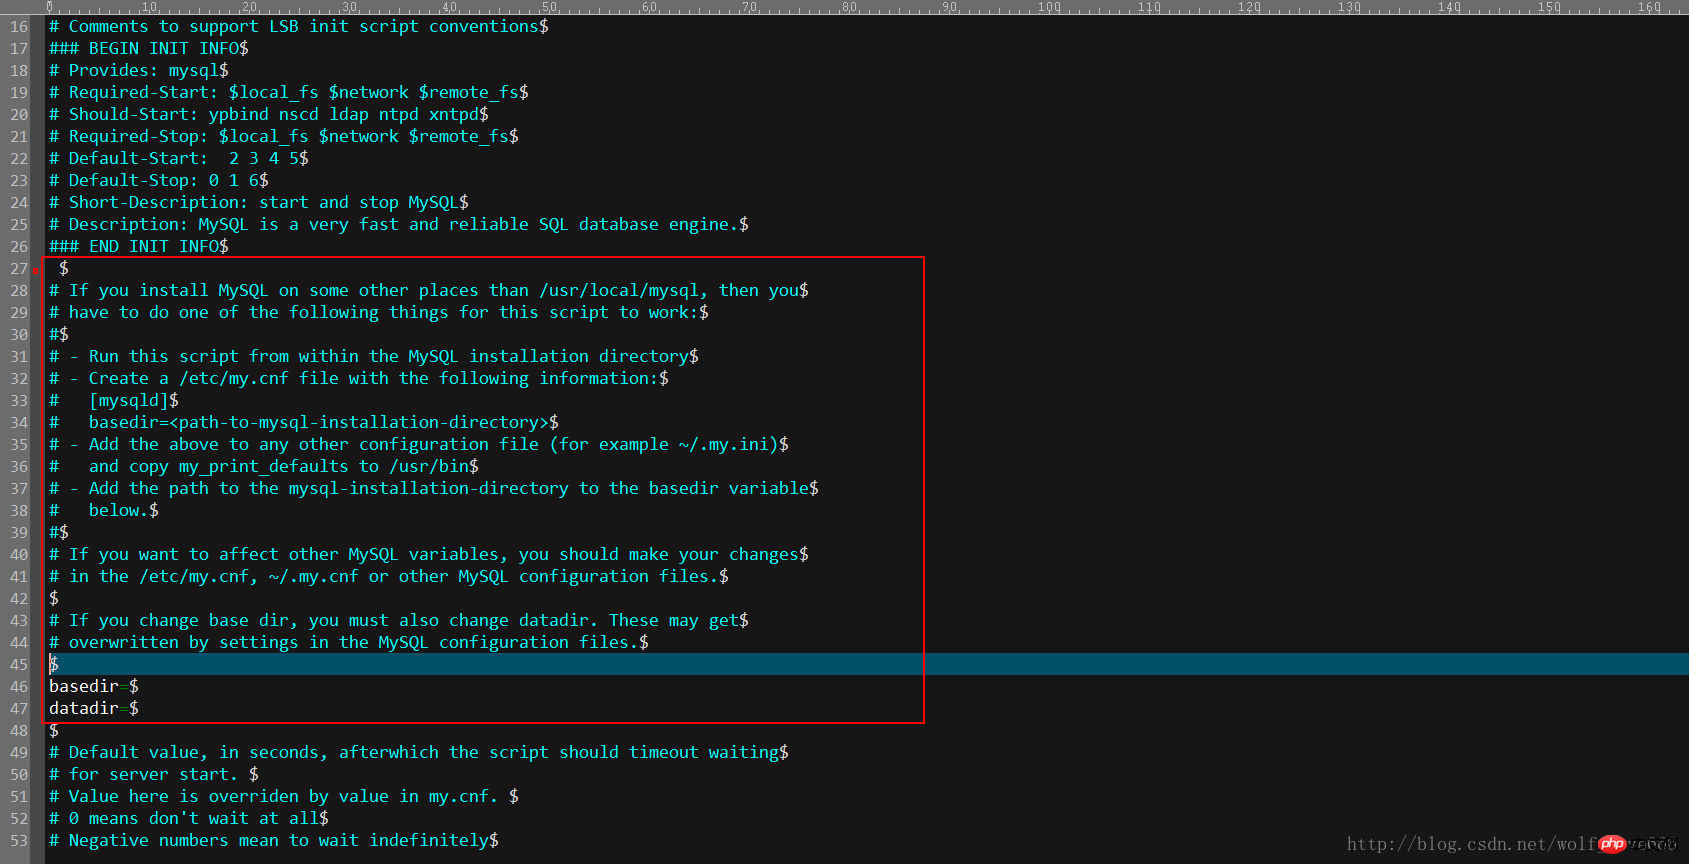
General translation: If you installed mysql in another path than usr/local/mysql, then you must do the following. Run this script in the directory where mysql is installed and create a /etc/my.cnf file with the following information
[mysqld]
basedir=<path-to-mysql-installation-directory>
Add the above content to any other configuration file such as ~/.my.ini
and copy my_print_defaults to /usr /bin Add this path to the base path of the installation directory. If you want to affect other variables you should make changes in etc/my.cnf or other configuration information.
If you change the base directory, you must also change the datadir data directory, these will be overwritten by the default configuration files set.
But for the same reason, I found a hateful thing. If you install this installation now, then the next mysql will be installed in the same way, to etc/my.cnf? It can be found that what he actually wants to express here is that if you only need to install one mysql, then just follow the above mentioned. But now we have to install multiple, so this is definitely not possible, but the configuration file is definitely
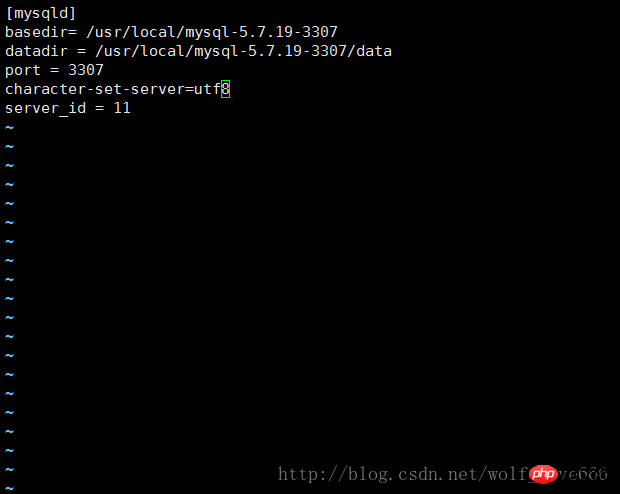
6. You must first create the my.cnf configuration file in the mysql-5.7.19-3307 directory as shown below:
7. Then start to initialize mysql on port 3307:
The code is as follows:
bin/mysqld --defaults-file=/usr/local/mysql-5.7.19-3307/my.cnf --initialize --user=mysqlosf

Then the prompt information is as shown in the figure :
2017-07-20T03:34:58.140832Z 0 [Warning] TIMESTAMP with implicit DEFAULT value is deprecated. Please use --explicit_defaults_for_timestamp server option (see documentation for more details).
2017-07-20T03:35:00.213126Z 0 [Warning] InnoDB: New log files created, LSN=45790
2017-07-20T03:35:00.482183Z 0 [Warning] InnoDB: Creating foreign key constraint system tables.
2017-07-20T03:35:00.554451Z 0 [Warning] No existing UUID has been found, so we assume that this is the first time that this server has been started. Generating a new UUID: 68e5e3b4-6cfc-11e7-a9af-00163e30bbf6.
2017-07-20T03:35:00.557933Z 0 [Warning] Gtid table is not ready to be used. Table 'mysql.gtid_executed' cannot be opened.
2017-07-20T03:35:00.562343Z 1 [Note] A temporary password is generated for
 root@localhost:

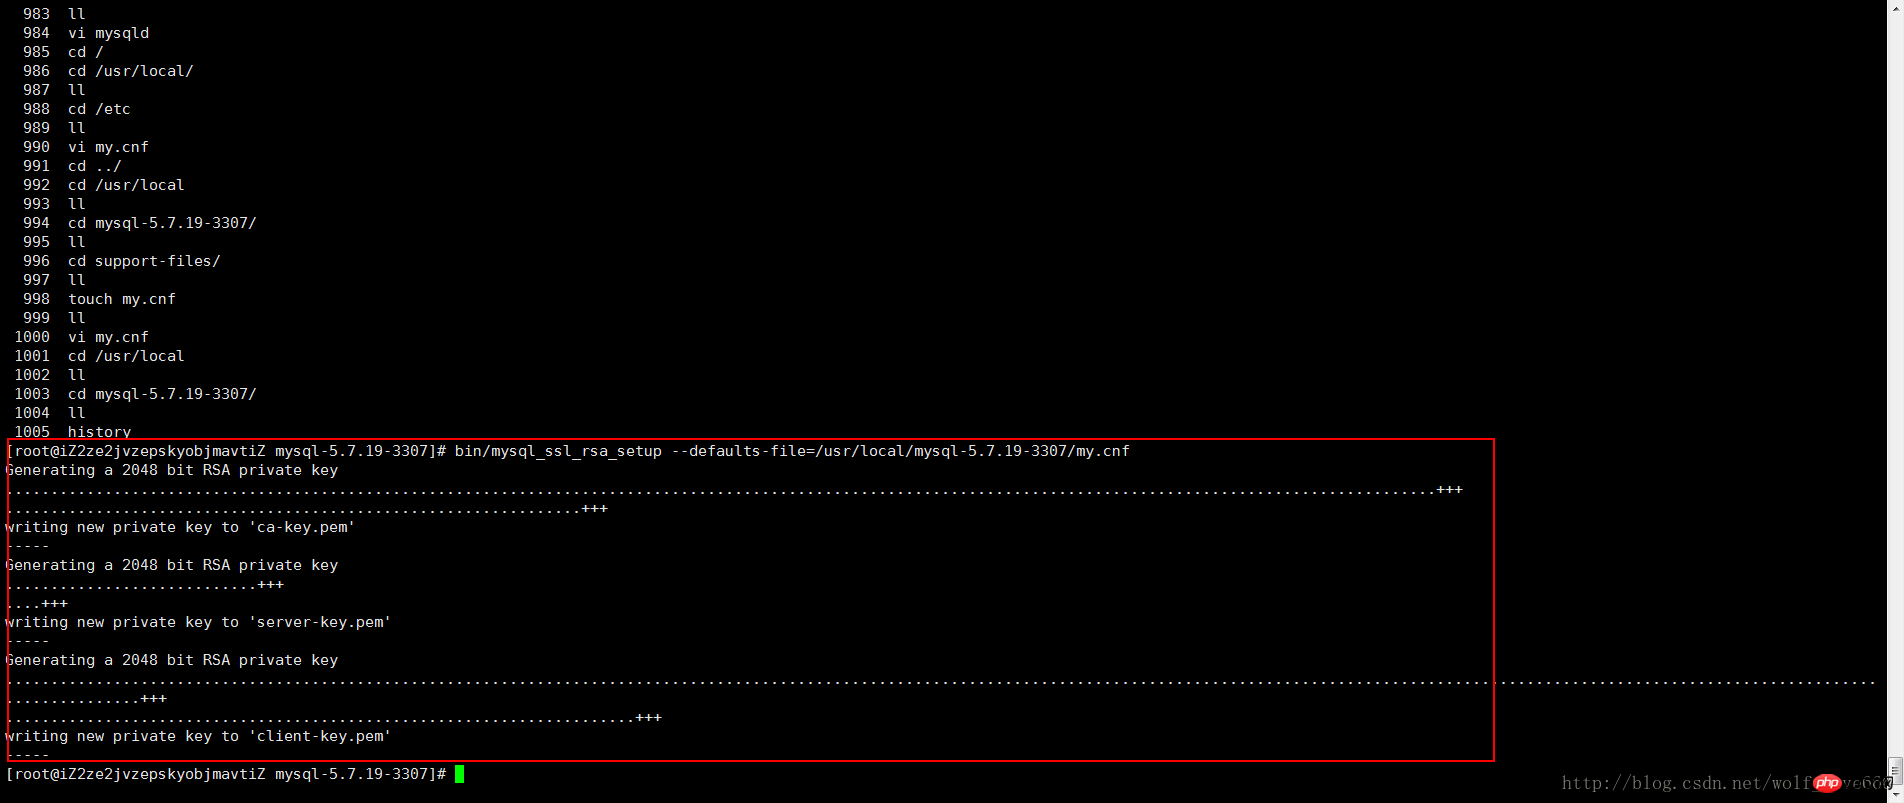
8. Generate key:
bin/mysql_ssl_rsa_setup --defaults-file=/usr/local/mysql-5.7.19-3307/my.cnf
Generating a 2048 bit RSA private key
........................................................................................+++
................................................................+++
writing new private key to 'ca-key.pem'
-----
Generating a 2048 bit RSA private key
............................+++
....+++
writing new private key to 'server-key.pem'
-----
Generating a 2048 bit RSA private key
...........................................................................................+++
......................................................................+++
writing new private key to 'client-key.pem'
-----
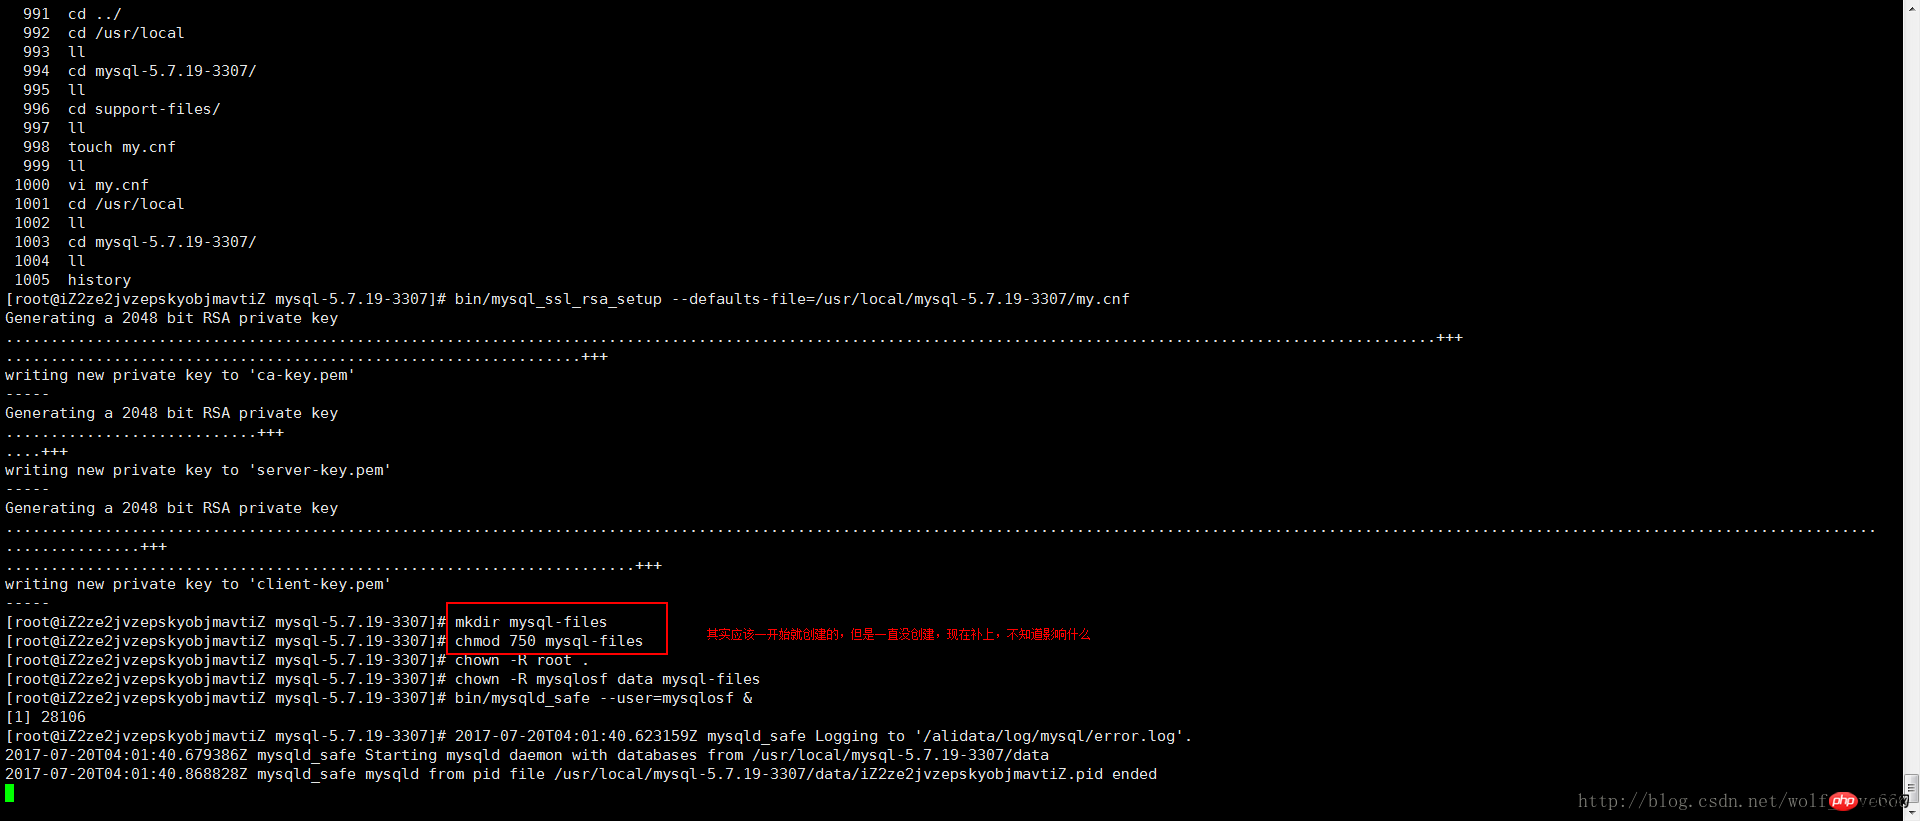
9 , make up for the previous directory. Haha, I didn’t create it before. I don’t know what the impact will be.
mkdir mysql-files
chmod 750 mysql-files
chown -R root .
chown -R mysqlosf data mysql-files
10. Start the mysql background for
bin/mysqld_safe --user=mysqlosf &
[1] 28106
[root@iZ2ze2jvzepskyobjmavtiZ mysql-5.7.19-3307]# 2017-07-20T04:01:40.623159Z mysqld_safe Logging to '/alidata/log/mysql/error.log'.
2017-07-20T04:01:40.679386Z mysqld_safe Starting mysqld daemon with databases from /usr/local/mysql-5.7.19-3307/data
2017-07-20T04:01:40.868828Z mysqld_safe mysqld from pid file /usr/local/mysql-5.7.19-3307/data/iZ2ze2jvzepskyobjmavtiZ.pid ended
11、 Next command is optional
shell> cp support-files/mysql.server /etc/init.d/mysql.server
12-开始登录mysql进行相关操作
bin/mysql -uroot -p
输入密码就是:初始化端口的时候提示的

但是拒绝了,发现上面的sql启动的时候有问题msyqld_safe 。。。。ended
代码如下:
mysqld_safe mysqld from pid file /usr/local/mysql-5.7.19-3307/data/iZ2ze2jvzepskyobjmavtiZ.pid ended

也就是说没有启动起来,查看下:(果然没有哈哈 那么遇见问题了继续解决呗)

使用root用户登陆没有报错但是一直是这状态 没有成功

查看状态启动了但是发现有个问题就是socket两个相同不过不是一个端口也是可以存在的继续走试试
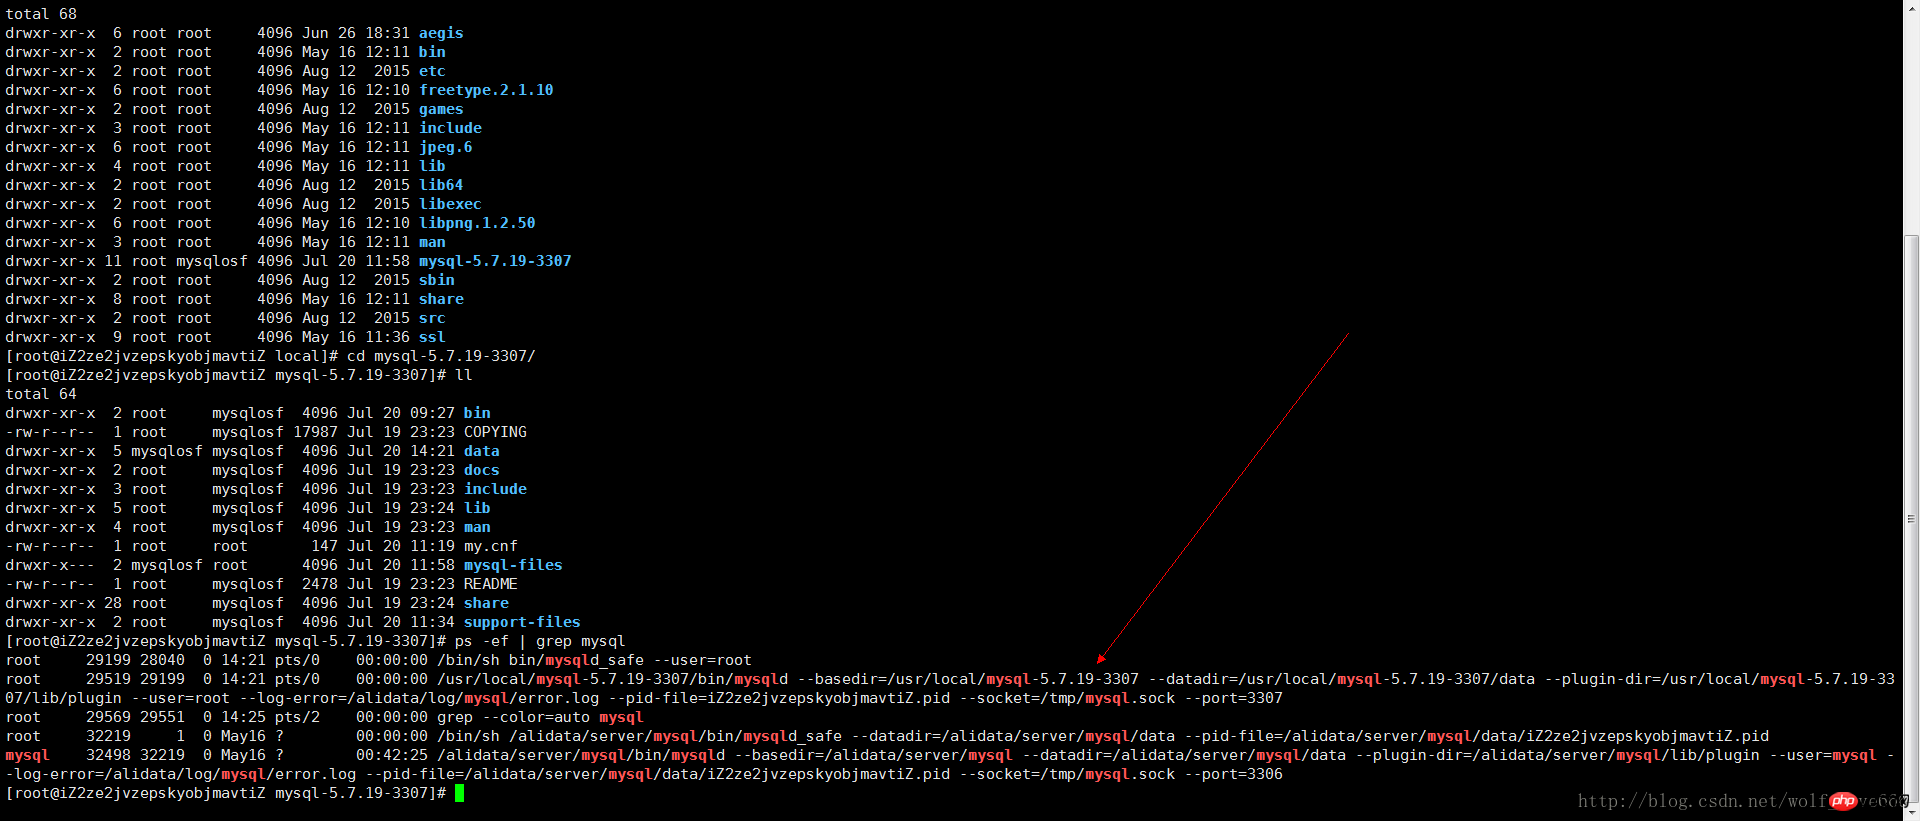
成功了应该就是刚才的那个mysqlosf我没有赋值权限成功。。。我的天呢
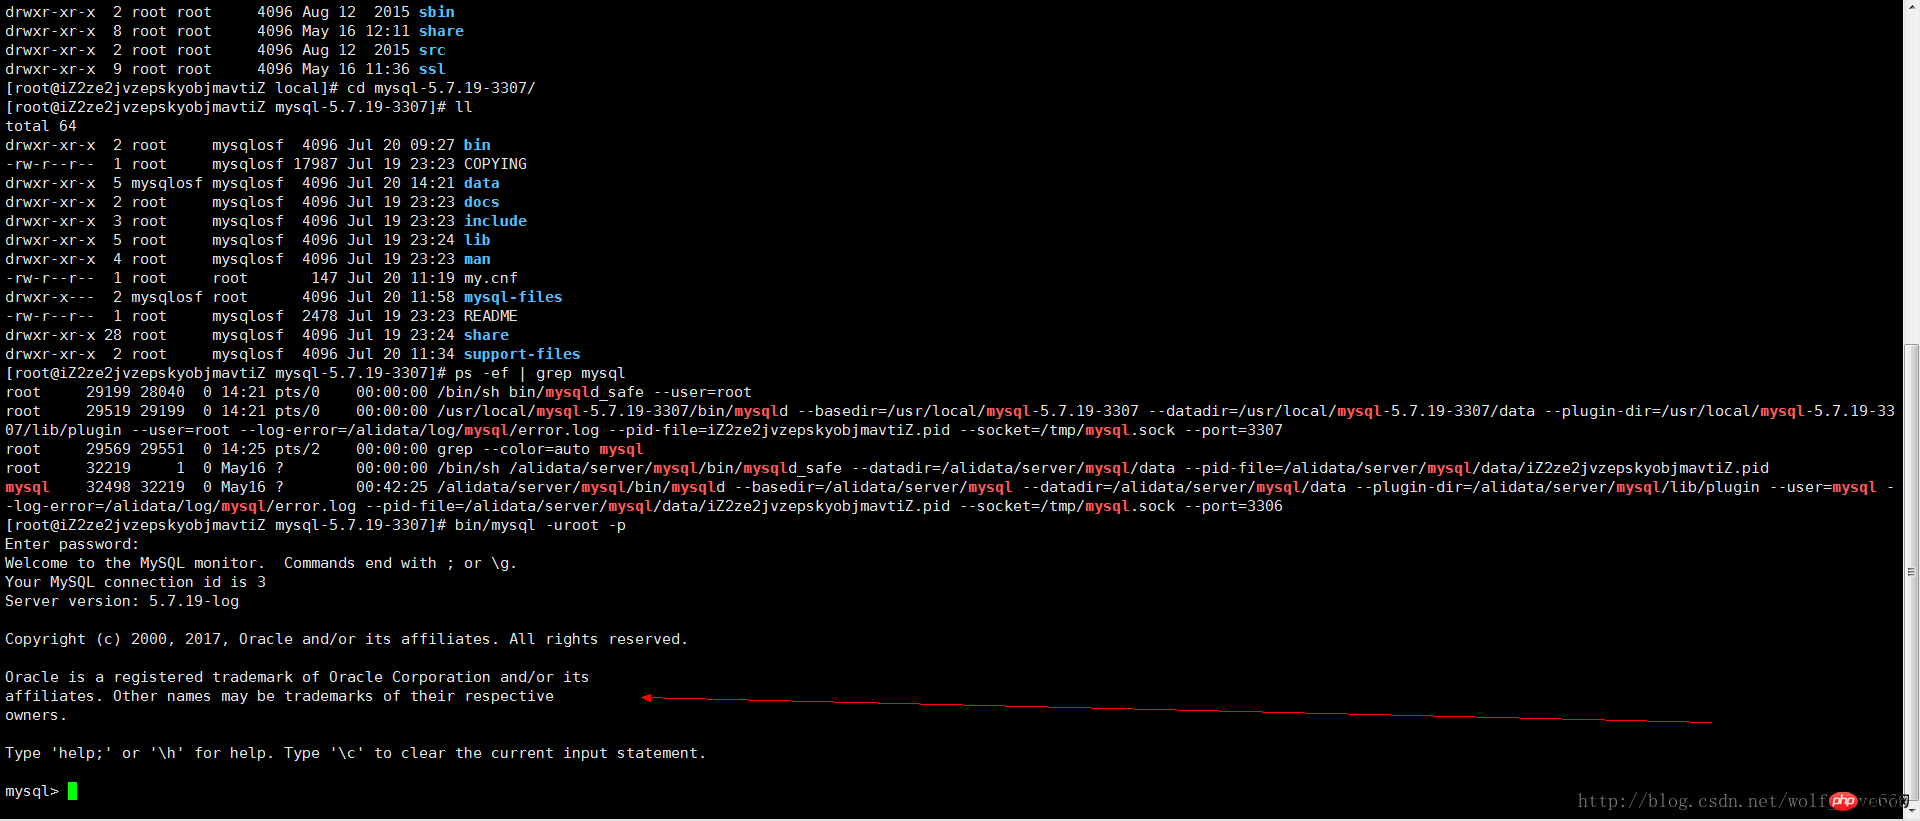
13、登录MySQL之后,要求立即修改密码,否则不能进行任何操作。执行下面的命令修改'root'@'localhost'的密码:
SET PASSWORD = PASSWORD('root');
 ALTER USER 'root'@'localhost' PASSWORD EXPIRE NEVER;
flush privileges;
14、为了可以远程登录,增加一个'root'@'%'账号:
grant all privileges on *.* to 'root'@'%' identified by 'root' with grant option;
15、本地测试连接
按照上面的办法,继续解压安装mysql-5.7.19-linux-glibc2.5-x86_64.tar.gz,并且配置为3308,3309端口,就可以安装多个mysql了。
The above is the detailed content of Detailed graphic tutorial on installing mysql5.7.19 (tar.gz) under Linux. For more information, please follow other related articles on the PHP Chinese website!

