
Home >Database >Mysql Tutorial >CentOS7 64-bit installation mysql graphic tutorial
CentOS7 64-bit installation mysql graphic tutorial
- 巴扎黑Original
- 2017-05-14 14:20:361432browse
This article mainly introduces the graphic tutorial for CentOS7 64-bit installation mysql in detail, which has certain reference value. Interested friends can refer to it
Prerequisites for installing mysql: Install CentOS 7 64-bit, CentOS 7 system can connect to the network
After completion, open the terminal and check whether mysql has been installed:
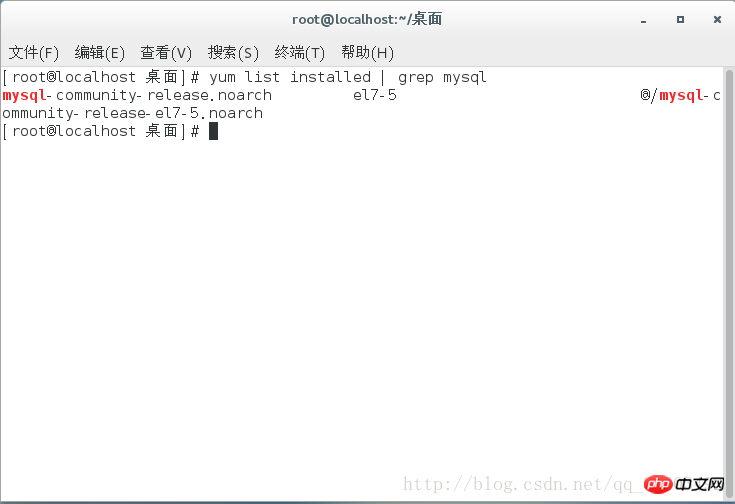
Enter # in the terminal
##
yum list installed | grep mysqlAs shown below:
yum -y remove mysql-libs.x86_64Delete the installed mysql
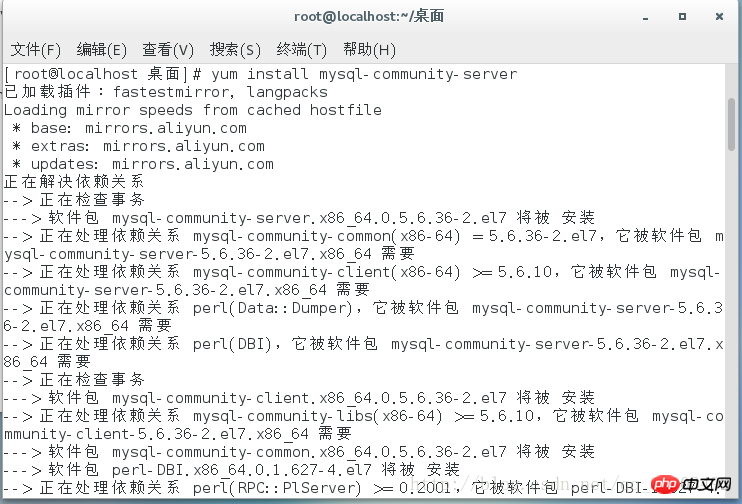
After deletion, enter in the terminal:
yum install mysql-community-serverAs shown below:
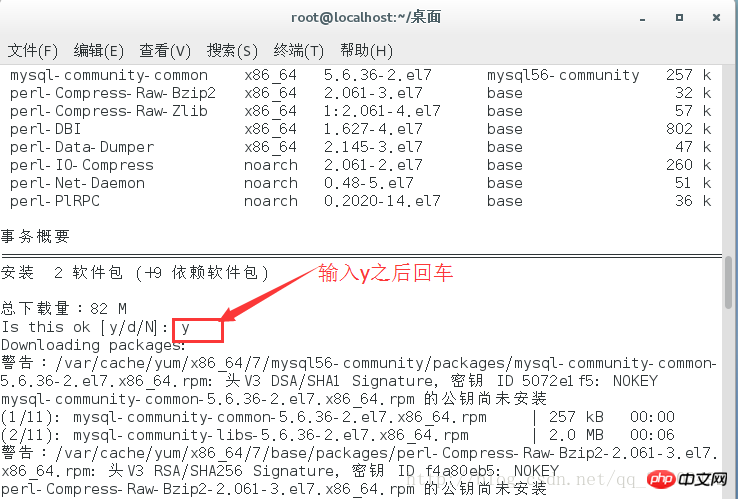
During the automatic installation process, you will be asked to choose whether to continue downloading, etc. Enter y and press Enter as shown below:
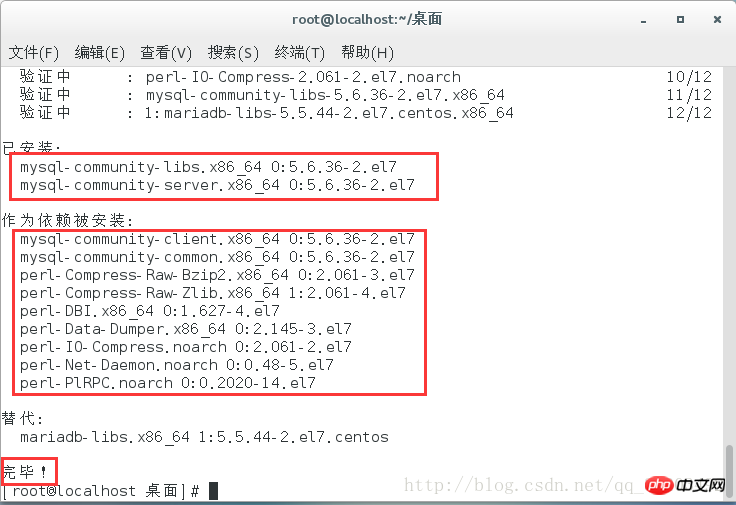
After the installation is complete, enter in the terminal:
systemctl start mysqld
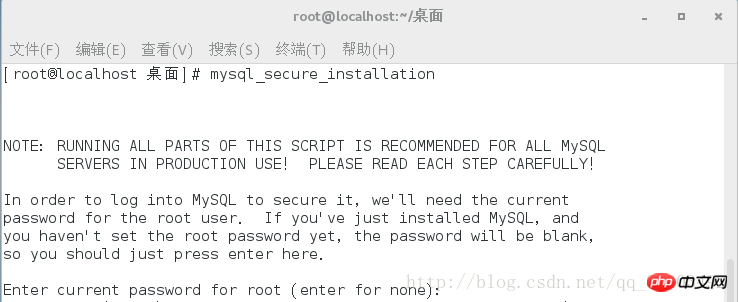
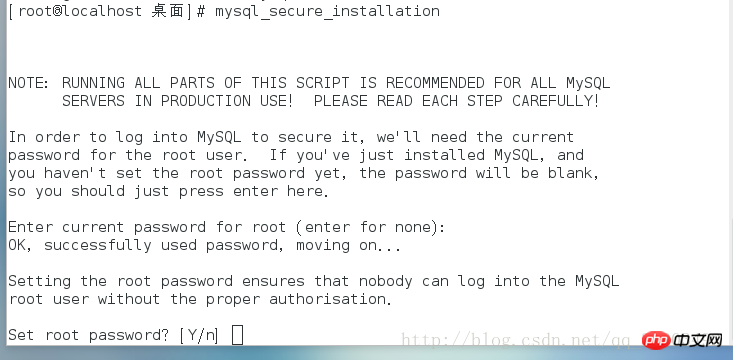
Restart the mysql service, set the initial user name and password, and enter in the terminal: mysql_secure_installation

remotely access MySQL after installing mysql, need to open the default port number 3306. Enter in the terminal: systemctl start mysqld
Restart Start the mysql service, and then enter:
firewall-cmd –permanent –zone=public –add-port=3306/tcp
firewall-cmd –permanent –zone=public –add-port=3306/udp
These two commands can open port 3306, as shown below:

rm -f /var/run/yum.pidDelete the file and run yum again to make it available.
The above is the detailed content of CentOS7 64-bit installation mysql graphic tutorial. For more information, please follow other related articles on the PHP Chinese website!