Home >Web Front-end >PS Tutorial >Use ps to create small error crystal icon
Use ps to create small error crystal icon
- 高洛峰Original
- 2017-02-14 10:15:041925browse
ps version cs2 or above.
Icon Tutorial
-
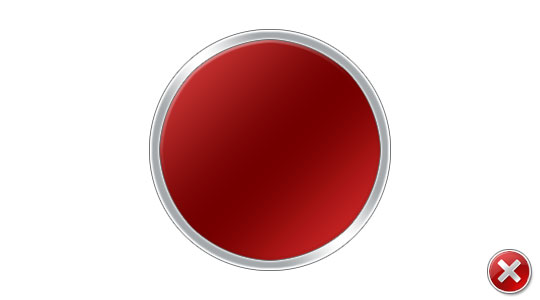
As usual, take a look at the result picture first:

-
Let us first take a look at a few icons of the Vista system. The icon on the left below is what we are going to talk about today. By simply changing the color and icon style, you can easily make other icons, and many people have already made some.

-
Let’s get started, first create a new file: ctrl + double-click: Default-> web -> 600 X 400
Then create a new layer through the New Layer button in the lower right corner of the layer panel, double-click the layer name, and enter border
If your current tool is not the Elliptical selection tool, please use the keyboard Press the M key on the toolbar, and use shift + M to switch to the elliptical selection tool. Start clicking and dragging at the corner until 2/3 of the entire canvas is occupied and release the left button. Or release the key when the top, right, bottom, and left blank areas are equal.
Then press the D key on the keyboard, reset the foreground and back to the default black and white, and use alt + backspace (alt + del) to fill the foreground color to the blocks.

-
Be sure to click the menu command without canceling the selection: Select-> Modify-> Shrink-> 15, press Enter ,delete(backspace).

-
Create a new layer through the Layers panel, double-click the layer name, enter middle, and fill it with another color you like.
Then ctrl + d to cancel the current selection, and ctrl + s to save the file and name it icon.

-
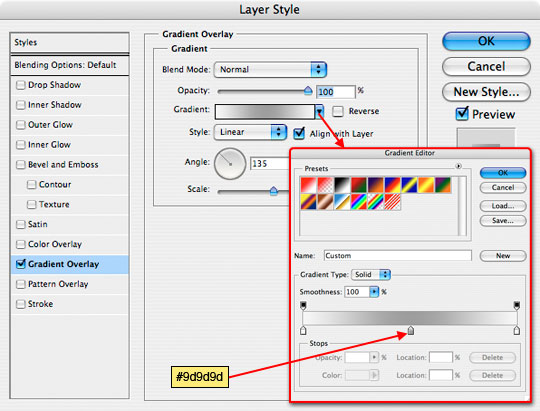
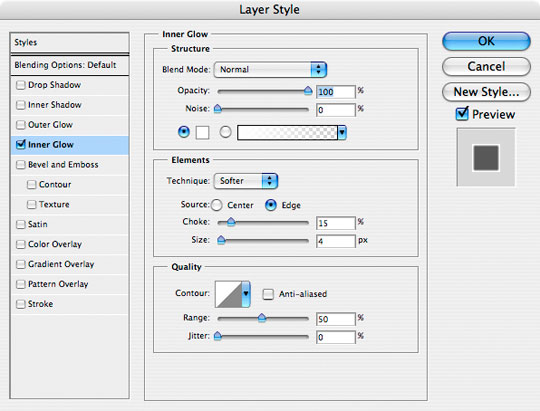
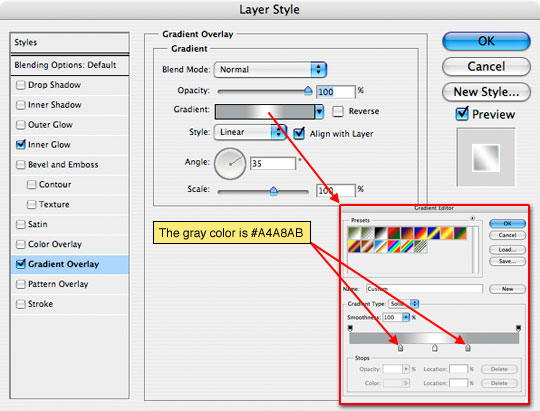
Now we add some layer styles, double-click after the border layer name to pop up the blending layer style panel. By setting the following parameters, our icons will have a good light effect.
inerr Glow: Inner glow, blending mode: normal, opacity: 100%
Gradient Overlay: gradient overlay, angle: 35
- Stoke: stroke

##If these steps are difficult for you If you want to do it, please go directly to the end of the article to download the .PSD file so that you can follow my ideas more easily.
We generally create effects more conveniently by editing layer styles.

-
Then, double-click after the middle layer name and create the style like the previous step. Bevel and Emboss: Bevel and Emboss, Depth: 200, Size: 3,
 Gradient Overlay, Angle: 135
 -

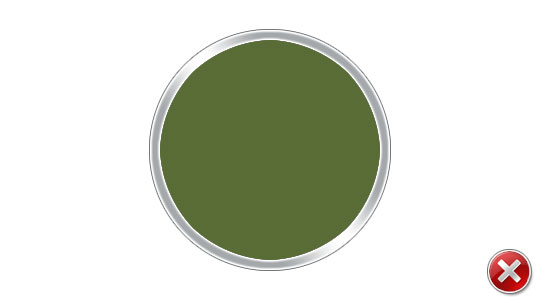
This way the icon already has a rough look.


-
#Next let’s add x. You can use fonts or draw them in PS. Since the x number in Vista has parallel sides and rounded corners, I used a font called Army with a size of 300pt. It can be downloaded from here.

-
Obviously the direction is wrong and needs to be rotated. Use ctrl+T to switch to the Free Transform Tool, hold down the shift key (keep it proportional and rotate at an angle of 15 degrees) and let the mouse rotate in the deformation area. Double-click in the deformation area or press Enter to confirm this step. Then adjust the position so that it is centered horizontally and vertically relative to the icon background.

-
Copy another x layer through ctrl+J and name it: x-top or x-bottom.
Click the small eye icon of x-top to hide him temporarily.

-
Create 3D edges and shadows on x-bottom, and use outer glow to add a 1px white border to make it look slightly larger than x- top, please refer to the following two steps to set it.


-
Click on the x-top, left eye position, to make it visible.
Like before, add a gradient layer to give it a metallic look.

-
To make it look more three-dimensional, use the move tool to select the x-botom layer, and then move it up or to the right. It has the effect as shown below.

-
Before this tutorial is about to end, we need to add some web2.0 styles to the icon to make it more perfect. Since the icon gradient of Vista is not regular, the following operations need to be performed:
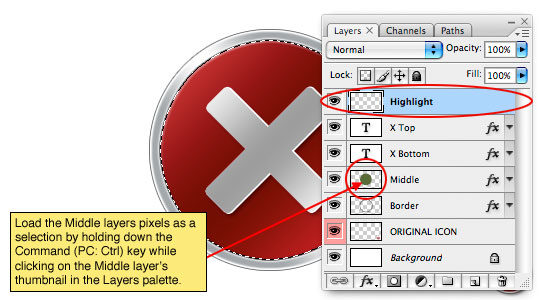
Create a new layer on the x-top layer named: Highlight, and make sure it is selected. Then hold down the ctrl key and click on the middle layer to get the middle selection,

-
Press the D key to reset the ps foreground and background color settings, and then ctrl + For the backspace, fill the Highlight with white, and then adjust the fill to 10% to make it look more natural.

-
Under the premise of ensuring the selection tool, move the current selection to the backspace at the lower right position of the icon, and use the remaining part as a highlight .

-
Click here to download the relevant documents.

- # This may be here, maybe you feel that the icon is a bit not round, maybe it is not pleasing to the eye, okay, there may be a problem there. Since PS is a pixel drawing software, the circle created by the selection is not a perfect circle, so in the third step, you cannot use the Ellipse tool to create a circle, but use the Ellipse tool in the shape tool.



 Gradient Overlay, Angle: 135

