Home >Web Front-end >JS Tutorial >Implement local image preview based on JavaScript
Implement local image preview based on JavaScript
- 高洛峰Original
- 2017-02-10 17:44:441193browse
The example in this article shares the specific code for js local image preview for your reference. The specific content is as follows
<!DOCTYPE html>
<!--
<!DOCTYPE html>一定要放在第一行,除非上面都是空行

在HTML规范中,单独存在的标签是不需要使用/来自我关闭的,比如<br>,<input>,<hr>等等这样的标签都是符合语法的.
在XHTML规范中,单独存在的标签要按照XML的语法规则进行自我关闭,上面三个标签就应写成<br />,<input />,<hr />
-->
<html>
  <head>
    <meta charset="utf8">
    <style>
      input[type=radio] {
        /* 按钮与文字对齐 */
        vertical-align:middle;
      }
      input[type=file] {
        display: block;
      }
      #img {
        width: 200px;
        height: 200px;
        border: 1px solid black;
        margin-top: 10px;
      }
    </style>
  </head>
  <body>
    <input type="radio" name="previewType" value="fileReader" onChange="onPreviewTypeChange()">fileReader
    <input type="radio" name="previewType" value="createURL" onChange="onPreviewTypeChange()">createURL
    <hr>
    <input type="file" id="imgFile" onChange="imgChange()" value="test.jpg">
    <img  src="/static/imghwm/default1.png"  data-src="https://img.php.cn//upload/image/184/782/801/1486719627555160.jpg"  class="lazy"  id="img" alt="Implement local image preview based on JavaScript" >
    <script>
      var previewTypes = document.getElementsByName("previewType");
      var imgFile = document.getElementById("imgFile");
      var img = document.getElementById("img");

      function getPreviewType() {
        for(var i=0; i<previewTypes.length; i++) {
          if(previewTypes[i].checked) {
            return previewTypes[i].value;
          }
        }
      }

      function onPreviewTypeChange() {
        imgChange(event.target.value);
      }

      function imgChange(type) {
        img.src = "";
        var files = imgFile.files;
        console.log(files);
        if(!files || files.length === 0) {
          return;
        }
        var file = files[0];
        if(!type) {
          type = getPreviewType();
          if(!type) {
            return;
          }
        }
        switch(type) {
          case "fileReader":
            var fr = new FileReader();
            fr.onload = function(progressEvent) {
              console.log(progressEvent);
              img.src = progressEvent.target.result;
            }
            fr.readAsDataURL(file);
            break;
          case "createURL":
            img.onload = function() {
              //释放一个之前通过调用 URL.createObjectURL() 创建的已经存在的 URL 对象。
              URL.revokeObjectURL(img.src);
            }
            img.src = URL.createObjectURL(file);
            break;
        }
      }
    </script>
  </body>
</html>
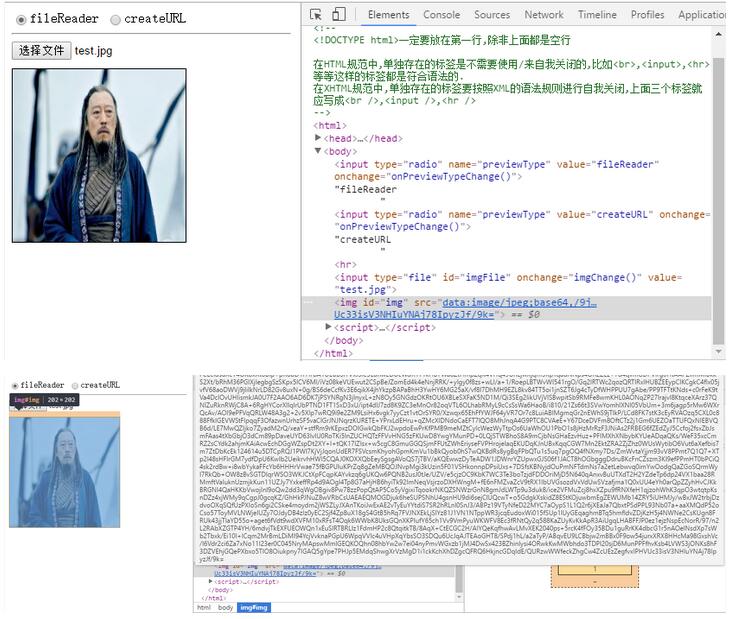
fileReader.readAsDataURL

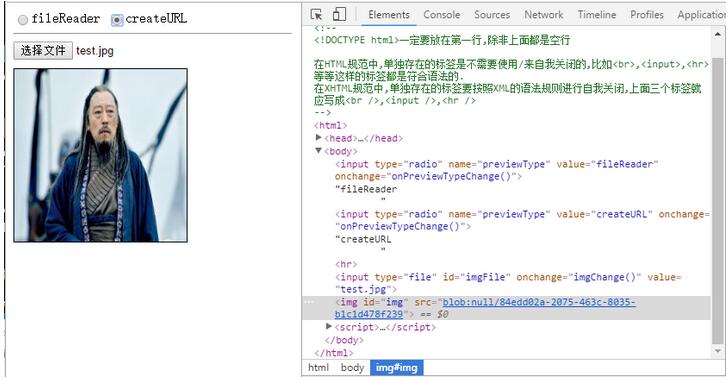
URL .createObjectURL
It can be seen that the URL actually starts with "blob:", followed by a 32-bit UUID (8-4-4-4-12) structure.

The above is the entire content of this article. I hope it will be helpful to everyone's learning. I also hope that everyone will support the PHP Chinese website.
For more articles related to local image preview based on JavaScript, please pay attention to the PHP Chinese website!
Statement:
The content of this article is voluntarily contributed by netizens, and the copyright belongs to the original author. This site does not assume corresponding legal responsibility. If you find any content suspected of plagiarism or infringement, please contact admin@php.cn
Previous article:Native JS implements simple magnifying glass effectNext article:Native JS implements simple magnifying glass effect
Related articles
See more- An in-depth analysis of the Bootstrap list group component
- Detailed explanation of JavaScript function currying
- Complete example of JS password generation and strength detection (with demo source code download)
- Angularjs integrates WeChat UI (weui)
- How to quickly switch between Traditional Chinese and Simplified Chinese with JavaScript and the trick for websites to support switching between Simplified and Traditional Chinese_javascript skills

