


Do you need to add custom metafields to custom taxonomy in WordPress?
Custom taxonomy allows you to organize content besides categories and tags. Sometimes it is useful to add other fields to describe them.
In this article, we will show you how to add other metafields to the taxonomy they create.

When should custom metafields be added to custom taxonomy?
When you create new content on your WordPress site, you can organize it using two default taxonomy (category and tag).
Some websites benefit from the use of custom taxonomy. These allow you to sort content in other ways.
For example, websites that publish book reviews can add "topic" and "author" taxonomy so that visitors can quickly find comments they are interested in.
For more information, see a guide on how to create a custom taxonomy in WordPress.
By default, each taxonomy has only three to four fields: name, slug, parent (if hierarchical), and description.

Sometimes it is useful to add other fields to better describe the taxonomy. For example, you can add the Year of Birth field to the Authors taxonomy.
That being said, here is how to add custom metafields to custom taxonomy in WordPress.
Adding custom metafields to custom classification in WordPress
First, you need to install and activate the Advanced Custom Fields Plugin. To learn more, see our step-by-step guide on how to install WordPress plug-ins.
Next, go to Custom Fields »Add New Page. Here you can add a field group that contains one or more new fields.
You will be asked to assign a title to the field group that will be displayed with the new field when you add or edit a taxonomy. In this tutorial, we want to add custom fields to the author category, so we name the field group "Author Details".

Once you have done this, you should click the Add Field button to add the field. A new form will appear where you can fill in the details of the new field.
After entering the field tag, the system will automatically create a field name for you, which you can edit as needed. You will need to use the field name later in this tutorial, so note it down.

You should now fill in additional details for the field, such as field type, description of the author who will fill out the form, and whether the field is required. Other options not shown in the screenshot include default text, placeholder text, character limits, and more.
If you want to add a second field, you should click the Add Field button and repeat the process. Otherwise, just scroll down to the Position section.
Here you can create rules that describe where the new field is displayed. You should select "Taxonomy" from the first drop-down menu and leave the intermediate field as "Equal to". Finally, select the correct custom taxonomy for the last field. In this tutorial, we will select "Author".

If you want to add this field to another taxonomy, you can click the Add Rule Group button and repeat the step.
Now you should adjust any other settings on the page. We just need to keep the default value. Once you're done, you should scroll to the top of the page and click the Publish button.

Congratulations, you have successfully added a custom metafield to your custom taxonomy in WordPress. But you have more work to do.
Add data to new custom metafields
Although the taxonomy has a new field, it does not contain any data yet. You should take some time to do this now.
In our example, we need to enter the birth year of each author. To do this, we need to navigate to Post » Author and click on the author name we want to edit.

After that, we can enter the data in the new field. In this case, we will enter the author's year of birth. Don't forget to click the "Update" button to store new data.

You should follow the same steps on the website to add the data to your custom taxonomy.
Once you're done, there's one more step to do. Although you can see a custom field when you log in to the WordPress admin area, visitors to your website will not be able to see it. You need to add this field to the archive page of the custom category.
Show custom metafields on category archive page
In this step, you need to add the code to the theme file. If you haven't done this before, see our beginner's guide on how to paste web clips into WordPress.
The first thing you need to do is go into the topic folder and look for the classified archive file. It will have a similar name taxonomy-YOURTAXONOMYNAME.php.
For example, if you have a custom taxonomy called "Author", then you need to look for a taxonomy-authors.php.
If you don't see the file, look for archive.php. You need to copy the file and name it as above.
Note : If your theme does not contain archive.php, you may be using the WordPress theme framework and you must create a classification archive manually. A great starting point for learning how to create archive files is our guide on how to create custom archive pages in WordPress.
Now you need to add the following code to the classification archive before the loop:

We hope this tutorial helps you understand how to add custom metafields to custom taxonomy in WordPress. You may also want to learn how to add keywords and meta descriptions in WordPress, or check out our list of must-have plugins to extend your site.
The above is the detailed content of How to add custom metafields to custom classification in WordPress. For more information, please follow other related articles on the PHP Chinese website!

 How to easily move your blog from WordPress.com to WordPress.orgApr 18, 2025 am 11:33 AM
Do you want to move your blog from WordPress.com to WordPress.org? Many beginners start with WordPress.com but quickly realize their limitations and want to switch to the self-hosted WordPress.org platform. In this step-by-step guide, we will show you how to properly move your blog from WordPress.com to WordPress.org. Why migrate from WordPress.com to WordPress.org? WordPress.com allows anyone to create an account
 How to Automate WordPress and Social Media with IFTTT (and more)Apr 18, 2025 am 11:27 AM
Are you looking for ways to automate your WordPress website and social media accounts? With automation, you will be able to automatically share your WordPress blog posts or updates on Facebook, Twitter, LinkedIn, Instagram and more. In this article, we will show you how to easily automate WordPress and social media using IFTTT, Zapier, and Uncanny Automator. Why Automate WordPress and Social Media? Automate your WordPre
 How to Fix Custom Menu Item Limits in WordPressApr 18, 2025 am 11:18 AM
Just a few days ago, one of our users reported an unusual problem. The problem is that he reaches the limit of custom menu items. Any content he saves after reaching the menu item limit will not be saved at all. We've never heard of this issue, so we decided to give it a try on our local installation. More than 200 menu items were created and saved. The effect is very good. Move 100 items to the drop-down list and save them very well. Then we knew it had to do with the server. After further research, it seems that many others have encountered the same problem. After digging deeper, we found a trac ticket ( #14134 ) that highlighted this issue. Read very
 How to add custom metafields to custom classification in WordPressApr 18, 2025 am 11:11 AM
Do you need to add custom metafields to custom taxonomy in WordPress? Custom taxonomy allows you to organize content besides categories and tags. Sometimes it is useful to add other fields to describe them. In this article, we will show you how to add other metafields to the taxonomy they create. When should custom metafields be added to custom taxonomy? When you create new content on your WordPress site, you can organize it using two default taxonomy (category and tag). Some websites benefit from the use of custom taxonomy. These allow you to sort content in other ways. For example,
 How to Remotely Publish to WordPress using Windows Live WriterApr 18, 2025 am 11:02 AM
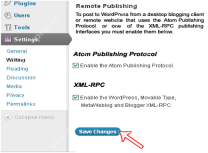
Windows live writer is a versatile tool that allows you to post posts directly from your desktop to your WordPress blog. This means you don't need to log in to the WordPress admin panel to update your blog at all. In this tutorial, I will show you how to enable desktop publishing for your WordPress blog using Windows Live Writer. How to set up Windows Live Writer on WordPress Step 1: To use Windows Live Writer in WordPr
 How to Fix White Text and Missing Buttons in WordPress Visual EditorApr 18, 2025 am 10:52 AM
Recently, one of our users reported a very strange installation problem. When writing a post, they can’t see anything they write. Because the text in the post editor is white. What's more, all the visual editor buttons are missing, and the ability to switch from visual to HTML doesn't work either. In this article, we will show you how to fix the white text and missing button issues in the WordPress visual editor. Be a Beginner Note: If you are looking for hidden buttons that may be seen in screenshots of other websites, you may be looking for a kitchen sink. You have to click on the kitchen sink icon to see other options such as underline, copy from word, etc.
 How to display avatar in user email in WordPressApr 18, 2025 am 10:51 AM
Do you want to display avatars in user emails in WordPress? Gravatar is a network service that connects a user's email address to an online avatar. WordPress automatically displays visitors’ profile pictures in the comments section, but you may also want to add them to other areas of the site. In this article, we will show you how to display avatars in user emails in WordPress. What is Gravatar and why should I display it? Gravatar stands for globally recognized avatars, which allows people to link images to their email addresses. If the website supports
 How to change the default media upload location in WordPressApr 18, 2025 am 10:47 AM
Do you want to change the default media upload location in WordPress? Moving media files to other folders can improve website speed and performance and help you create backups faster. It also gives you the freedom to organize your files in the way that suits you best. In this article, we will show you how to change the default media upload location in WordPress. Why change the default media upload location? By default, WordPress stores all images and other media files in the /wp-content/uploads/ folder. In this folder you will find children of different years and months


Hot AI Tools

Undresser.AI Undress
AI-powered app for creating realistic nude photos

AI Clothes Remover
Online AI tool for removing clothes from photos.

Undress AI Tool
Undress images for free

Clothoff.io
AI clothes remover

AI Hentai Generator
Generate AI Hentai for free.

Hot Article
Hot Tools

SecLists
SecLists is the ultimate security tester's companion. It is a collection of various types of lists that are frequently used during security assessments, all in one place. SecLists helps make security testing more efficient and productive by conveniently providing all the lists a security tester might need. List types include usernames, passwords, URLs, fuzzing payloads, sensitive data patterns, web shells, and more. The tester can simply pull this repository onto a new test machine and he will have access to every type of list he needs.

EditPlus Chinese cracked version
Small size, syntax highlighting, does not support code prompt function

Zend Studio 13.0.1
Powerful PHP integrated development environment

SublimeText3 English version
Recommended: Win version, supports code prompts!

PhpStorm Mac version
The latest (2018.2.1) professional PHP integrated development tool

