


Efficiently compress pictures and free up storage space! This article will share a variety of practical methods to help you easily reduce image file size while maintaining image quality.
![How to reduce image size [Quick guide]](https://img.php.cn/upload/article/000/000/000/174339667385008.jpg?x-oss-process=image/resize,p_40)
Compress multiple pictures in seconds
The Squash app on Setapp is perfect for this job and saves a lot of time.
Free trial security test recommended four best picture compression applications on Mac system
To help you quickly find the best tools, we have systematically sorted out all solutions.
- Squash: Fast image compression
- PhotoBulk: Batch image compression
- Clop: Optimize clipboard files
- Permute: Image format conversion
Why reduce the size of the picture?
There are many reasons for reducing the size of the picture:
- Save storage space: Reducing the size of the picture can save valuable storage space on the device.
- Improve loading speed: Smaller images load faster, thereby improving website performance and user experience.
- Reduced bandwidth usage: Smaller images use less bandwidth, making it easier for users with limited data traffic to access your content.
- Improved SEO: Faster loading pages are more popular with search engines and help improve the search engine ranking of the website.
- Improve mobile experience: Smaller images load faster on mobile devices, providing mobile users with a smooth browsing experience.
What is picture compression?
There are two main ways to reduce the size of the image file:
- Adjust the image size and reduce the size and size of the image.
- Compress pictures and reduce file size.
Adjusting the image size usually refers to changing the visual size of the image, for example, adjusting a 2000 pixel x 2000 pixels to 1000 pixels x 1000 pixels. Resizing will reduce file size.
Image compression uses special mathematical techniques to reduce file size while maintaining resolution (remember the number of pixels?) and visual size. Think of it as a way to contain more data in the same space. After compression, the image should still be clear and there will be no pixelation.
In many cases, image compression is the best choice because it retains the original resolution and the compressed image looks almost the same. This is important because it is better to have a larger picture for modern monitors.
![How to reduce image size [Quick guide]](https://img.php.cn/upload/article/000/000/000/174339667433459.jpg?x-oss-process=image/resize,p_40)
Personal experience According to my personal experience, if you find that the pictures take up too much space, you should first clean up duplicate and similar pictures on your Mac. I use Geminito to scan my computer and delete unnecessary pictures. There is a similar solution on the iPhone called CleanMy® Phone, which I use as well to keep my device tidy. Both tools are available on Setapp, which also offers over 240 other handy apps that can do almost any task you can imagine on your Apple device.
How to compress pictures on Mac to reduce file size?
As you know, changing the image size may be the easiest way to reduce the size of your photo file, but if you need to print or enlarge your photo later, it is best to compress it in a way that doesn't change the image resolution. Let me show you my way of reducing the size of the picture on your Mac.
How to easily compress image size
I have three favorite apps, and I believe you will also like them.
Squash: The Best Quick Compression Tool
One of my favorite ways to reduce image files on your Mac is to use Squash. This process is very simple and you may never want to use another method again. You just need to drag and drop a picture or group of images into its Dock icon or Squash window. It will then complete its image compression magic in seconds and prompt you to save.
I uploaded a 10MB image. After compression, I got a 779KB image with no loss of image quality.
![How to reduce image size [Quick guide]](https://img.php.cn/upload/article/000/000/000/174339667549156.jpg?x-oss-process=image/resize,p_40)
PhotoBulk: The Best Bulk Compression Tool
Another great app I sincerely recommend is called PhotoBulk. The best part of this tool is that it can easily batch compress images.
The process is as simple as Squash. Simply drag and drop the image into the application and select the Optimize box to reduce file size without degrading image quality.
![How to reduce image size [Quick guide]](https://img.php.cn/upload/article/000/000/000/174339667883317.jpg?x-oss-process=image/resize,p_40)
Clop: The Best Clipboard File Optimization Tool
Finally, let me show you Clop. This application automatically resizes the images, videos, and PDFs you copied to the clipboard. I like to use it for screenshots: After taking the screen, Clop automatically shrinks the file, you can email it or put it into a chat - it will weigh much lighter than the original file.
![How to reduce image size [Quick guide]](https://img.php.cn/upload/article/000/000/000/174339668288707.jpg?x-oss-process=image/resize,p_40)
Use the preview function to reduce image file size
I also used the preview feature before I discovered the Squash image file size reducer. To compress images in preview without losing quality, follow these steps:
- Double-click the file you want to process and open it in the preview.
- Then, click File > Export…
- Set the file format to TIFF and the compression to JPEG.
- Click Save.
- After that, open the new TIFF file in the preview. Go to File > Export again.
- Select "Export..." to set JPEG.
- Click Save and rename the image if needed.
In this way, we reduce the file size, but has the image quality changed after compression?
The pictures are clear and high-quality, without blur. You can judge for yourself. Just check out the screenshot below.
![How to reduce image size [Quick guide]](https://img.php.cn/upload/article/000/000/000/174339668466295.jpg?x-oss-process=image/resize,p_40)
Reduce image size using transformation and optimization
Among digital images, JPEG and PNG are the most common image formats. At first glance, the individual images displayed in both formats may look the same, but if you look closely and dig into the data, you will find that they are very different. Each format is designed according to your needs for image quality, file size, etc. and is used in specific situations. This means that one format is not always better than the other.
When dealing with image compression, you should know that JPEG is prone to losing quality and is best for photos and realistic images. PNGs do not lose quality when compressed, so they are suitable for line drawings and images containing a lot of text and less color.
Furthermore, JPEG contains less data than PNG—and therefore, it is usually smaller in size.
So, the next time you compress the image, consider the format. Sometimes you don't need the image to be PNG, just convert it to another format to reduce the size from MB to KB. The easiest way is to use Permute. Here is how to convert images using this application:
- Open Permute.
- Drag your image into the main application window.
- Select the desired format from the drop-down menu and click Start.
- Click the magnifying glass icon to open the folder containing the new image.
![How to reduce image size [Quick guide]](/static/imghwm/default1.png)
![How to reduce image size [Quick guide]](https://img.php.cn/upload/article/000/000/000/174339669079620.jpg?x-oss-process=image/resize,p_40)
Most importantly, you can use Permute's file size limiting option. Follow the instructions below:
- Open the application.
- Go to Permute > Settings > Presets.
- Find the image format you want to use (for example, JPEG) and select the box next to File Size Limits. Set the desired size and return to image conversion.
![How to reduce image size [Quick guide]](https://img.php.cn/upload/article/000/000/000/174339669323060.jpg?x-oss-process=image/resize,p_40)
Should the image be resized before compression?
Resizing before compression can significantly reduce file size. Compression then further reduces the size to the desired level.
Resizing an image means reducing its length and width, which also reduces its file size. First, determine the size you need, such as the optimal size for your website image.
I prefer to batch resize images using the Squash app mentioned above.
How to compress photos on iPhone and iPad?
Now that you already know how to reduce the file size of your photos on your Mac, let's take a look at how to do the same on your iPhone and iPad.
Here is how I used to reduce the size of photo files on my iPhone.
Built-in editing tools
My first choice is very simple.
- Open the Photos app and select the image you want to compress.
- Click Edit and make a small amount of adjustments (for example, crop) to reduce file size.
- Save the edited image.
This can reduce file size slightly, but cropping is not always the best choice.
Online Tools
Use your browser to visit sites like TinyPNG or JPEG Optimizer. Upload your image, compress it, and download the smaller version.
Adjust camera settings
Finally, you may need to adjust the camera settings to reduce file size.
- Go to the Settings app > Camera > Format.
- Select "Efficient" to take photos in a smaller file size format (HEIF/HEIC).
These methods can easily compress image file size on iPhone and iPad and save storage space.
Want to free up storage space on your iPad? Please read "Is iPad storage full? How to free up iPad storage space".
Use online tools to reduce image size to KB
You can also reduce the image size to KB online. For perfectly compressed photos, I prefer the tinyPNG tool. It uses intelligent lossy compression technology to reduce the size of WEBP, JPEG and PNG files.
Simply drag and drop the file to the selected area, wait a moment, and download the compressed image to your computer.
![How to reduce image size [Quick guide]](https://img.php.cn/upload/article/000/000/000/174339669414047.jpg?x-oss-process=image/resize,p_40)
Tools to reduce file size using image compression: Final Ideas
In my experience, Squash and Clop are my preferred tools for image compression. Squash is perfect for fast, high-quality compression tasks, while Clop seamlessly optimizes images in the clipboard, saving time and integrating well into my workflow.
I also often use PhotoBulk for batch compression. It is capable of handling batch tasks without affecting quality, which is a big advantage.
I tend to not use preview for image compression because it has limited functionality and basic compression capabilities. While it does the job, it does not provide the advanced options other tools have.
As for tinyPNG, it is a powerful online tool for smart lossy compression, but I prefer not to upload all photos online for security. Still, I occasionally use tinyPNG on my iPhone for quick compression on the go.
As you can see, each tool has its advantages and you may find one method that suits your needs better than the other. But again, Squash and Clop are still my favorites for me.
The best part? You can try Squash and Clop for free and other apps I mentioned (PhotoBulk, Permute, Gemini and CleanMy®Phone) for seven days on Setapp, an app subscription service that offers dozens of apps that can do almost anything you can imagine. Try it!
The above is the detailed content of How to reduce image size [Quick guide]. For more information, please follow other related articles on the PHP Chinese website!

 How to create a bootable USB masOS installerMay 07, 2025 am 11:14 AM
In this article, we’ll run through the steps necessary to create a bootable installer of the Mac operating system, whether it’s so you can install the latest version of the macOS on multiple Macs, install the latest macOS beta, perform a c
 7 Creative Ways to Reuse an Old Mac at No CostMay 07, 2025 am 11:10 AM
The heyday of your old Mac is over and it is just sitting there collecting dust? So, what to do with an old MacBook or iMac? Unless you want to turn it into a home decor item, you could use at least these 7 creative ways to turn it in
 MacBook Battery Not Charging? Common Reasons and FixesMay 07, 2025 am 10:50 AM
If your MacBook is plugged in but won’t charge, there are several possible reasons why -— including broken chargers, outdated software, or even routine servicing requirements.In this article, we’ll look at some of the most common caus
 How to open a Mac app from an unidentified or unknown developerMay 07, 2025 am 10:46 AM
If you have tried to install an app on you Mac and been greeted with a warning that it is from an unidentified or unknown developer you may be wondering is it is safe, whether you should install it, and if you can actually install it. Well, in this a
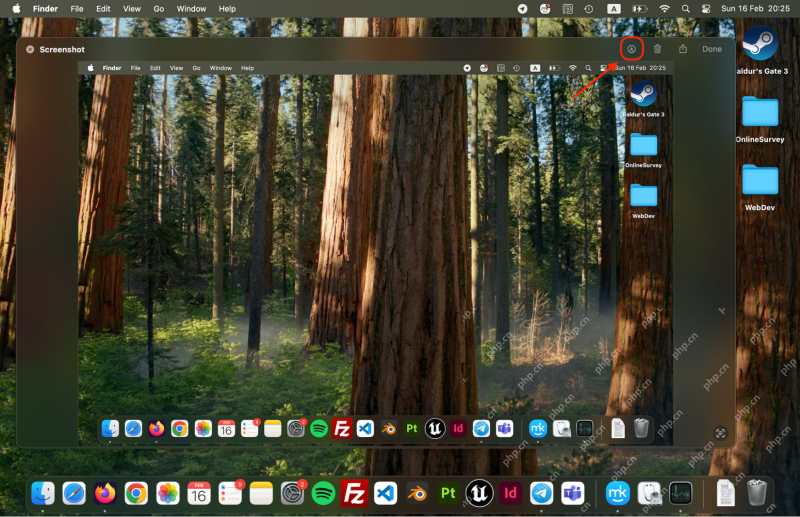 How to Crop Screenshot on Mac? How to Cut It on MacBook Air/Pro?May 07, 2025 am 10:43 AM
To cut a screenshot on Mac:Open the screenshot, access the Markup Toolbar, click Crop, adjust the selection, and press Done.Open the image in Preview, select the area you want to keep, then go to Tools > Crop or press C
 System Preferences on Mac: How to Open & Use It on MacBook Air/Pro?May 07, 2025 am 10:37 AM
What is System Preferences on MacMacOS system preferences is a built-in app that allows users to control and customize their Mac’s settings. It’s a central software hub that manages many aspects, from display settings t
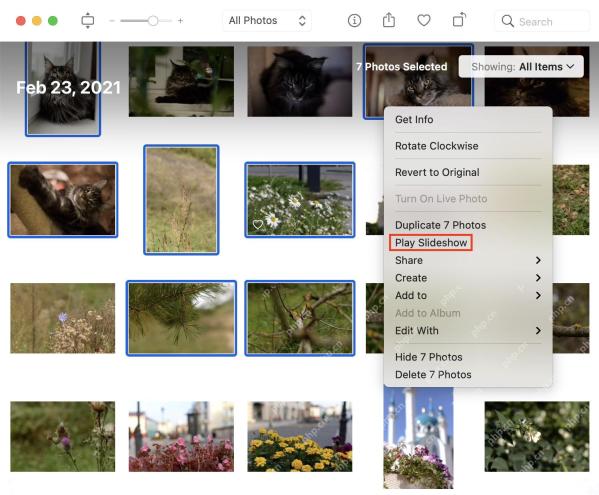 Simple Ways to Make a Slideshow on a MacMay 07, 2025 am 10:27 AM
Slideshow making is a joyous activity that can release your inner artist. And when it comes to artistry, your Mac is your trusted partner. You can make slideshows on a Mac using Apple Photos, Preview, iMovie, or third-party apps.This
 Here's why Time Machine won't work with your external driveMay 07, 2025 am 10:25 AM
Mac users relying on Time Machine went through a rough transition a few years ago when Apple migrated away from its long-used HFS format for encoding hard drives and SSDs to the modern, more capable, and more robust APFS format. During that changeov


Hot AI Tools

Undresser.AI Undress
AI-powered app for creating realistic nude photos

AI Clothes Remover
Online AI tool for removing clothes from photos.

Undress AI Tool
Undress images for free

Clothoff.io
AI clothes remover

Video Face Swap
Swap faces in any video effortlessly with our completely free AI face swap tool!

Hot Article
Hot Tools

Atom editor mac version download
The most popular open source editor

SublimeText3 Mac version
God-level code editing software (SublimeText3)

SublimeText3 Chinese version
Chinese version, very easy to use

SublimeText3 Linux new version
SublimeText3 Linux latest version

VSCode Windows 64-bit Download
A free and powerful IDE editor launched by Microsoft

