

 System TutorialLINUXNow You Can Write ISO Images To USB Disks Directly Using Pv Command In Linux
Now You Can Write ISO Images To USB Disks Directly Using Pv Command In Linux

Say Goodbye to the dd command! The latest Pv (Pipe Viewer) utility can now write ISOs directly to USB disks!! This guide will show you how to use the pv command instead of dd for image writing in Linux.
Using pv command-line utility provides a real-time progress bar, an estimated transfer time (ETA), and greater transparency during the process.
Table of Contents
Introduction
Many of us are familiar with using the dd command to write installer images to storage devices. The dd command is the old-school method for creating bootable USB drives in Linux.
The dd command is quite powerful. It simply reads from one file and writes to another. The typical command to write images to a device looks like this:
sudo dd if=installer.img of=/dev/sda2 bs=1M status=progress
Of course, some other tools like pv (Pipe Viewer) and cat could perform the same task. The primary reason dd is commonly used for this purpose is that it can be run with root privileges, whereas redirecting the output of cat or pv typically requires running the shell with root access. The commandsudo dd ...is more concise thansudo sh -c 'cat ...', isn't?
Limitations of dd
While the dd command works just fine for creating images, it has some limitations:
- The progress information provided by dd does not display the progress as a percentage or calculate an estimated time of arrival (ETA). It only shows the number of bytes written.
- The default block size of dd is not optimized for modern systems, which is why thebs=parameter is often included.
- It's easy to forget to includestatus=progress, and having to specify it each time can be cumbersome.
What is pv Command?
Pv stands for Pipe Viewer, which is a command-line tool that allows users to monitor the progress of data through a pipeline.
It can be inserted into any ordinary pipeline between two processes to give a visual indication of how quickly data is passing through, how long it has taken, and an estimate of how long it will take to complete.
Here are some key features of pv:
- Progress Indication: pv displays a progress bar, percentage completion, elapsed time, and estimated time remaining.
- ETA Calculation: It calculates and updates the estimated time of arrival (ETA) for the completion of the data transfer.
- Buffering: pv can handle buffering, which is useful when dealing with slow devices or network transfers.
- Control and Statistics: It provides control over the data flow and can output statistics about the transfer.
- Flexibility: pv can be used in various scenarios, such as copying files, compressing data, or any other situation where data is piped from one process to another.
The pv command is particularly useful when you need to monitor the progress of operations that might otherwise be invisible, such as when using the dd command to write an image to a disk or when piping data through multiple commands without direct feedback on the transfer rate or progress.
Why Use pv for Writing Files to Block Devices?
The pv utility offers a few advantages over dd:
- pv displays a real-time progress bar and an ETA, providing more detailed information than just bytes written.
- pv automatically determines the optimal buffer sizes, eliminating the need for manual adjustments.
- pv is more concise, as there is no need to specifystatus=progressorbs=....
The Latest pv Command Can Flash ISOs to USB Directly
The recent version of pv (1.8.10) include a new --output (-o) option. This feature allows pv to write directly to a file or device, similar to dd.
The--outputoption in pv version 1.8.10 allows you to redirect the output of the pipe viewer to a file instead of displaying it on the standard output (usually the terminal).
This change can be particularly useful in scenarios where you want to monitor the progress of data transfer while simultaneously saving the output to a file, rather than just displaying it on the terminal.
Now let us go ahead and install the latest pv utility. The latest pv is not yet available in the default repositories of popular Linux operating systems. So we need to install it from source.
To install any software from source, you must install the development tools and GNU Stow. While Stow is optional, I highly recommend you to install it in order to efficiently manage software installed from source.
Install Development Tools
If you haven't install Development tools yet, it is mandatory to install them first. We have documented the steps to install Development tools on various Linux distributions in the link given below:
- How To Install Development Tools In Linux
Install GNU Stow
You can install a software from source without Stow. But I prefer to use GNU Stow to install software from source for efficiently managing them.
Here’s how you can install GNU Stow on various operating systems:
On Ubuntu/Debian
1. Update Package List:
sudo apt update
2. Install Stow:
sudo apt install stow
On Fedora/RHEL/AlmaLinux/Rocky Linux
1. Enable EPEL Repository:
sudo dnf install epel-release
2. Install Stow:
sudo dnf install stow
On older RHEL versions, use yum instead of `dnf'.
Install Latest pv from Source in Linux
After installing the necessary development tools and GNu Stow, you can install the GNU Stow in your Linux system as shown below:
1. Download the latest pv utility from its official releases page:
wget https://codeberg.org/a-j-wood/pv/releases/download/v1.8.10/pv-1.8.10.tar.gz
2. Go to the directory where you downloaded the pv tar file and extract it using command:
tar xvf pv-1.8.10.tar.gz
This will extract the contents of the tar file in a directory called pv-1.8.10 in your current directory.
3. Cd into the extracted directory:
cd pv-1.8.10
4. Configure the Build:
./configure --prefix=/usr/local/stow/pv-1.8.10
This command is used to configure the build process of the software with a specified installation prefix. In this case, it sets the installation directory to /usr/local/stow/pv-1.8.10.
5. Compile the Software:
make
6. Install the pv Software:
sudo make install
7. Use GNU Stow to Manage the Installation:
After installing the software in the specified directory, you can use GNU Stow to create symbolic links from the standard system directories (like /usr/local/bin, /usr/local/lib, etc.) to the files in /usr/local/stow/pv-1.8.10.
To do so, go to the /usr/local/stow directory:
cd /usr/local/stow
And run the following command to create the necessary symlinks:
sudo stow pv-1.8.10
This keeps your system directories clean and makes it easy to manage multiple versions of software.
Now check pv command is available using command:
pv --version
You will see an output like below:
pv 1.8.10
Copyright 2024 Andrew Wood
License: GPLv3  <https:>
This is free software: you are free to change and redistribute it.
There is NO WARRANTY, to the extent permitted by law.

Project web site: <https:></https:></https:>
Congratulations! We have successfully installed the latest 'pv' version 1.8.10.
How to Use pv for Image Writing
Once you installed pv version 1.8.10 in your system, you can use the following command to write an image:
sudo pv installer.iso -Yo /path/to/block/device
Here's the breakdown of the above command:
- sudo: Run the command with root privileges.
- pv: The Pipe Viewer utility.
- installer.iso: The input file (your installer image).
- -Y: Sync after every write, preventing hangs at 100% while flushing buffers.
- -o or --output: Use the new output option to write directly to a file or device.
- /path/to/block/device: The target device (e.g., /dev/sda).
For example, the following output shows that the KDE Neon ISO is being written to an external USB drive /dev/sda:
$ sudo pv neon-user-20240620-0718.iso -Yo /dev/sda
Sample Output:
$ sudo pv neon-user-20240620-0718.iso -Yo /dev/sda
152MiB 0:00:19 [8.25MiB/s] [>                                    ] 5% ETA 0:05:20

As you see in the output above, Pv shows the data transfer speed, progress bar and ETA.
You can now use the newly created USB bootable drive to install Linux on your system.
The latest Pv utility is not only for writing ISOs, but can also be used for writing files to locations that require elevated permissions.
Using pv with sudo for Privileged Locations
One of the significant advantages of the new --output option is its compatibility with sudo. This allows for a more straightforward approach when writing to locations that require elevated permissions, such as block devices.
Previous Workarounds:
Before the --output option, users had to resort to one of the following methods:
1. Using tee with sudo:
pv file | sudo tee /path/to/output >/dev/null
2. Using sudo with a shell command:
sudo sh -c 'pv file > /path/to/output'
3. Starting a root shell and then running pv.
New Simplified Approach:
With the --output option, you can now simply use:
sudo pv file -o /path/to/output
This method combines the progress monitoring capabilities of pv with the ability to write to privileged locations, all in a single, easy-to-use command.
Conclusion
I am not saying that pv is superior to dd. The dd utility is excellent. However, the latest version of pv includes a feature for writing ISO images to USB drives, which I found useful.
Using pv offers a more user-friendly image writing experience with better progress tracking and optimized performance.
The addition of the --output option further simplifies the process, especially when dealing with privileged write locations.
As distributions update to include the latest version of pv, this method will become increasingly accessible and beneficial to users.
Resources:
- pv Codeberg Repository
- pv Website
Suggested Read:
- Etcher – A Beautiful App To Create Bootable USB Drives And SD Cards
- How To Create Multiboot USB Drives With Ventoy In Linux
- Popsicle – Create Multiple Bootable USB Drives At Once
- Bootiso Lets You Safely Create Bootable USB Drive
- MultiCD – Create Multiboot CD, DVD, and USB Images
- How To Write An ISO To The USB Drive Directly From The Internet
- How To Create An ISO From A Bootable USB Drive In Linux
- How To Create Custom Ubuntu Live CD Image
The above is the detailed content of Now You Can Write ISO Images To USB Disks Directly Using Pv Command In Linux. For more information, please follow other related articles on the PHP Chinese website!

 How does performance differ between Linux and Windows for various tasks?May 14, 2025 am 12:03 AM
Linux performs well in servers and development environments, while Windows performs better in desktop and gaming. 1) Linux's file system performs well when dealing with large numbers of small files. 2) Linux performs excellently in high concurrency and high throughput network scenarios. 3) Linux memory management has more advantages in server environments. 4) Linux is efficient when executing command line and script tasks, while Windows performs better on graphical interfaces and multimedia applications.
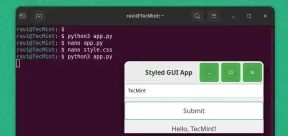 How to Create GUI Applications In Linux Using PyGObjectMay 13, 2025 am 11:09 AM
Creating graphical user interface (GUI) applications is a fantastic way to bring your ideas to life and make your programs more user-friendly. PyGObject is a Python library that allows developers to create GUI applications on Linux desktops using the
 How to Install LAMP Stack with PhpMyAdmin in Arch LinuxMay 13, 2025 am 11:01 AM
Arch Linux provides a flexible cutting-edge system environment and is a powerfully suited solution for developing web applications on small non-critical systems because is a completely open source and provides the latest up-to-date releases on kernel
 How to Install LEMP (Nginx, PHP, MariaDB) on Arch LinuxMay 13, 2025 am 10:43 AM
Due to its Rolling Release model which embraces cutting-edge software Arch Linux was not designed and developed to run as a server to provide reliable network services because it requires extra time for maintenance, constant upgrades, and sensible fi
![12 Must-Have Linux Console [Terminal] File Managers](https://img.php.cn/upload/article/001/242/473/174710245395762.png?x-oss-process=image/resize,p_40) 12 Must-Have Linux Console [Terminal] File ManagersMay 13, 2025 am 10:14 AM
12 Must-Have Linux Console [Terminal] File ManagersMay 13, 2025 am 10:14 AMLinux console file managers can be very helpful in day-to-day tasks, when managing files on a local machine, or when connected to a remote one. The visual console representation of the directory helps us quickly perform file/folder operations and sav
 qBittorrent: A Powerful Open-Source BitTorrent ClientMay 13, 2025 am 10:12 AM
qBittorrent is a popular open-source BitTorrent client that allows users to download and share files over the internet. The latest version, qBittorrent 5.0, was released recently and comes packed with new features and improvements. This article will
 Setup Nginx Virtual Hosts, phpMyAdmin, and SSL on Arch LinuxMay 13, 2025 am 10:03 AM
The previous Arch Linux LEMP article just covered basic stuff, from installing network services (Nginx, PHP, MySQL, and PhpMyAdmin) and configuring minimal security required for MySQL server and PhpMyadmin. This topic is strictly related to the forme
 Zenity: Building GTK Dialogs in Shell ScriptsMay 13, 2025 am 09:38 AM
Zenity is a tool that allows you to create graphical dialog boxes in Linux using the command line. It uses GTK , a toolkit for creating graphical user interfaces (GUIs), making it easy to add visual elements to your scripts. Zenity can be extremely u


Hot AI Tools

Undresser.AI Undress
AI-powered app for creating realistic nude photos

AI Clothes Remover
Online AI tool for removing clothes from photos.

Undress AI Tool
Undress images for free

Clothoff.io
AI clothes remover

Video Face Swap
Swap faces in any video effortlessly with our completely free AI face swap tool!

Hot Article
Hot Tools

SublimeText3 English version
Recommended: Win version, supports code prompts!

DVWA
Damn Vulnerable Web App (DVWA) is a PHP/MySQL web application that is very vulnerable. Its main goals are to be an aid for security professionals to test their skills and tools in a legal environment, to help web developers better understand the process of securing web applications, and to help teachers/students teach/learn in a classroom environment Web application security. The goal of DVWA is to practice some of the most common web vulnerabilities through a simple and straightforward interface, with varying degrees of difficulty. Please note that this software

Dreamweaver Mac version
Visual web development tools

Zend Studio 13.0.1
Powerful PHP integrated development environment

Dreamweaver CS6
Visual web development tools

