 Mobile Game Tutorial
 Mobile Game Guide
 Magic: The Gathering - Ruby, Daring Tracker Commander Deck Guide
Unlike the Grimm version of Little Red Riding Hood, the one portrayed in Magic: The Gathering is no stranger to terrifying beasts. In fact, Ruby, Daring Tracker is the ideal card to lead a Commander deck full of monstrous creatures ready to leap into action—quite the switch from being a helpless victim of a big bad wolf.

With Ruby as a springboard, you can fill an entire deck full of powerful creatures that would otherwise be quite difficult to cast. Then, once she's paired with a larger creature, Ruby can go on the offensive while still providing mana for bigger creatures to come.
The Commander: Ruby, Daring Tracker

Ruby is pretty simple as far as commanders go. For one red and one green mana, you get a 1/2 haste critter that gets 2/ 2 so long as she attacks while you control another creature with power over four. That's all well and good, but the real draw with Ruby is that she can tap for either green or red mana.
Having that little bit of early-game power is probably not going to win too many games, but being priced at just two mana means that Ruby is almost guaranteed to show up on the second turn of every game she's played. This means that, if you draw the required number of lands, you're (almost) guaranteed to have four mana on your third turn.
A mana curve that starts at four mana means you can start casting big, splashy creatures reliably in the early stages of the game. It also means you can ramp up even more generously with cards like Migration Path and Vastwood Surge, which draw out two lands from your library instead of just one.
This doesn't mean you should entirely ignore cards that cost less than four mana as there will always be some room to cast one, two, or three-mana spells, but you can afford to push your deck into the higher-costed cards with Ruby at the helm.
With a deck that loves to cast big creatures, the rest of a Ruby Commander deck should focus on empowering those big-mana critters and ensuring that you're able to refill your hand after you cast all those ramp spells. Luckily, there are plenty of ways to do that in a deck that loves both mana and creatures to start at the number four.

How To Build A Ruby, Daring Tracker Commander Deck

Ultimately, your path to victory will be casting big-mana bombshells faster than your opponents can set up their defenses. Ruby will play a big part in that, as will other sources of fast mana, bombastically large creatures, a few big-swing sorceries, and a bunch of creatures and enchantments that refill your hand every time you cast a creature.
Ramp, Ramp, Ramp

Ruby can't do all the heavy lifting when it comes to producing mana. To get enough to start hard-casting enormous Dinosaurs and Elder Dragons, you'll need more.
Luckily, green is the king of ramp. Start off with Birds of Paradise, then Sakura-Tribe Elder, Three Visits, or Rampant Growth, then Cultivate, before finally hitting the big leagues with Migration Path and Vastwood Surge.
Your creatures can also help produce mana, either by making things cost less (like Goblin Anarchomancer and Drumhunter) or by letting you play more lands every turn (like Loot, Exuberant Explorer or Silverback Elder Elder).
There are also cards like Overlord of the Hauntwoods which creates mana-producing lands from thin air, Defiler of Vigor which lets you pay life instead of green mana, and Domri, Anarch of Bolas which both adds mana and prevents your creatures from being countered.
Powerful Creatures

Red and green have no shortage of big creatures (typically defined as having four or more power, which is where Ruby's other ability triggers). Here, we're looking not just for large numbers, but also additional abilities that enhance your army, sneak more creatures onto the battlefield, or provide great flexibility in how they're played.
On the 'enhance your army' side, Cactusfolk Sureshot gives your team trample and haste, Railway Brawler can double the numbers of every creature you play, and Silverback Elder turns every creature played into potential removal, life gain, or ramp.
Loot, Exuberant Explorer, Bloodbraid Challenger, Ilharg, the Raze-Boar, and Emergent Woodwurm are all great at sneaking creatures into play without even paying for them. Overlord of the Hauntwoods, Trumpeting Carnosaur, and Kogla and Yidaro all have alternate casting costs that make them quite flexible, able to answer threats more directly than with just another big creature.
Special mention goes to Raggadragga, Goreguts Boss and Kogla, the Titan Ape. Both of these creatures directly interact with Ruby to either enhance her or themselves.
There are a lot of other options here, so feel free to experiment with whatever big red/green monsters you like, or just skip ahead to the deck list to see what other creatures are recommended.
Beastly Card Draw

Once you've cast Ruby, a few ramp spells, and finally have enough mana to start casting your big creatures, you've probably only got two or three cards left in your hand, which will limit the amount of pressure you can apply no matter how big a monster you cast. You need to draw more than one card per turn to keep the pressure on.
The best way to do that is to replace cards as you cast them. Since your deck is going to be mostly creatures, cards like Beast Whisperer, Guardian Project, and Soul of the Harvest are ideal. Cast a creature, get a card, continue until you run out of mana.
Another good alternative is to draw cards when a certain condition is met—like, say, possessing a creature with four or more power. Garruk's Uprising, Colossal Majesty, Elemental Bond, Hunter's Talent, Vaultborn Tyrant, Drumhunter, and Garruk's Packleader all fall into this category.
Then there are one-time spells that offer a lot of cards all at once. Shamanic Revelation, Hunter's Insight, Disciple of Freyalise, and Garruk, Primal Hunter all fall into this category (although Garruk can potentially draw cards several times if your foe's let you).
Good Red/Green Stuff

Every deck needs a few answers, and Gruul (red/green) has them in spades. Heroic Intervention and Untimely Malfunction offer some protection for your big monsters, while Beast Within and Chaos Warp provide targeted removal at the expense of giving your opponent something less potent (hopefully).
Call Forth the Tempest and Ezuri's Predation are both big-swing sorceries that can win games all on their own, especially if you manage to cast them early enough. Blasphemous Act is a good board sweeper, while The Skullspore Nexus keeps your army alive if and of your opponents decide to sweep the board.
Jeska's Will offers both ramp and access to additional cards as a one-time deal that can produce truly explosive starts. It's an expensive card, so we'll note some cheaper alternatives in a budget substitutions section.

Ruby, Daring Tracker Commander Deck List

Here’s a recommended deck list for Ruby, Daring Tracker.
|
Ruby, Daring Tracker Commander Deck List |
||||
|---|---|---|---|---|
|
Commander (1) |
||||
| Ruby, Daring Tracker | Creatures (34) | |||
| Birds of Paradise | Goblin Anarchomancer | Sakura-Tribe Elder | Spinner of Souls | Loot, Exuberant Explorer |
| Beast Whisperer | Drumhunter | Anzrag, the Quake-Mole | Cactusfolk Sureshot | Primeval Herald |
| Raggadragga, Goreguts Boss | Garruk's Packleader | Bloodbraid Challenger | Terror of the Peaks | Ilharg, the Raze-boar |
| Overlord of the Hauntwoods | Railway Brawler | Silverback Elder | Defiler of Vigor | Xenagos, God of Revels |
| Etali, Primal Storm | Kogla, the Titan Ape | Trumpeting Carnosaur | Disciple of Freyalise / Garden of Freyalise | Soul of the Harvest |
| Kogla and Yidaro | Soul of New Phyrexia | Emergent Woodwurm | Tyrant's Familiar | Drakuseth, Maw of Flames |
| Vaultborn Tyrant | Terastodon | Ghalta, Primal Hunger | Hugs, Grisly Guardian | Planeswalkers (2) |
| Domri, Anarch of Bolas | Garruk, Primal Hunter | Sorcery (10) | ||
| Stump Stomp / Burnwillow Clearing | Three Visits | Cultivate | Jeska's Will | Migration Path |
| Vastwood Surge | Shamanic Revelation | Call Forth the Tempest | Ezuri's Predation | Blasphemous Act |
|
Instants (6) |
||||
| Heroic Intervention | Untimely Malfunction | Beast Within | Chaos Warp | Hunter's Insight |
| Return of the Wildspeaker | Enchantments (7) | |||
| Utopia Sprawl | Hunter's Talent | Garruk's Uprising | Rhythm of the Wild | Colossal Majesty |
| Elemental Bond | Guardian Project | Artifacts (4) | ||
| Sol Ring | Swiftfoot Boots | Hedron Archive | The Skullspore Nexus | Lands (35) |
| Command Tower | Thornspire Verge | Rogue's Passage | Kessig Wolf Run | Temple of the False God |
| Bonder's Enclave | Boseiju, who Endures | Cinder Glade | Game Trail | Mossfire Valley |
| Rockfall Vale | Rootbound Crag | Karplusan Forest | Stomping Ground | Spire Garden |
| Sheltered Thicket | Copperline Gorge | Temple of Abandon | Gruul Turf | Wooded Foothills |
| Cragcrown Pathway / Timbercrown Pathway | Commercial District | Fire-Lit Thicket | Forest (7) | Mountain (5) |
Budget Substitutions
Some of these cards are going to be on the pricey side for new Magic players. Here are a few substitutions that won’t break the bank.
|
Budget Substitutions | ||||||||||||||||||||||||||||||
|---|---|---|---|---|---|---|---|---|---|---|---|---|---|---|---|---|---|---|---|---|---|---|---|---|---|---|---|---|---|---|---|
| Terror of the Peaks | Ojer Kaslem, Deepest Growt, Dragonhawk, Fate's Tempest | ||||||||||||||||||||||||||||||
| Overlord of the Hauntwoods | Kona, Rescue Beastie | ||||||||||||||||||||||||||||||
| Railway Brawler | Goreclaw, Terror of Qal Sisma, | ||||||||||||||||||||||||||||||
| Xenagos, God of Revels | Savage Ventmaw, Screamer-Killer | ||||||||||||||||||||||||||||||
| Vaultborn Tyrant | Annoyed Altisaur, Shriekwood Devourer, End-Raze Forerunners | ||||||||||||||||||||||||||||||
| Jeska's Will | Kodama's Reach, Tempt with Discovery, Bridgeworks Battle / Tanglespan Bridgeworks | ||||||||||||||||||||||||||||||
| Call Forth the Tempest | Soulfire Eruption, Hit the Mother Lode, Rishkar's Expertise | ||||||||||||||||||||||||||||||
| Heroic Intervention | Tamiyo's Safekeeping, Gaea's Gift, Collective Resistance, Overprotect | ||||||||||||||||||||||||||||||
| Guardian Project | Glorious Sunrise, Monstrous Vortex | ||||||||||||||||||||||||||||||
| Boseiju, Who Endures | Mosswort Bridge, Hidden Nursery | ||||||||||||||||||||||||||||||
| Stomping Ground | Wooded Ridgeline, Fabled Passage, Rugged Highlands, Restless Ridgeline, Highland Forest | ||||||||||||||||||||||||||||||
| Thornspire Verge | Wooded Ridgeline, Fabled Passage, Rugged Highlands, Restless Ridgeline, Highland Forest | ||||||||||||||||||||||||||||||
| Spire Garden | Wooded Ridgeline, Fabled Passage, Rugged Highlands, Restless Ridgeline, Highland Forest | ||||||||||||||||||||||||||||||
| Wooded Foothills | Wooded Ridgeline, Fabled Passage, Rugged Highlands, Restless Ridgeline, Highland Forest |
Tips For Playing Ruby, Daring Tracker

- Your game plan should always be first turn land, second turn land then Ruby, and then third turn either an aggressive four-mana creature, a ramp spell like Migration Path, or a card-draw source like Beast Whisperer or Guardian Project.
- By turn four or five, you should be seeking to go on the offensive with a lot of power at your back. Successively cast creatures will play defense or join the offense if you've got something like Rhythm of the Wild giving them haste.
- If you don't need her for mana, and you've got a big creature on the board to trigger her 2/ 2 boost, feel free to send Ruby in to attack. She's so cheap that she can afford to die a few times before it becomes prohibitive to recast her.
- Remember that being the aggressor means picking your targets carefully. In a multiplayer game, that might mean going after the weak and defenseless players first while you build your strength to tackle the bigger threats later on.

The above is the detailed content of Magic: The Gathering - Ruby, Daring Tracker Commander Deck Guide. For more information, please follow other related articles on the PHP Chinese website!
 Wordle Answer And Hints - April 27 2025 Solution #1,408Apr 26, 2025 pm 06:04 PM
Don't let your Wordle streak end! Before the weekend's over, conquer today's puzzle. Need a little help? We've got you covered with spoiler-free hints and solutions. All answers are carefully hidden to prevent accidental spoilers. We offer helpful
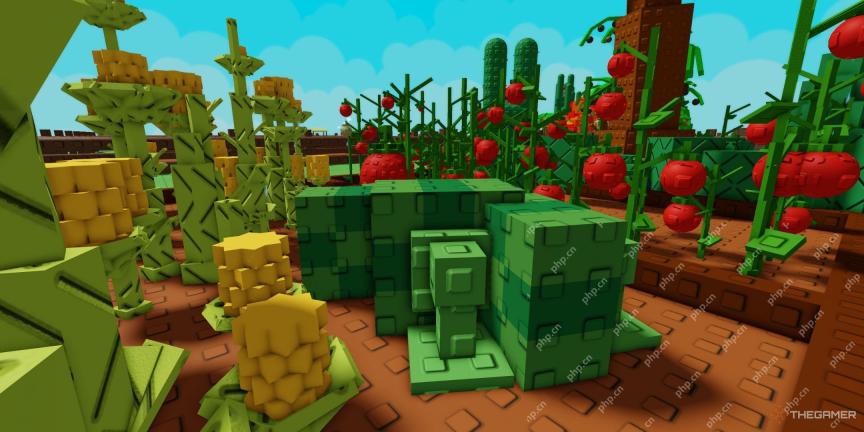 Roblox: Grow A Garden - How To Get LemonsApr 26, 2025 pm 06:03 PM
Lemons: Roblox Grow A Garden's Elusive Prize Lemons are highly sought-after but incredibly rare in Roblox's Grow A Garden. Unlike other crops, they aren't available through shops, quests, or random drops. Attempts to acquire them through convention
 Assassin's Creed Shadows: Stealing Samurai Quest WalkthroughApr 26, 2025 pm 04:03 PM
In Assassin's Creed: Shadows of Death, honor isn't always a samurai's strong suit. The "Stealing Samurai" side quest throws you into a situation where you'll confront dishonorable samurai, unlike the noble Yasuke. This quest offers substan
 Fatal Fury: City Of The Wolves - Complete Guide To Every MechanicApr 26, 2025 pm 02:55 PM
This concise guide covers every mechanic in Fatal Fury: City of the Wolves. While the game offers in-game tutorials, this guide provides a comprehensive overview and context for each mechanic. This guide breaks down each mechanic for easy reference
 Fatal Fury: City Of The Wolves - Tizoc GuideApr 26, 2025 pm 12:10 PM
Fatal Fury: City of the Wolves's Tizoc: A Comprehensive Guide for Grappling Glory Tizoc, the avian grappler in Fatal Fury: City of the Wolves, transcends the typical Zangief-esque archetype. This guide provides a deep dive into his moveset, offering
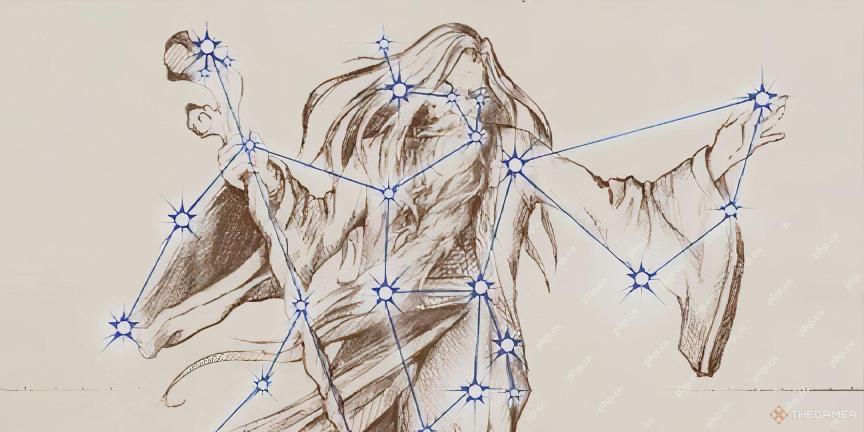 Oblivion Remastered: Best Melee BuildApr 26, 2025 pm 12:09 PM
Oblivion Remastered: The Ultimate Weapon-Focused Melee Build Looking to create a devastating melee character in Oblivion Remastered? This guide focuses on a pure-carnage, weapon-heavy build, emphasizing choices that maximize damage output. While spec
 NYT Mini Crossword Answers And Hints - April 26, 2025Apr 26, 2025 pm 12:08 PM
Stuck on today's NYT Mini Crossword? Need a fresh perspective on those tricky clues? Don't worry, we've got you covered! Sometimes a different hint is all you need to unlock that satisfying "aha!" moment. Whether you're looking for alter
 Pokemon Go: Growing Up Event GuideApr 26, 2025 pm 12:07 PM
Pokemon Go's "Growing Up" Event: A Celebration of Starter Pokemon! Get ready for a new Pokemon Go event focusing on the adorable early-stage Pokemon! The "Growing Up" event brings exciting bonuses and encounters. This event runs


Hot AI Tools

Undresser.AI Undress
AI-powered app for creating realistic nude photos

AI Clothes Remover
Online AI tool for removing clothes from photos.

Undress AI Tool
Undress images for free

Clothoff.io
AI clothes remover

Video Face Swap
Swap faces in any video effortlessly with our completely free AI face swap tool!

Hot Article

Hot Tools

mPDF
mPDF is a PHP library that can generate PDF files from UTF-8 encoded HTML. The original author, Ian Back, wrote mPDF to output PDF files "on the fly" from his website and handle different languages. It is slower than original scripts like HTML2FPDF and produces larger files when using Unicode fonts, but supports CSS styles etc. and has a lot of enhancements. Supports almost all languages, including RTL (Arabic and Hebrew) and CJK (Chinese, Japanese and Korean). Supports nested block-level elements (such as P, DIV),

SublimeText3 Linux new version
SublimeText3 Linux latest version

VSCode Windows 64-bit Download
A free and powerful IDE editor launched by Microsoft

SAP NetWeaver Server Adapter for Eclipse
Integrate Eclipse with SAP NetWeaver application server.

Safe Exam Browser
Safe Exam Browser is a secure browser environment for taking online exams securely. This software turns any computer into a secure workstation. It controls access to any utility and prevents students from using unauthorized resources.


