


Read our disclosure page to find out how can you help MSPoweruser sustain the editorial team Read more
![Critical Error Start Menu Isn’t Working on Windows 11 [Fixed]](https://img.php.cn/upload/article/000/000/000/173104374414595.jpg?x-oss-process=image/resize,p_40)
Have you encountered a critical error saying your Start menu isn’t working on Windows 11?
A bug in the latest Windows 11 update or system files might show a frozen Start menu when you log in to the desktop and click the Windows flag. You’ll see this message:
<code><em>Critical Error – Your Start menu isn’t working. We’ll try to fix it the next time you sign in.</em></code>
![Critical Error Start Menu Isn’t Working on Windows 11 [Fixed]](https://img.php.cn/upload/article/000/000/000/173104374667497.jpg?x-oss-process=image/resize,p_40)
I’ve tested many troubleshooting ideas suggested by Microsoft’s official support pages and singled out the ones that work in most cases. Let’s check them out!
Restart the StartMenuExperienceHost.exe Service
You can perform this if your PC allows you to navigate around after showing you the warning pop-up.
- Press the Ctrl Shift Esc keys altogether to bring up the Task Manager tool.
- Navigate to the Details tab from the Processes tab.
- Click on any item below the Name column and start pressing the S key repeatedly until you locate the StartMenuExperienceHost.exe entry.
- Select it, right-click, and choose End task.
![Critical Error Start Menu Isn’t Working on Windows 11 [Fixed]](https://img.php.cn/upload/article/000/000/000/173104374766405.jpg?x-oss-process=image/resize,p_40)
- Restart the PC.
Update Windows 11 to Get the KB5032288 Update
Many Windows 11 users from Microsoft Learn forum pages and Reddit have confirmed that the KB5032288 update fixed the repetitive “Start menu isn’t working” error.
To apply it:
- Press the Windows I keys to open the Settings app.
- Select Windows Update on the left.
- Scroll down, find the Advanced options, and click on that.
- Select the Optional updates card.
![Critical Error Start Menu Isn’t Working on Windows 11 [Fixed]](https://img.php.cn/upload/article/000/000/000/173104374860900.jpg?x-oss-process=image/resize,p_40)
- Here, you should find the KB5032288 update if it’s been rolled out for your device.
- If you don’t, go back and hit the Check for updates or the Resume updates button.
![Critical Error Start Menu Isn’t Working on Windows 11 [Fixed]](https://img.php.cn/upload/article/000/000/000/173104375075386.jpg?x-oss-process=image/resize,p_40)
- Once the update is over, reboot the PC and see if the error shows up.
If the automatic Windows Update doesn’t work, follow these steps to get a standalone installer:
- Visit this Microsoft Update Catalog portal.
- You’ll see four downloadable files.
- To download the correct one, press Windows I to go to the Settings app.
- Select the System menu on the left.
- On the right, scroll down to the bottom of the window and click on the About card.
![Critical Error Start Menu Isn’t Working on Windows 11 [Fixed]](https://img.php.cn/upload/article/000/000/000/173104375120522.jpg?x-oss-process=image/resize,p_40)
- Go to the Windows specifications section and look for the Windows 11 build version.
- It could be either 22H2 or 23H2.
- Take a note of the code.
![Critical Error Start Menu Isn’t Working on Windows 11 [Fixed]](https://img.php.cn/upload/article/000/000/000/173104375382730.jpg?x-oss-process=image/resize,p_40)
- Now, scroll up to the Device specifications section.
- Look at the System type line to know the kind of processor you’re using.
- Note that information too.
- Now, go back to the Microsoft Update website and download the appropriate installer for your PC.
![Critical Error Start Menu Isn’t Working on Windows 11 [Fixed]](https://img.php.cn/upload/article/000/000/000/173104375467153.jpg?x-oss-process=image/resize,p_40)
- Go to the Downloads directory and double-click on the binary file to install the update.
- Reboot your PC.
Restart Windows Explorer
If the error warning dialog doesn’t allow you to click anywhere on the PC and the system seems frozen, do the following as a workaround:
- Press the Ctrl Shift Esc keys to launch the Task Manager.
- In the Processes column, find the Windows Explorer process.
- Select the item, right-click, and hit the Restart option.
![Critical Error Start Menu Isn’t Working on Windows 11 [Fixed]](https://img.php.cn/upload/article/000/000/000/173104375596662.jpg?x-oss-process=image/resize,p_40)
The critical error saying the Start menu isn’t working on Windows 11 should disappear temporarily.
Reboot your PC and see if the issue comes up again.
Re-register the Windows Start Menu
You can also force the stuck or frozen Start menu to work as it should by re-registering the feature:
- Press the Windows C keys together to launch the Power User menu.
- Click on the Terminal (Admin) option.
- This will open the Windows PowerShell prompt with elevated rights.
- Firstly, copy and paste the following script into the terminal and Hit Enter:
<code><em>Critical Error – Your Start menu isn’t working. We’ll try to fix it the next time you sign in.</em></code>
![Critical Error Start Menu Isn’t Working on Windows 11 [Fixed]](https://img.php.cn/upload/article/000/000/000/173104375793959.jpg?x-oss-process=image/resize,p_40)
Now, execute the following script as well:
<code>Get-AppxPackage Microsoft.Windows.ShellExperienceHost -ErrorAction Stop | ForEach-Object {
    try {
        Add-AppxPackage -DisableDevelopmentMode -Register "$($_.InstallLocation)\AppXManifest.xml" -ErrorAction Stop
        Write-Output "ShellExperienceHost re-registered successfully."
    }
    catch {
        Write-Output "Failed to re-register ShellExperienceHost. Error: $_"
    }
}</code>
![Critical Error Start Menu Isn’t Working on Windows 11 [Fixed]](https://img.php.cn/upload/article/000/000/000/173104375845561.jpg?x-oss-process=image/resize,p_40)
Uninstall a Recent Windows 11 Update
If the Start menu error started showing up after a recent Windows Update, do the following to undo it:
- Go to the Windows Update window from Settings by pressing the Windows I keys together.
- Click on the Update history option on the right side list of cards.
![Critical Error Start Menu Isn’t Working on Windows 11 [Fixed]](https://img.php.cn/upload/article/000/000/000/173104375954031.jpg?x-oss-process=image/resize,p_40)
- Scroll down to the bottom and click on the Uninstall updates card.
![Critical Error Start Menu Isn’t Working on Windows 11 [Fixed]](https://img.php.cn/upload/article/000/000/000/173104376160349.jpg?x-oss-process=image/resize,p_40)
- Click on the Uninstall button for the latest update.
![Critical Error Start Menu Isn’t Working on Windows 11 [Fixed]](https://img.php.cn/upload/article/000/000/000/173104376239331.jpg?x-oss-process=image/resize,p_40)
- If you’re unsure, you can uninstall all the removable Windows updates.
- Restart the PC.
Create a New User Account
A new user profile with admin rights often fixes the critical error saying the Start menu isn’t working on Windows 11.
- Launch the Settings app and click on the Accounts menu on the left.
- Select the Other users option on the right.
![Critical Error Start Menu Isn’t Working on Windows 11 [Fixed]](https://img.php.cn/upload/article/000/000/000/173104376445630.jpg?x-oss-process=image/resize,p_40)
- Click on the Add account button below the Other users section.
- Hit the I don’t have this person’s sign-in information hyperlink on the Microsoft Account dialog box.
![Critical Error Start Menu Isn’t Working on Windows 11 [Fixed]](https://img.php.cn/upload/article/000/000/000/173104376568746.jpg?x-oss-process=image/resize,p_40)
- Click on the Add a user without a Microsoft account link on the Create account dialog.
- You should now see the Create a user for this PC dialog box.
- Enter a User name, a password, and hit Next.
![Critical Error Start Menu Isn’t Working on Windows 11 [Fixed]](https://img.php.cn/upload/article/000/000/000/173104376696302.jpg?x-oss-process=image/resize,p_40)
- The new account should be visible on the Other users menu.
- Press the Windows L keys together to lock the PC.
- Click on the Other users option on the login screen.
- Enter the User name and PIN.
![Critical Error Start Menu Isn’t Working on Windows 11 [Fixed]](https://img.php.cn/upload/article/000/000/000/173104376879836.jpg?x-oss-process=image/resize,p_40)
You should be able to access all the content from the previous user account from the following directory address:
<code><em>Critical Error – Your Start menu isn’t working. We’ll try to fix it the next time you sign in.</em></code>
SFC and DISM Scan
Run the following scans to fix any Windows 11 system file damages that might be causing the Start menu error.
Running an SFC Scan
- Press the Windows R keys together to launch the Run dialog.
- Type in cmd admin and hit Enter.
- The Windows Command Prompt utility will open with administrative access.
- Type in sfc /scannow and hit Enter.
![Critical Error Start Menu Isn’t Working on Windows 11 [Fixed]](https://img.php.cn/upload/article/000/000/000/173104376987690.jpg?x-oss-process=image/resize,p_40)
- Wait for the SFC scan to complete.
You’ll get any of the following responses once the scan is over:
- Windows Resource Protection did not find any integrity violations: No actions needed.
- Windows Resource Protection found corrupt files and successfully repaired them: SFC fixed the file system so you can close the terminal now.
- Windows Resource Protection found corrupt files but was unable to fix some of them: Run the DISM scan.
- There is a system repair pending which requires reboot to complete. Restart Windows and run SFC again: Restart the PC and follow the steps again from scratch.
Running a DISM Scan
- Enter the following command inside the terminal:
<code><em>Critical Error – Your Start menu isn’t working. We’ll try to fix it the next time you sign in.</em></code>
![Critical Error Start Menu Isn’t Working on Windows 11 [Fixed]](https://img.php.cn/upload/article/000/000/000/173104377096957.jpg?x-oss-process=image/resize,p_40)
- Hit Enter to run.
Alternatively, system repair can be simplified with the help of professional software such as Fortect. This tool will perform an in-depth scan of your computer and deploy the right fix in just a few minutes.
- Get Fortect
Repair Windows 11 System Apps Using PowerShell
Open Windows PowerShell with elevated rights. Copy and paste the following script into the terminal and hit Enter:
<code>Get-AppxPackage Microsoft.Windows.ShellExperienceHost -ErrorAction Stop | ForEach-Object {
    try {
        Add-AppxPackage -DisableDevelopmentMode -Register "$($_.InstallLocation)\AppXManifest.xml" -ErrorAction Stop
        Write-Output "ShellExperienceHost re-registered successfully."
    }
    catch {
        Write-Output "Failed to re-register ShellExperienceHost. Error: $_"
    }
}</code>
![Critical Error Start Menu Isn’t Working on Windows 11 [Fixed]](https://img.php.cn/upload/article/000/000/000/173104377144685.jpg?x-oss-process=image/resize,p_40)
Reboot PC to Safe Mode
Maybe a third-party app is causing this unusual behavior of the Windows 11 Start menu. First, access Safe Mode by following these steps:
- Press and hold the Shift key and restart the PC.
- When the PC reboots, you’ll see the Please Wait screen.
- If you can’t access the Power menu, press and hold the power button to shut down the PC.
- Repeat the step again.
- Now, turn on the PC for the third time to access the Please Wait screen.
- Once loaded, you’ll enter the WinRE window.
- Click Troubleshoot.
![Critical Error Start Menu Isn’t Working on Windows 11 [Fixed]](https://img.php.cn/upload/article/000/000/000/173104377259220.jpg?x-oss-process=image/resize,p_40)
- Select Advanced options in the next window.
- Click on the Startup Settings option.
![Critical Error Start Menu Isn’t Working on Windows 11 [Fixed]](https://img.php.cn/upload/article/000/000/000/173104377323926.jpg?x-oss-process=image/resize,p_40)
- Hit the Restart button.
- When the Startup Settings window reopens, press 4 to reboot into Safe Mode.
- If the Start menu button works flawlessly in the Safe Mode, restart the PC.
- Uninstall any third-party apps you might have recently installed just before seeing this anomaly.
Perform a System Restore
- Press the Windows R keys together to launch Run.
- Type rstrui in the Open field and hit Enter.
- The System Restore dialog box will open. Click Next.
![Critical Error Start Menu Isn’t Working on Windows 11 [Fixed]](https://img.php.cn/upload/article/000/000/000/173104377496406.jpg?x-oss-process=image/resize,p_40)
- Select a restore point from the table and click Next.
![Critical Error Start Menu Isn’t Working on Windows 11 [Fixed]](https://img.php.cn/upload/article/000/000/000/173104377545964.jpg?x-oss-process=image/resize,p_40)
- Hit Finish to start the process to restore the system.
![Critical Error Start Menu Isn’t Working on Windows 11 [Fixed]](https://img.php.cn/upload/article/000/000/000/173104377646864.jpg?x-oss-process=image/resize,p_40)
Reset Your PC
Finally, you can reset your PC while keeping old files to fix the Start menu error. Here are the steps you can try:
- Open the Windows Update menu from the Windows Settings app.
- Click on the Advanced options card on the right side.
- Scroll down to the Additional options and click on the Recovery card.
![Critical Error Start Menu Isn’t Working on Windows 11 [Fixed]](https://img.php.cn/upload/article/000/000/000/173104377787897.jpg?x-oss-process=image/resize,p_40)
- Click on the Reset PC button.
![Critical Error Start Menu Isn’t Working on Windows 11 [Fixed]](https://img.php.cn/upload/article/000/000/000/173104377959508.jpg?x-oss-process=image/resize,p_40)
- Select the Keep my files option in the dialog box.
- Choose Cloud download to get Windows 11 installation media.
![Critical Error Start Menu Isn’t Working on Windows 11 [Fixed]](https://img.php.cn/upload/article/000/000/000/173104378185857.jpg?x-oss-process=image/resize,p_40)
- Click Next on the Additional settings dialog.
- Follow the onscreen instructions to continue with the PC reset process.
If you’re here, congratulations! Now you know how to fix the critical error saying the Start menu isn’t working on Windows 11.
Did the article help you fix your Windows 11 Start menu button? Comment below. If you know any better methods, feel free to share.
The above is the detailed content of Critical Error Start Menu Isn't Working on Windows 11 [Fixed]. For more information, please follow other related articles on the PHP Chinese website!

 This Tiny PC Can Fit In Your PocketApr 23, 2025 pm 12:01 PM
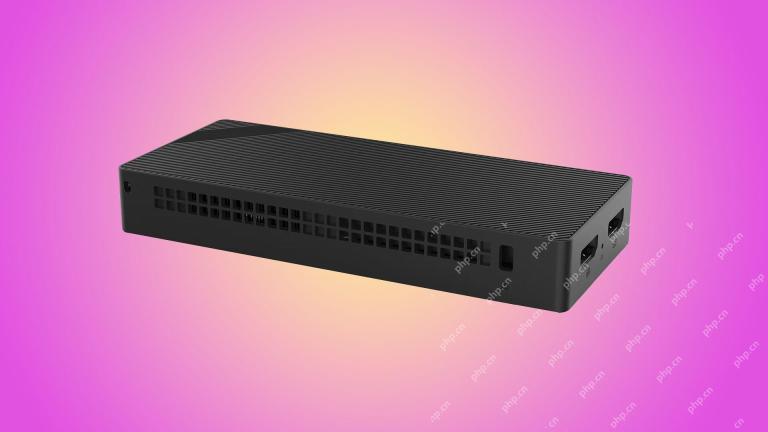
This incredibly compact PC rivals the size of a smartphone, making it one of the smallest PCs available. Measuring just 145mm long, 62mm wide, and 20mm thick (approximately 5.7 x 2.4 x 0.8 inches), it's remarkably portable, reminiscent of the now-di
 Logitech Is Quietly Increasing Its PricesApr 23, 2025 am 03:02 AM
Logitech quietly raises prices on many products, citing no specific reason. Observers note price increases of up to 25% on various items, strongly suggesting the impact of ongoing US tariffs on goods imported from China, where Logitech's main manufa
 How to Stop Windows 11 From Auto-Installing Device DriversApr 23, 2025 am 01:02 AM
The only way to safely update Windows hardware drivers Want to update your computer's hardware driver? Please get driver updates from Windows Update or the device manufacturer's website. Before making the following changes, be sure to create a system restore point. If something goes wrong, it will be easier to undo the changes. Use Settings to turn off automatic device driver installation One way to prevent Windows 11 from automatically installing device drivers is to switch an option in Settings. To do this, press Windows i to start "Settings". In the left sidebar, select System. At the bottom of the right pane, select About. Select Device Specifications. In the expanded section, select Advanced System Settings. exist
 8 Ways to Clear the Clipboard on Windows 11Apr 21, 2025 pm 12:13 PM
This guide provides multiple ways to clear your Windows 11 clipboard, ensuring your copied data remains private. Your clipboard stores various items, including text, images, and videos. Let's explore several methods to erase its contents. Method 1:
 Logitech's G515 Lightspeed keyboard is 25% offApr 21, 2025 pm 12:06 PM
Logitech G515 Lightspeed TKL Mechanical Gaming Keyboard Review The Logitech G515 Lightspeed TKL uses low profile keys and feels very similar to the Apple Magic Keyboard, but has an additional mechanical switch, which is slim overall and has a rechargeable battery. Amazon Link This keyboard is perfect for users who both work and games. Amazon currently sells for $119.99, down from its original price of $159.99, only once before it reached this price. G515 Lightspeed TKL is slim in size, 14.49 inches long and 5.91 inches wide,
 How to Enable TPM 2.0 to Get Windows 11Apr 21, 2025 am 11:17 AM
Many users with powerful desktops were initially blocked from upgrading to Windows 11 due to a simple BIOS setting being disabled by default: TPM 2.0. This guide explains how to enable it. Checking for TPM Compatibility Windows has a built-in tool t
 How to Download a Website as an App on the DesktopApr 21, 2025 am 10:37 AM
Quickly Access Your Favorite Websites: Two Methods for Adding Websites to Your Desktop Tired of hunting through bookmarks? Windows offers easy ways to add frequently visited websites directly to your desktop for instant access. This guide details tw
 8 Ways to Open the Run Dialog Box on Windows 11Apr 20, 2025 am 06:01 AM
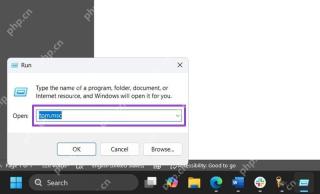
Windows 11's Run dialog box (Run) provides a convenient way to quickly access various system features and installed applications. The way to start this dialog is simple, just use keyboard shortcuts or select menu items. This article will describe several ways to start this utility. Use keyboard shortcuts to open the run dialog The quickest way to start a Run dialog on Windows 11 is to use keyboard shortcuts. This method opens the dialog box instantly. To do this, press the Windows R key on the keyboard. No matter where you are currently on your computer, Windows 11 will immediately open the Run dialog box. You can then enter the name of the utility you want to start.


Hot AI Tools

Undresser.AI Undress
AI-powered app for creating realistic nude photos

AI Clothes Remover
Online AI tool for removing clothes from photos.

Undress AI Tool
Undress images for free

Clothoff.io
AI clothes remover

Video Face Swap
Swap faces in any video effortlessly with our completely free AI face swap tool!

Hot Article
Hot Tools

SAP NetWeaver Server Adapter for Eclipse
Integrate Eclipse with SAP NetWeaver application server.

Dreamweaver Mac version
Visual web development tools

SublimeText3 English version
Recommended: Win version, supports code prompts!

MantisBT
Mantis is an easy-to-deploy web-based defect tracking tool designed to aid in product defect tracking. It requires PHP, MySQL and a web server. Check out our demo and hosting services.

WebStorm Mac version
Useful JavaScript development tools

