实例演示课堂上提及的全部指令, 并详细写出常用的术语,以及使用场景
一、vue动态修改html内容
<!DOCTYPE html><html lang="en"><head><meta charset="UTF-8"><meta http-equiv="X-UA-Compatible" content="IE=edge"><meta name="viewport" content="width=device-width, initial-scale=1.0"><title>Document</title><script src="https://unpkg.com/vue@next"></script><script src="http://libs.baidu.com/jquery/2.0.0/jquery.min.js"></script></head><body><h1>Hello world</h1><!-- {{message}}:插值,数据占位符,供Vue使用。 --><h1 class="title">{{message}}</h1><script>// es6// document.querySelector('.title').textContent = "es6大家好";// jQuery// $('.title').text('jQuery 大家好');// VUE,es6和jQuery的修改会破坏message,因此要使用时注释掉上面内容。const app = Vue.createApp({data(){return {message:'Vue 大家好',};},});app.mount('.title');</script></body></html>

二、vue术语与实例
1. 挂载点
挂载点:vue实例的作用域
只能有一个挂载点,body不能作为为挂载点。
2. vue实例
<!DOCTYPE html><html lang="en"><head><meta charset="UTF-8"><meta http-equiv="X-UA-Compatible" content="IE=edge"><meta name="viewport" content="width=device-width, initial-scale=1.0"><title>Document</title><script src="https://unpkg.com/vue@next"></script><script src="http://libs.baidu.com/jquery/2.0.0/jquery.min.js"></script></head><body><div class="app"><p>{{username}}</p></div><script>// vue配置项const config = {data(){return {// 返回的数据username: 'vue hello',};},};// vue实例const app = Vue.createApp(config);// vue挂载app.mount('.app');</script></body></html>

3. 注入
<!DOCTYPE html><html lang="en"><head><meta charset="UTF-8"><meta http-equiv="X-UA-Compatible" content="IE=edge"><meta name="viewport" content="width=device-width, initial-scale=1.0"><title>Document</title><script src="https://unpkg.com/vue@next"></script><script src="http://libs.baidu.com/jquery/2.0.0/jquery.min.js"></script></head><body>...<script>...// 数据注入console.log(app.$data.username);// 可以简化如下,因为数据已经被注入到vue的实例中console.log(app.username);// 用访问器属性模拟数据注入const obj = {$data: {mail: 'mail@php.cn',},get email() {return this.$data.mail;},};console.log(obj.$data.mail);console.log(obj.email);</script></body></html>

4. 响应式
<script>...// 响应式app.username = "响应式修改结果";</script>

三、vue指令
本质上就是html便签的自定义属性
1.v-text
类似textContent属性
<body><div class="app"><p>用户名:<span v-text="username"></span></p></div><script>const app = Vue.createApp({data(){return {username: '路人甲',};},}).mount('.app');</script></body></html>

2. v-html
类似innerhtml属性
如果使用v-text,下面代码输出为html原样输出。
<body><div class="app"><p>用户名:<span v-text="username"></span></p></div><script>const app = Vue.createApp({data(){return {username: '路人甲',};},}).mount('.app');app.username = '<i style="color:red">路人乙</i>';</script></body>

将v-text改为v-html,则可以按样式输出。
<body>...<p>用户名:<span v-html="username"></span></p>...<script>...app.username = '<i style="color:red">路人乙</i>';</script></body>

3. v-bind
vue动态属性设置指令 v-bind:属性名
3.1 行内样式
<body><style>.active{color:red;}.bgc {background-color: yellow;}</style><div class="app"><!-- <p style="color: green;">php.cn</p> --><!-- vue动态属性设置指令 v-bind:属性名 --><p v-bind:style="style">php.cn</p></div><script>const app = Vue.createApp({data(){return {style: "color:blue",};},}).mount('.app');</script></body>

改变多个属性值时,
<body><style>......<!-- vue动态属性设置指令 v-bind:属性名 --><p v-bind:style="{color:txtcolor,backgroundColor:bgc}">php.cn</p>...<script>const app = Vue.createApp({data(){return {txtcolor: 'blue',bgc: 'lightcoral',};},}).mount('.app');</script></body>

以数组方式添加多个属性值
...<div class="app"><!-- <p style="color: lightcoral;">php.cn</p> --><!-- vue动态属性设置指令 v-bind:属性名 --><p v-bind:style="{color:txtcolor,backgroundColor:bgc}">php.cn</p><p v-bind:style="[base,custom]">php.cn</p></div><script>const app = Vue.createApp({data(){return {txtcolor: 'blue',bgc: 'lightcoral',base: {border: '1px solid',background: 'lightgreen',},custom: {color: 'black',padding: '15px',},};},}).mount('.app');</script>

3.2 类样式
3.2.1 直接传字面量
...<style>.active{color:red;}.bgc {background-color: yellow;}</style><div class="app">...<!-- 直接传字符串 --><p v-bind:class="'active'">路人甲</p></div><script>const app = Vue.createApp({...};},}).mount('.app');</script>

3.2.2 传变量
...<style>.active{color:red;}.bgc {background-color: yellow;}</style><div class="app">...<!-- 传变量 --><p v-bind:class="active">路人甲</p></div><script>const app = Vue.createApp({...active: 'active',};},}).mount('.app');</script>
3.2.3 传对象字面量
...<style>.active{color:red;}.bgc {background-color: yellow;}</style><div class="app">...<!-- 传字面量 --><p v-bind:class="{active: isActive}">路人甲</p></div><script>const app = Vue.createApp({...active: 'active',isActive: true,};},}).mount('.app');</script>
3.2.4 多个属性设置,传入字面量
<p v-bind:class="['active', 'bgc']">路人甲</p>
3.2.4 多个属性设置,传入变量
<p v-bind:class="[mycolor, mybgc]">路人甲</p>const app = Vue.createApp({data(){...mycolor: 'active',mybgc: 'bgc',...}).mount('.app');
3.2.5 v-bind可以简写为冒号
v-bind是高频指令,可以简化为冒号 “:”
<p :class="['active', 'bgc']">路人甲</p>
4 数据双向绑定
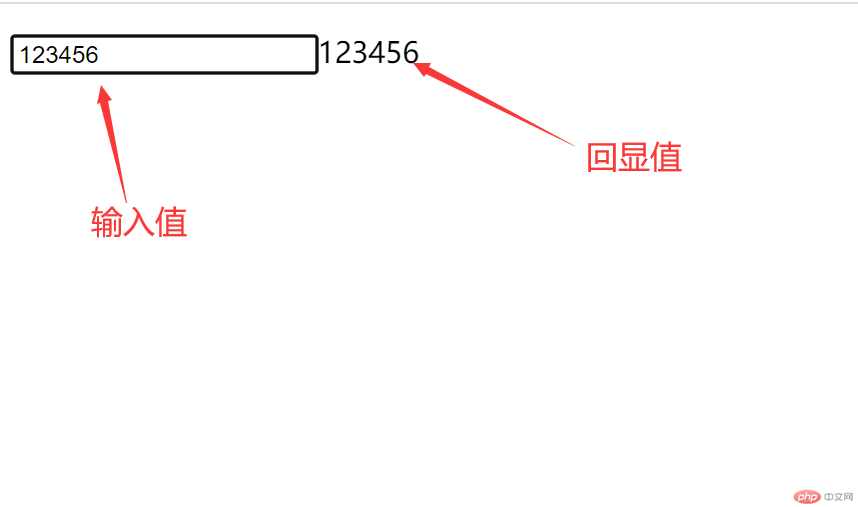
4.1 传统方法实现数据双向绑定
<!DOCTYPE html><html lang="en"><head><meta charset="UTF-8"><meta http-equiv="X-UA-Compatible" content="IE=edge"><meta name="viewport" content="width=device-width, initial-scale=1.0"><title>Document</title><script src="https://unpkg.com/vue@next"></script><script src="http://libs.baidu.com/jquery/2.0.0/jquery.min.js"></script></head><body><p><div>ES6:</div><input type="text" oninput="this.nextElementSibling.textContent = this.value"><span></span></p><script></script></body></html>

4.2 vue方式实现数据双向绑定
vue中event不能直接使用,要加$符号,见代码中16行。
<!DOCTYPE html><html lang="en"><head><meta charset="UTF-8"><meta http-equiv="X-UA-Compatible" content="IE=edge"><meta name="viewport" content="width=device-width, initial-scale=1.0"><title>Document</title><script src="https://unpkg.com/vue@next"></script><!-- <script src="http://libs.baidu.com/jquery/2.0.0/jquery.min.js"></script> --></head><body><!-- vue实现数据双向绑定 --><div class="app"><p><!-- v-on:vue的事件指令 --><input type="text" v-on:input="comment = $event.target.value" :value="comment" /><span>{{comment}}</span></p></div><script>const app = Vue.createApp({data(){return {comment: '',};},}).mount('.app');</script></body></html>
4.3 v-on可以简化为“@”符号
<input type="text" @input="comment = $event.target.value" :value="comment" />
4.4 v-model
可以使用v-model简化v-on
原语句
<input type="text" @input="comment = $event.target.value" :value="comment" />
v-model简化后
<input type="text" v-model="comment" />
v-model.lazy延迟绑定
<input type="text" v-model.lazy ="comment" />
效果不像之前输入一个内容回显一个内容,这样增加页面负担,延迟就是等全部输入完成,失去焦点后再回显。

