一. 将课堂中的全部案例照写一遍, 并达到默写级别
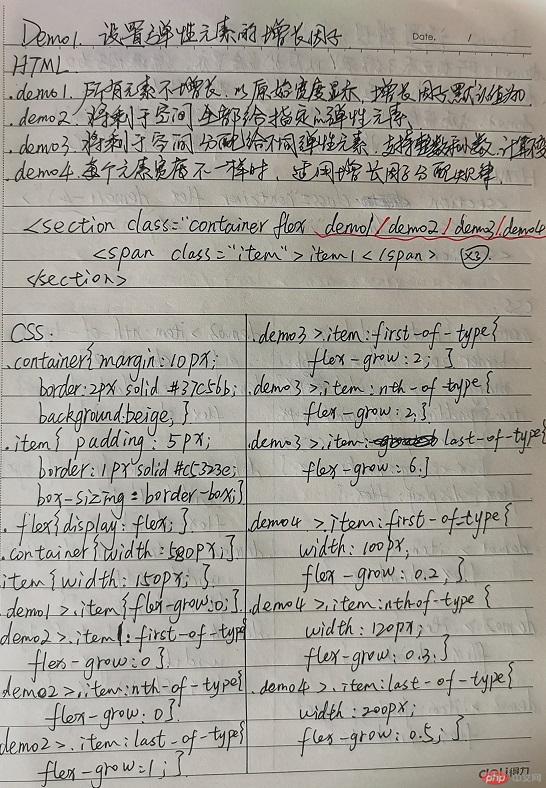
1.设置弹性元素的增长因子
HTML
<!DOCTYPE html>
<html lang="en">
<head>
    <meta charset="UTF-8">
    <title>设置弹性元素的增长因子</title>
    <link rel="stylesheet" href="css/style1.css">
</head>
<body>
<h1>设置弹性元素的增长因子</h1>
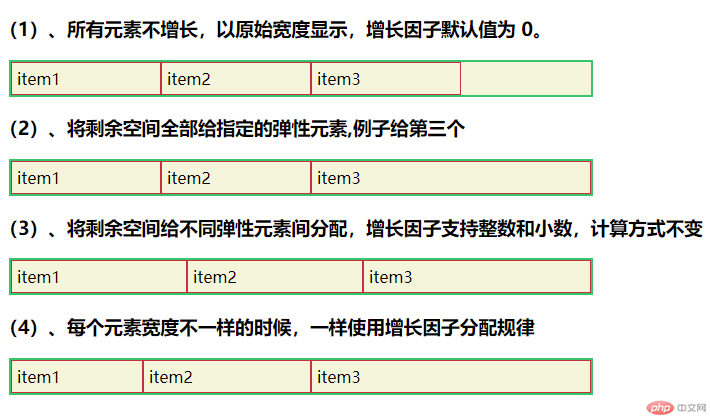
<h3>(1)、所有元素不增长,以原始宽度显示,增长因子默认值为 0。</h3>
<section class="container flex demo1">
    <span class="item">item1</span>
    <span class="item">item2</span>
    <span class="item">item3</span>
</section>
<h3>(2)、将剩余空间全部给指定的弹性元素,例子给第三个</h3>
<section class="container flex demo2">
    <span class="item">item1</span>
    <span class="item">item2</span>
    <span class="item">item3</span>
</section>
<h3>(3)、将剩余空间给不同弹性元素间分配,增长因子支持整数和小数,计算方式不变</h3>
<section class="container flex demo3">
    <span class="item">item1</span>
    <span class="item">item2</span>
    <span class="item">item3</span>
</section>
<h3>(4)、每个元素宽度不一样的时候,一样使用增长因子分配规律</h3>
<section class="container flex demo4">
    <span class="item">item1</span>
    <span class="item">item2</span>
    <span class="item">item3</span>
</section>
</body>
</html>
运行实例 »
点击 "运行实例" 按钮查看在线实例
CSS
@import "public.css";

.container{
    width:580px;
}
.item{
    width: 150px;
}
/*所有元素不增长,以原始宽度显示,增长因子默认值为 0。*/
.demo1 > .item{
    flex-grow: 0;
}
/*将剩余空间全部给第三个弹性元素*/
.demo2 > .item:first-of-type{
    flex-grow: 0;
}
.demo2 > .item:nth-of-type(2){
    flex-grow: 0;
}
.demo2 > .item:last-of-type{
    flex-grow: 1;
}
/*增长因子可以是整数也可以是小数*/
.demo3 > .item:first-of-type{
    flex-grow: 2;
}
.demo3 > .item:nth-of-type(2){
    flex-grow: 2;
}
.demo3 > .item:last-of-type{
    flex-grow: 6;
}
/*
剩余空间:580-150*3=130px
增长比例=增长因子/增长因子之和
 1.增长比例 0.2
 2.增长比例 0.2
 3.增长比例 0.6
增长量:
 1.130*0.2=26px
 2.130*0.2=26px
 3.130*0.6=78px
 最终宽度:
 1.150+26=176
 2.150+26=176
 3.150+78=228
 */
/*每个元素宽度不一样的时候,一样使用增长因子分配规律*/
.demo4 > .item:first-of-type{
    width: 100px;
    flex-grow:0.2;
}
.demo4 > .item:nth-of-type(2){
    width: 120px;
    flex-grow:0.3;
}
.demo4 > .item:last-of-type{
    width: 200px;
    flex-grow:0.5;
}
/*
剩余空间:580-100-120-200=160px
增长比例=增长因子/增长因子之和
 1.增长比例 0.2
 2.增长比例 0.3
 3.增长比例 0.5
增长量:
 1.160*0.2=32px
 2.160*0.3=48px
 3.160*0.5=80px
 最终宽度:
 1.100+32=132
 2.120+484168
 3.200+80=280
 */
运行实例 »
点击 "运行实例" 按钮查看在线实例
手抄书:
实例效果图:
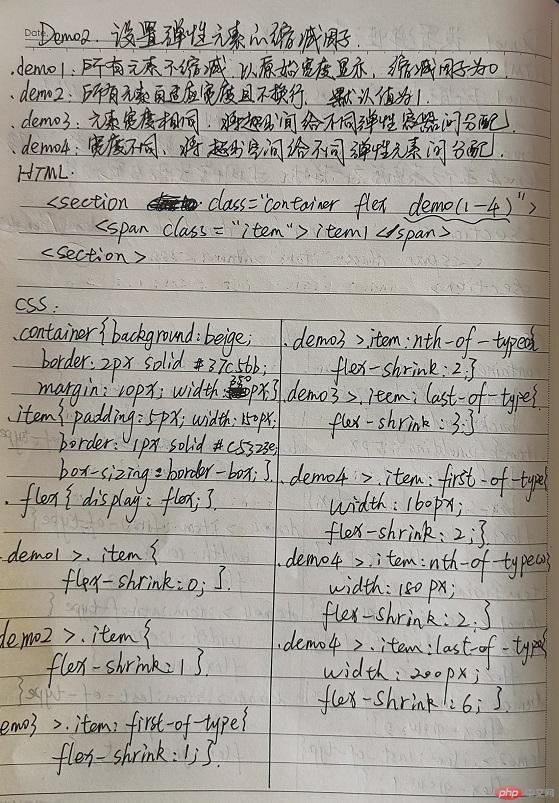
2.设置弹性元素的缩减因子
实例HTML
<!DOCTYPE html>
<html lang="en">
<head>
    <meta charset="UTF-8">
    <title>设置弹性元素的缩减因子</title>
    <link rel="stylesheet" href="css/style2.css">
</head>
<body>
<h1>设置弹性元素的缩减因子</h1>
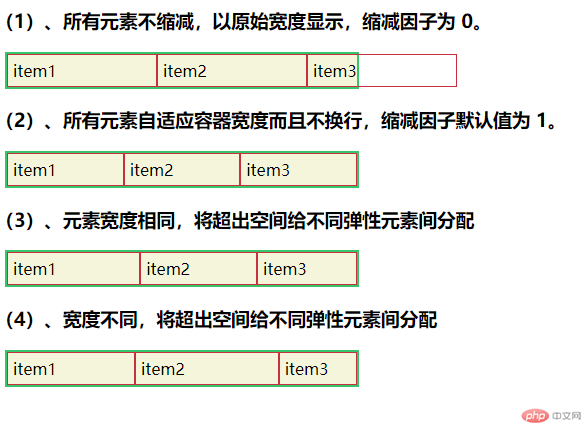
<h3>(1)、所有元素不缩减,以原始宽度显示,缩减因子为 0。</h3>
<section class="container flex demo1">
    <span class="item">item1</span>
    <span class="item">item2</span>
    <span class="item">item3</span>
</section>
<h3>(2)、所有元素自适应容器宽度而且不换行,缩减因子默认值为 1。</h3>
<section class="container flex demo2">
    <span class="item">item1</span>
    <span class="item">item2</span>
    <span class="item">item3</span>
</section>
<h3>(3)、元素宽度相同,将超出空间给不同弹性元素间分配</h3>
<section class="container flex demo3">
    <span class="item">item1</span>
    <span class="item">item2</span>
    <span class="item">item3</span>
</section>
<h3>(4)、宽度不同,将超出空间给不同弹性元素间分配</h3>
<section class="container flex demo4">
    <span class="item">item1</span>
    <span class="item">item2</span>
    <span class="item">item3</span>
</section>
</body>
</html>
运行实例 »
点击 "运行实例" 按钮查看在线实例
CSS
@import "public.css";

.container{
    width:350px;
}
.item{
    width:150px;
}
/*所有元素不缩减,以原始宽度显示,缩减因子为 0。*/
.demo1 > .item{
    flex-shrink: 0;
}
/*
所有元素自适应容器宽度而且不换行,缩减因子默认值为 1。
 适用元素宽度相同,缩减因子可以自己设置,计算方式相同
*/
.demo2 > .item{
    flex-shrink: 1;
}
/*
超出空间:350-150*3=100px
缩减比例=缩减因子/缩减因子之和
 1.缩减比例 0.3333
 2.缩减比例 0.3333
 3.缩减比例 0.3333
缩减量:
 1.100*0.3333=33.33px
 2.100*0.3333=33.33px
 3.100*0.3333=33.33px
 最终宽度:
 1.150-33.33=116.67
 2.150-33.33=116.67
 3.150-33.33=116.67
 */


/*适用元素宽度相同,将超出空间给不同弹性元素间分配,缩减因子支持整数*/
.demo3 > .item:first-of-type{
    flex-shrink:1;
}
.demo3 > .item:nth-of-type(2){
    flex-shrink:2;
}
.demo3 > .item:last-of-type{
    flex-shrink:3;
}
/*
超出空间:350-150*3=100px
缩减比例=缩减因子/缩减因子之和
 1.缩减比例 0.1667
 2.缩减比例 0.3333
 3.缩减比例 0.5
缩减量:
 1.100*0.1667=16.67px
 2.100*0.3333=33.33px
 3.100*0.5=50px
 最终宽度:
 1.150-16.67=133.33
 2.150-33.33=116.67
 3.150-50=100
 */

/*宽度不同,将超出空间给不同弹性元素间分配,缩减因子支持整数*/
.demo4 > .item:first-of-type{
    width: 160px;
    flex-shrink:2;
}
.demo4 > .item:nth-of-type(2){
    width: 180px;
    flex-shrink:2;
}
.demo4 > .item:last-of-type{
    width:200px;
    flex-shrink:6;
}
/*
超出空间:160+180+200-350=190px
缩减比例
190/ 160*2+180*2+200*6=0.1
缩减量:
 1.190*0.1*2=38px
 1.190*0.1*2=38px
1.190*0.1*6=114px
 最终宽度:
 1.160-38=122
 2.180-38=142
 3.200-114=86
 */
运行实例 »
点击 "运行实例" 按钮查看在线实例
手抄书:
实例效果图:
3.设置弹性元素的基准尺寸
实例html
<!DOCTYPE html>
<html lang="en">
<head>
    <meta charset="UTF-8">
    <title>设置弹性元素的基准尺寸</title>
    <link rel="stylesheet" href="css/style3.css">
</head>
<body>
<h1>flex-basis:设置弹性元素的基准尺寸</h1>
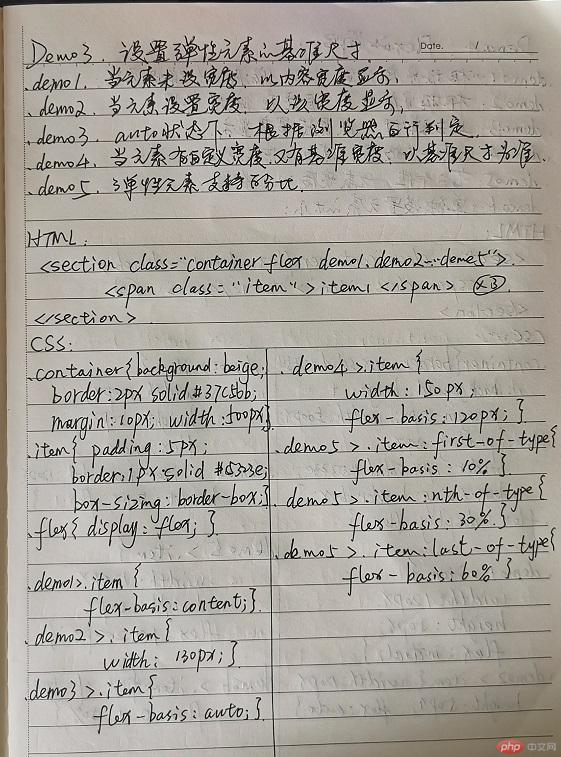
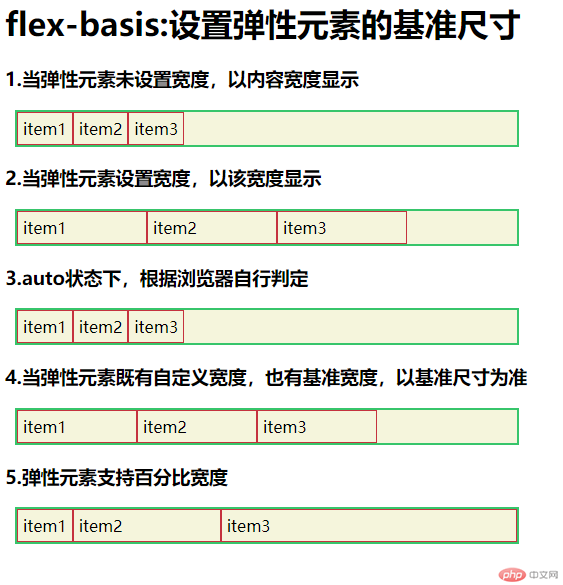
<h3>1.当弹性元素未设置宽度,以内容宽度显示</h3>
<section class="container flex demo1">
    <span class="item">item1</span>
    <span class="item">item2</span>
    <span class="item">item3</span>
</section>
<h3>2.当弹性元素设置宽度,以该宽度显示</h3>
<section class="container flex demo2">
    <span class="item">item1</span>
    <span class="item">item2</span>
    <span class="item">item3</span>
</section>
<h3>3.auto状态下,根据浏览器自行判定</h3>
<section class="container flex demo3">
    <span class="item">item1</span>
    <span class="item">item2</span>
    <span class="item">item3</span>
</section>
<h3>4.当弹性元素既有自定义宽度,也有基准宽度,以基准尺寸为准</h3>
<section class="container flex demo4">
    <span class="item">item1</span>
    <span class="item">item2</span>
    <span class="item">item3</span>
</section>
<h3>5.弹性元素支持百分比宽度</h3>
<section class="container flex demo5">
    <span class="item">item1</span>
    <span class="item">item2</span>
    <span class="item">item3</span>
</section>
</body>
</html>
运行实例 »
点击 "运行实例" 按钮查看在线实例
CSS
@import "public.css";

.container{
    width: 500px;
}
/*弹性元素未设置宽度,以内容宽度显示*/
.demo1 > .item{
    flex-basis: content;
}
/*当弹性元素设置宽度,以该宽度显示*/
.demo2 > .item{
    width: 130px;
}
/*3.auto情况下,根据浏览器自行判断*/
.demo3 > .item{
    flex-basis: auto;
}
/*当弹性元素既有自定义宽度,也有基准宽度,以基准尺寸为准*/
.demo4 > .item{
    width: 150px;
    flex-basis: 120px;
}
/*弹性元素支持百分比宽度*/
.demo5 > .item:first-of-type{
    flex-basis: 10%;
}
.demo5 > .item:nth-of-type(2){
    flex-basis: 30%;
}
.demo5 > .item:last-of-type{
    flex-basis: 60%;
}
运行实例 »
点击 "运行实例" 按钮查看在线实例
手抄书:
实例效果图:
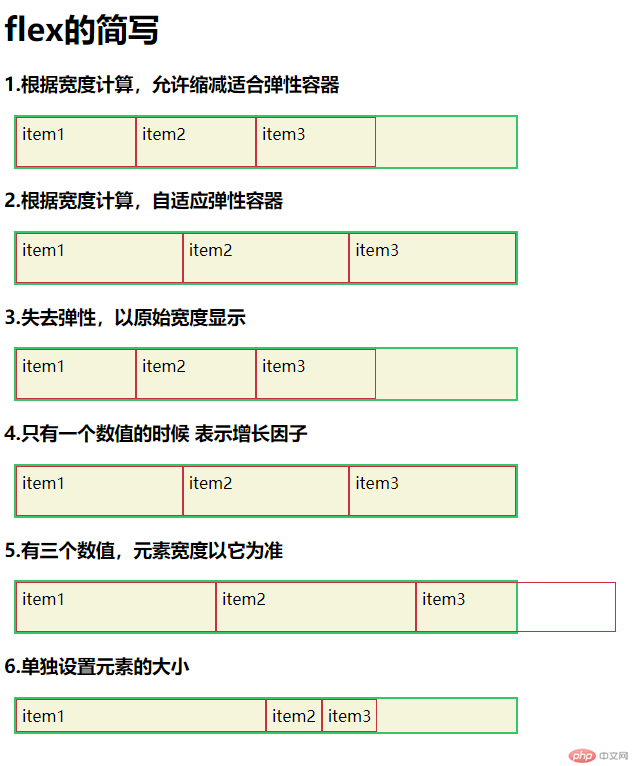
4.flex的简写
实例HTML
<!DOCTYPE html>
<html lang="en">
<head>
    <meta charset="UTF-8">
    <title>flex的简写</title>
    <link rel="stylesheet" href="css/style4.css">
</head>
<body>
<h1>flex的简写</h1>
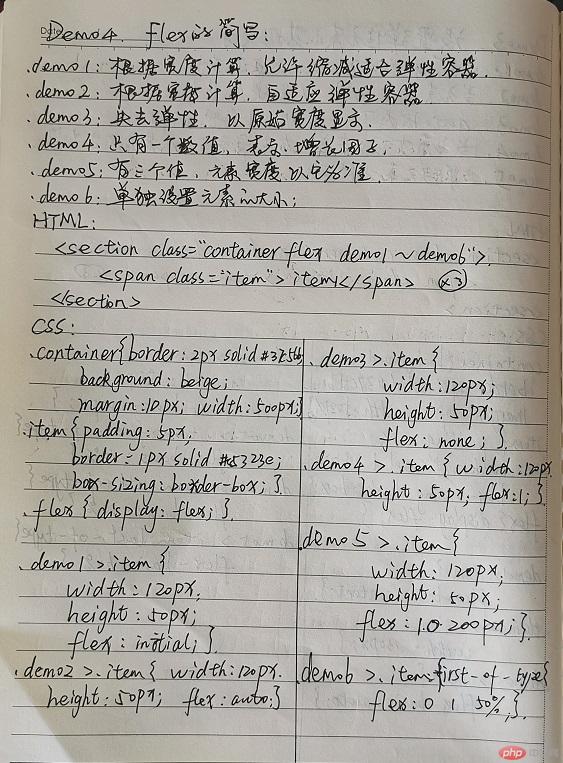
<h3>1.根据宽度计算,允许缩减适合弹性容器</h3>
<section class="container flex demo1">
    <span class="item">item1</span>
    <span class="item">item2</span>
    <span class="item">item3</span>
</section>
<h3>2.根据宽度计算,自适应弹性容器</h3>
<section class="container flex demo2">
    <span class="item">item1</span>
    <span class="item">item2</span>
    <span class="item">item3</span>
</section>
<h3>3.失去弹性,以原始宽度显示</h3>
<section class="container flex demo3">
    <span class="item">item1</span>
    <span class="item">item2</span>
    <span class="item">item3</span>
</section>
<h3>4.只有一个数值的时候 表示增长因子</h3>
<section class="container flex demo4">
    <span class="item">item1</span>
    <span class="item">item2</span>
    <span class="item">item3</span>
</section>
<h3>5.有三个数值,元素宽度以它为准</h3>
<section class="container flex demo5">
    <span class="item">item1</span>
    <span class="item">item2</span>
    <span class="item">item3</span>
</section>
<h3>6.单独设置元素的大小</h3>
<section class="container flex demo6">
    <span class="item">item1</span>
    <span class="item">item2</span>
    <span class="item">item3</span>
</section>
</body>
</html>
运行实例 »
点击 "运行实例" 按钮查看在线实例
CSS
@import "public.css";

.container{
    width: 500px;
}
/*简写格式:
flex:  [ <'flex-grow'> <'flex-shrink'> || <'flex-basis'> */

.demo1 > .item{
    width: 120px;
    height: 50px;
    /*flex:0 1 auto;*/
    flex: initial;
}

.demo2 > .item{
    width: 120px;
    height: 50px;
    /*flex:1 1 auto;*/
    flex: auto;
}
.demo3 > .item{
    width: 120px;
    height: 50px;
    /*flex:0 0 auto;*/
    flex: none;
}
.demo4 > .item{
    width: 120px;
    height: 50px;
    flex:1;
}
.demo5 > .item{
    width: 120px;
    height: 50px;
    flex:1 0 200px;
}
.demo6 > .item:first-of-type{
    flex:0 1 50%;
}
运行实例 »
点击 "运行实例" 按钮查看在线实例
手抄书:
实例效果图:
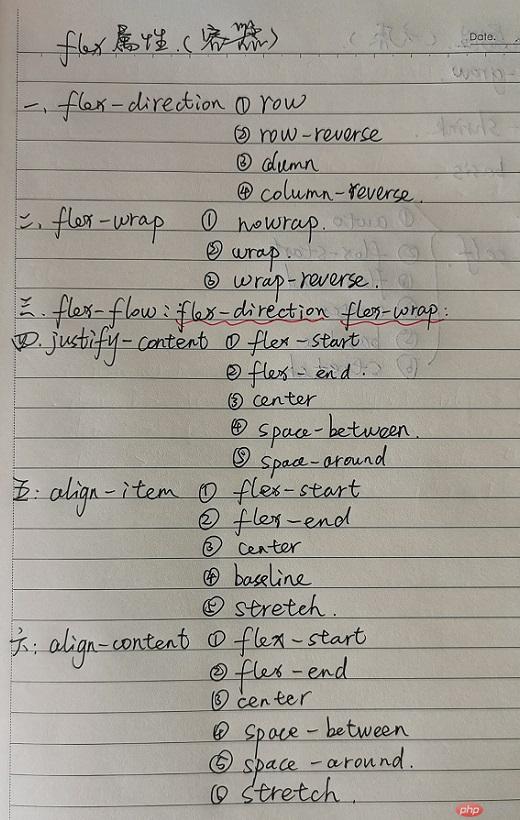
二.. 将flex属性的用法, 手抄, 建议二遍以上
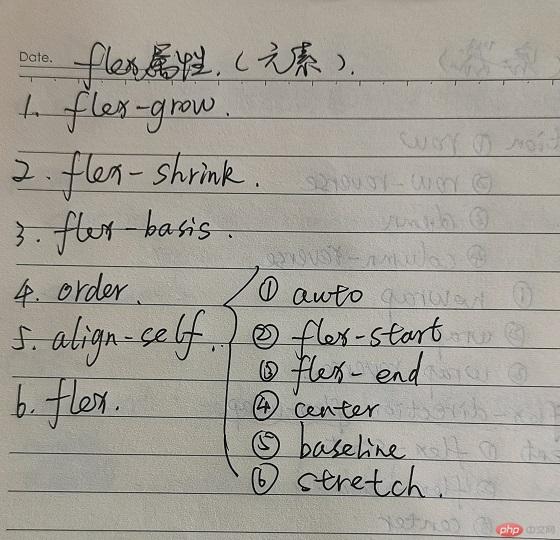
三. 自学:align-self, order的用法
order属性
实例HTML
<!DOCTYPE html>
<html lang="en">
<head>
    <meta charset="UTF-8">
    <title>弹性元素之order属性</title>
    <link rel="stylesheet" href="css/style5.css">
</head>
<body>
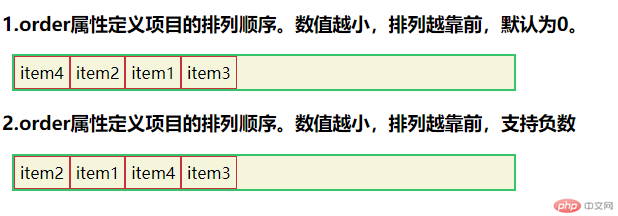
<h3>1.order属性定义项目的排列顺序。数值越小,排列越靠前,默认为0。</h3>
<section class="container flex demo1">
    <span class="item">item1</span>
    <span class="item">item2</span>
    <span class="item">item3</span>
    <span class="item">item4</span>
</section>

<h3>2.order属性定义项目的排列顺序。数值越小,排列越靠前,支持负数</h3>
<section class="container flex demo2">
    <span class="item">item1</span>
    <span class="item">item2</span>
    <span class="item">item3</span>
    <span class="item">item4</span>
</section>
</body>
</html>
运行实例 »
点击 "运行实例" 按钮查看在线实例
实例CSS
@import "public.css";

.container{
    width: 500px;
}
.demo1 > .item:first-of-type{
    order: 3;
}
.demo1 > .item:nth-of-type(2){
    order: 2;
}
.demo1 > .item:nth-of-type(3){
    order: 4;
}
.demo1 > .item:last-of-type{
    order: 1;
}

.demo2 > .item:first-of-type{
    order: -3;
}
.demo2 > .item:nth-of-type(2){
    order: -8;
}
.demo2 > .item:nth-of-type(3){
    order: 3;
}
.demo2 > .item:last-of-type {
    order: 2;
}
运行实例 »
点击 "运行实例" 按钮查看在线实例
手抄书:
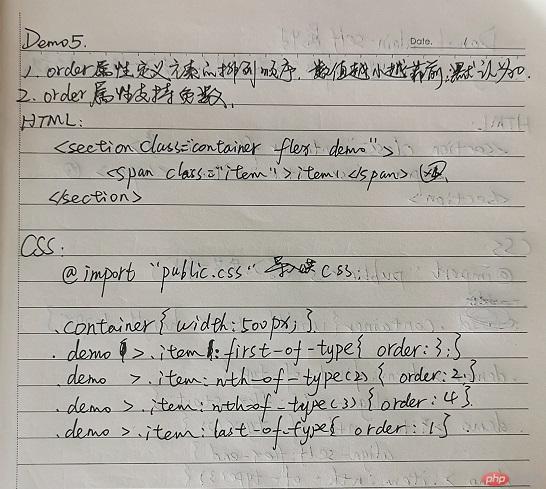
实例效果图:
2.align-self属性
实例HTML
<!DOCTYPE html>
<html lang="en">
<head>
    <meta charset="UTF-8">
    <title>弹性元素之align-self属性</title>
    <link rel="stylesheet" href="css/style6.css">
</head>
<body>
<h1>align-self属性</h1>
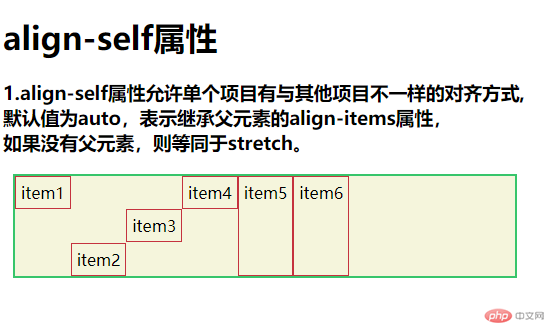
<h3>1.align-self属性允许单个项目有与其他项目不一样的对齐方式,<br>默认值为auto,表示继承父元素的align-items属性,<br>如果没有父元素,则等同于stretch。</h3>
<section class="container flex demo1">
    <span class="item">item1</span>
    <span class="item">item2</span>
    <span class="item">item3</span>
    <span class="item">item4</span>
    <span class="item">item5</span>
    <span class="item">item6</span>
</section>
</body>
</html>
运行实例 »
点击 "运行实例" 按钮查看在线实例
实例CSS
@import "public.css";

.container{
    width: 500px;
    height: 100px;
}
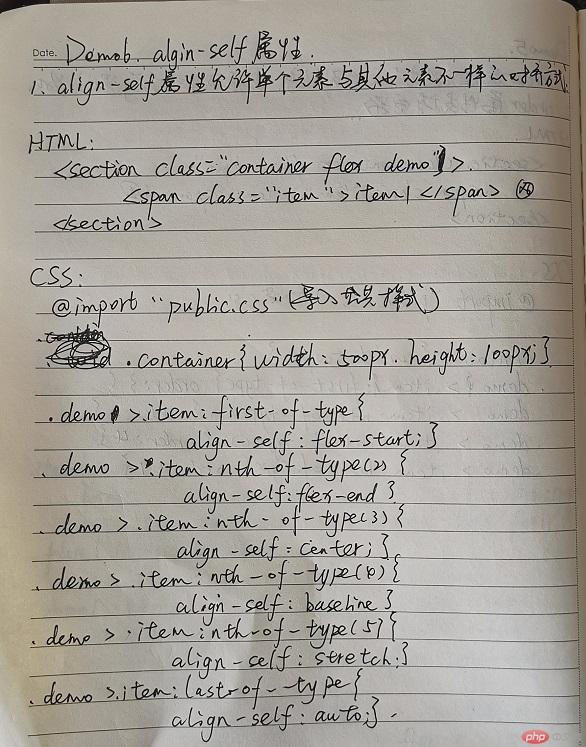
/*align-self: auto/flex-start/flex-end/center/baseline/ stretch;*/
.demo1 > .item:first-of-type{
    align-self: flex-start;
}
.demo1 > .item:nth-of-type(2){
    align-self: flex-end;
}
.demo1 > .item:nth-of-type(3){
    align-self:center;
}
.demo1 > .item:nth-of-type(4){
    align-self:baseline;
}
.demo1 > .item:nth-of-type(5){
    align-self:stretch;
}
.demo1 > .item:last-of-type{
    align-self:auto;
}
运行实例 »
点击 "运行实例" 按钮查看在线实例
手抄书:
实例效果图:
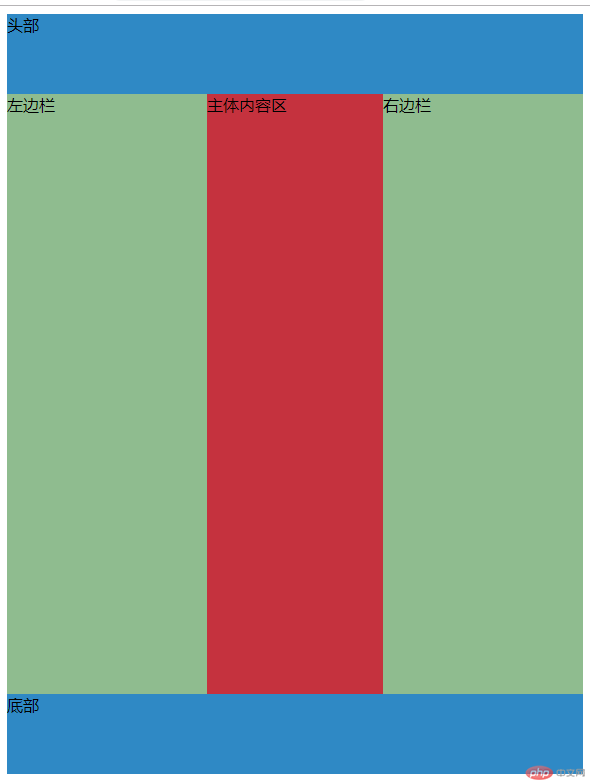
四. 试着将之前的一些案例用flex布局改定, 例如圣杯布局
实例HTML
<!DOCTYPE html>
<html lang="en">
<head>
    <meta charset="UTF-8">
    <title>圣杯布局改flex布局</title>
    <link rel="stylesheet" href="css/style7.css">
</head>
<body>
<header>头部</header>
<main>
    <article>主体内容区</article>
    <aside>左边栏</aside>
    <aside>右边栏</aside>
</main>
<footer>底部</footer>
</body>
</html>
运行实例 »
点击 "运行实例" 按钮查看在线实例
实例css
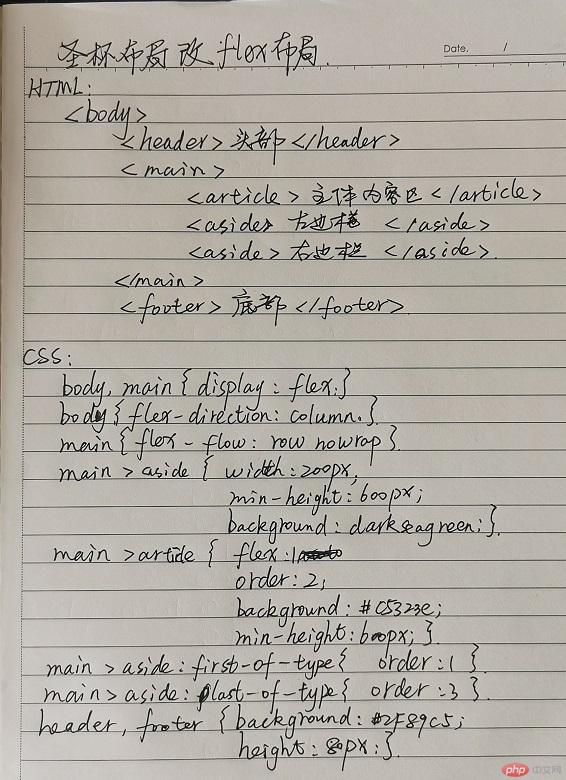
body,main{
    display: flex;
}
body{
    flex-direction:column;
}
header,footer{
    background: #2f89c5;
    height: 80px;
}
main{
    flex-flow:row nowrap;
}
main > aside{
    width: 200px;
    min-height: 600px;
    background: darkseagreen;
}
main > article{
    flex:1;
    order: 2;
    background: #c5323e;
    min-height: 600px;
}
main > aside:first-of-type{
    order: 1;
}
main > aside:last-of-type{
    order: 3;
}
运行实例 »
点击 "运行实例" 按钮查看在线实例
手抄书:
实例效果图:
