CSS表格控制以及通过元素的浮动和定位完成布局
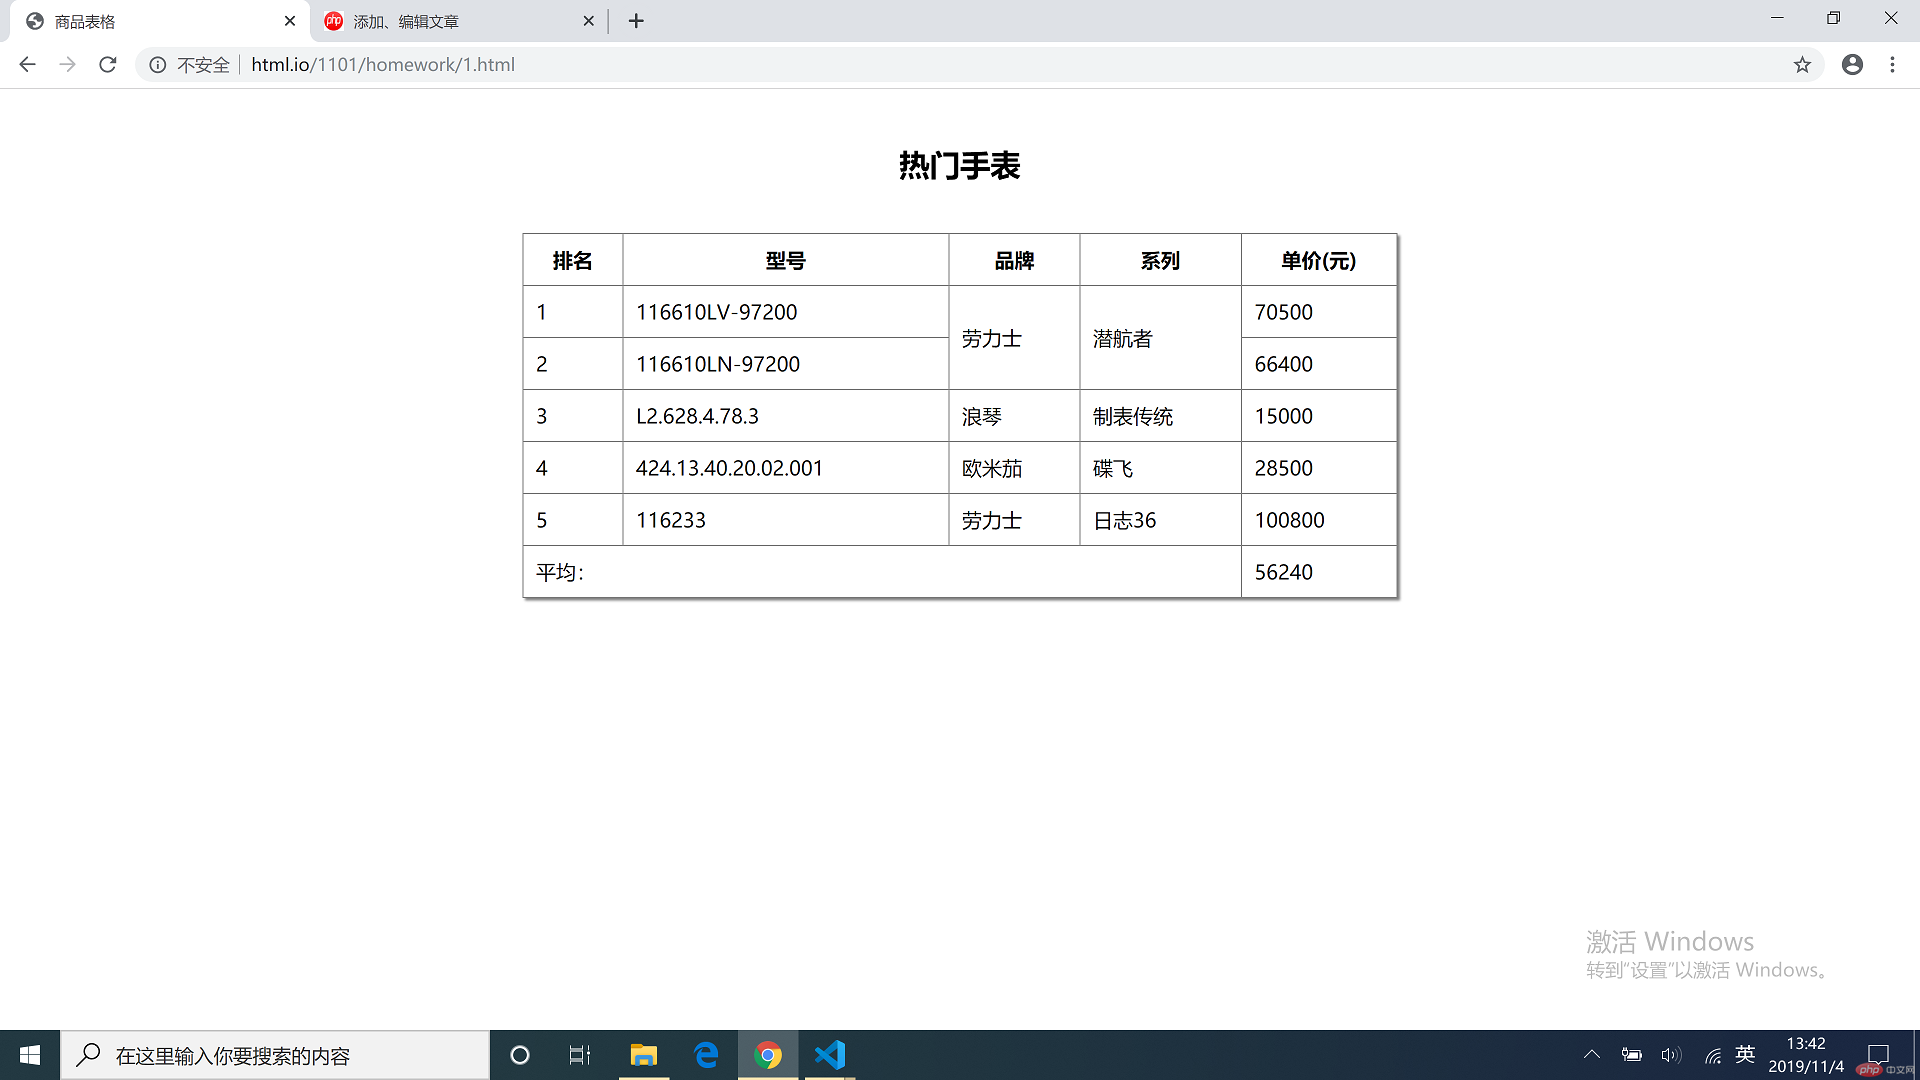
1. 制作商品信息表,实现行与列的合并
<table><caption><h3>热门手表</h3></caption><thead><tr><th>排名</th><th>型号</th><th>品牌</th><th>系列</th><th>单价(元)</th></tr></thead><tbody><tr><td>1</td><td>116610LV-97200</td><td rowspan="2">劳力士</td><td rowspan="2">潜航者</td><td>70500</td></tr><tr><td>2</td><td>116610LN-97200</td><!-- <td>劳力士</td><td>潜航者</td> --><td>66400</td></tr><tr><td>3</td><td>L2.628.4.78.3</td><td>浪琴</td><td>制表传统</td><td>15000</td></tr><tr><td>4</td><td>424.13.40.20.02.001</td><td>欧米茄</td><td>碟飞</td><td>28500</td></tr><tr><td>5</td><td>116233</td><td>劳力士</td><td>日志36</td><td>100800</td></tr></tbody><tfoot><tr><td colspan="4">平均:</td><!-- <td></td><td></td><td></td> --><td>56240</td></tr></tfoot></table>

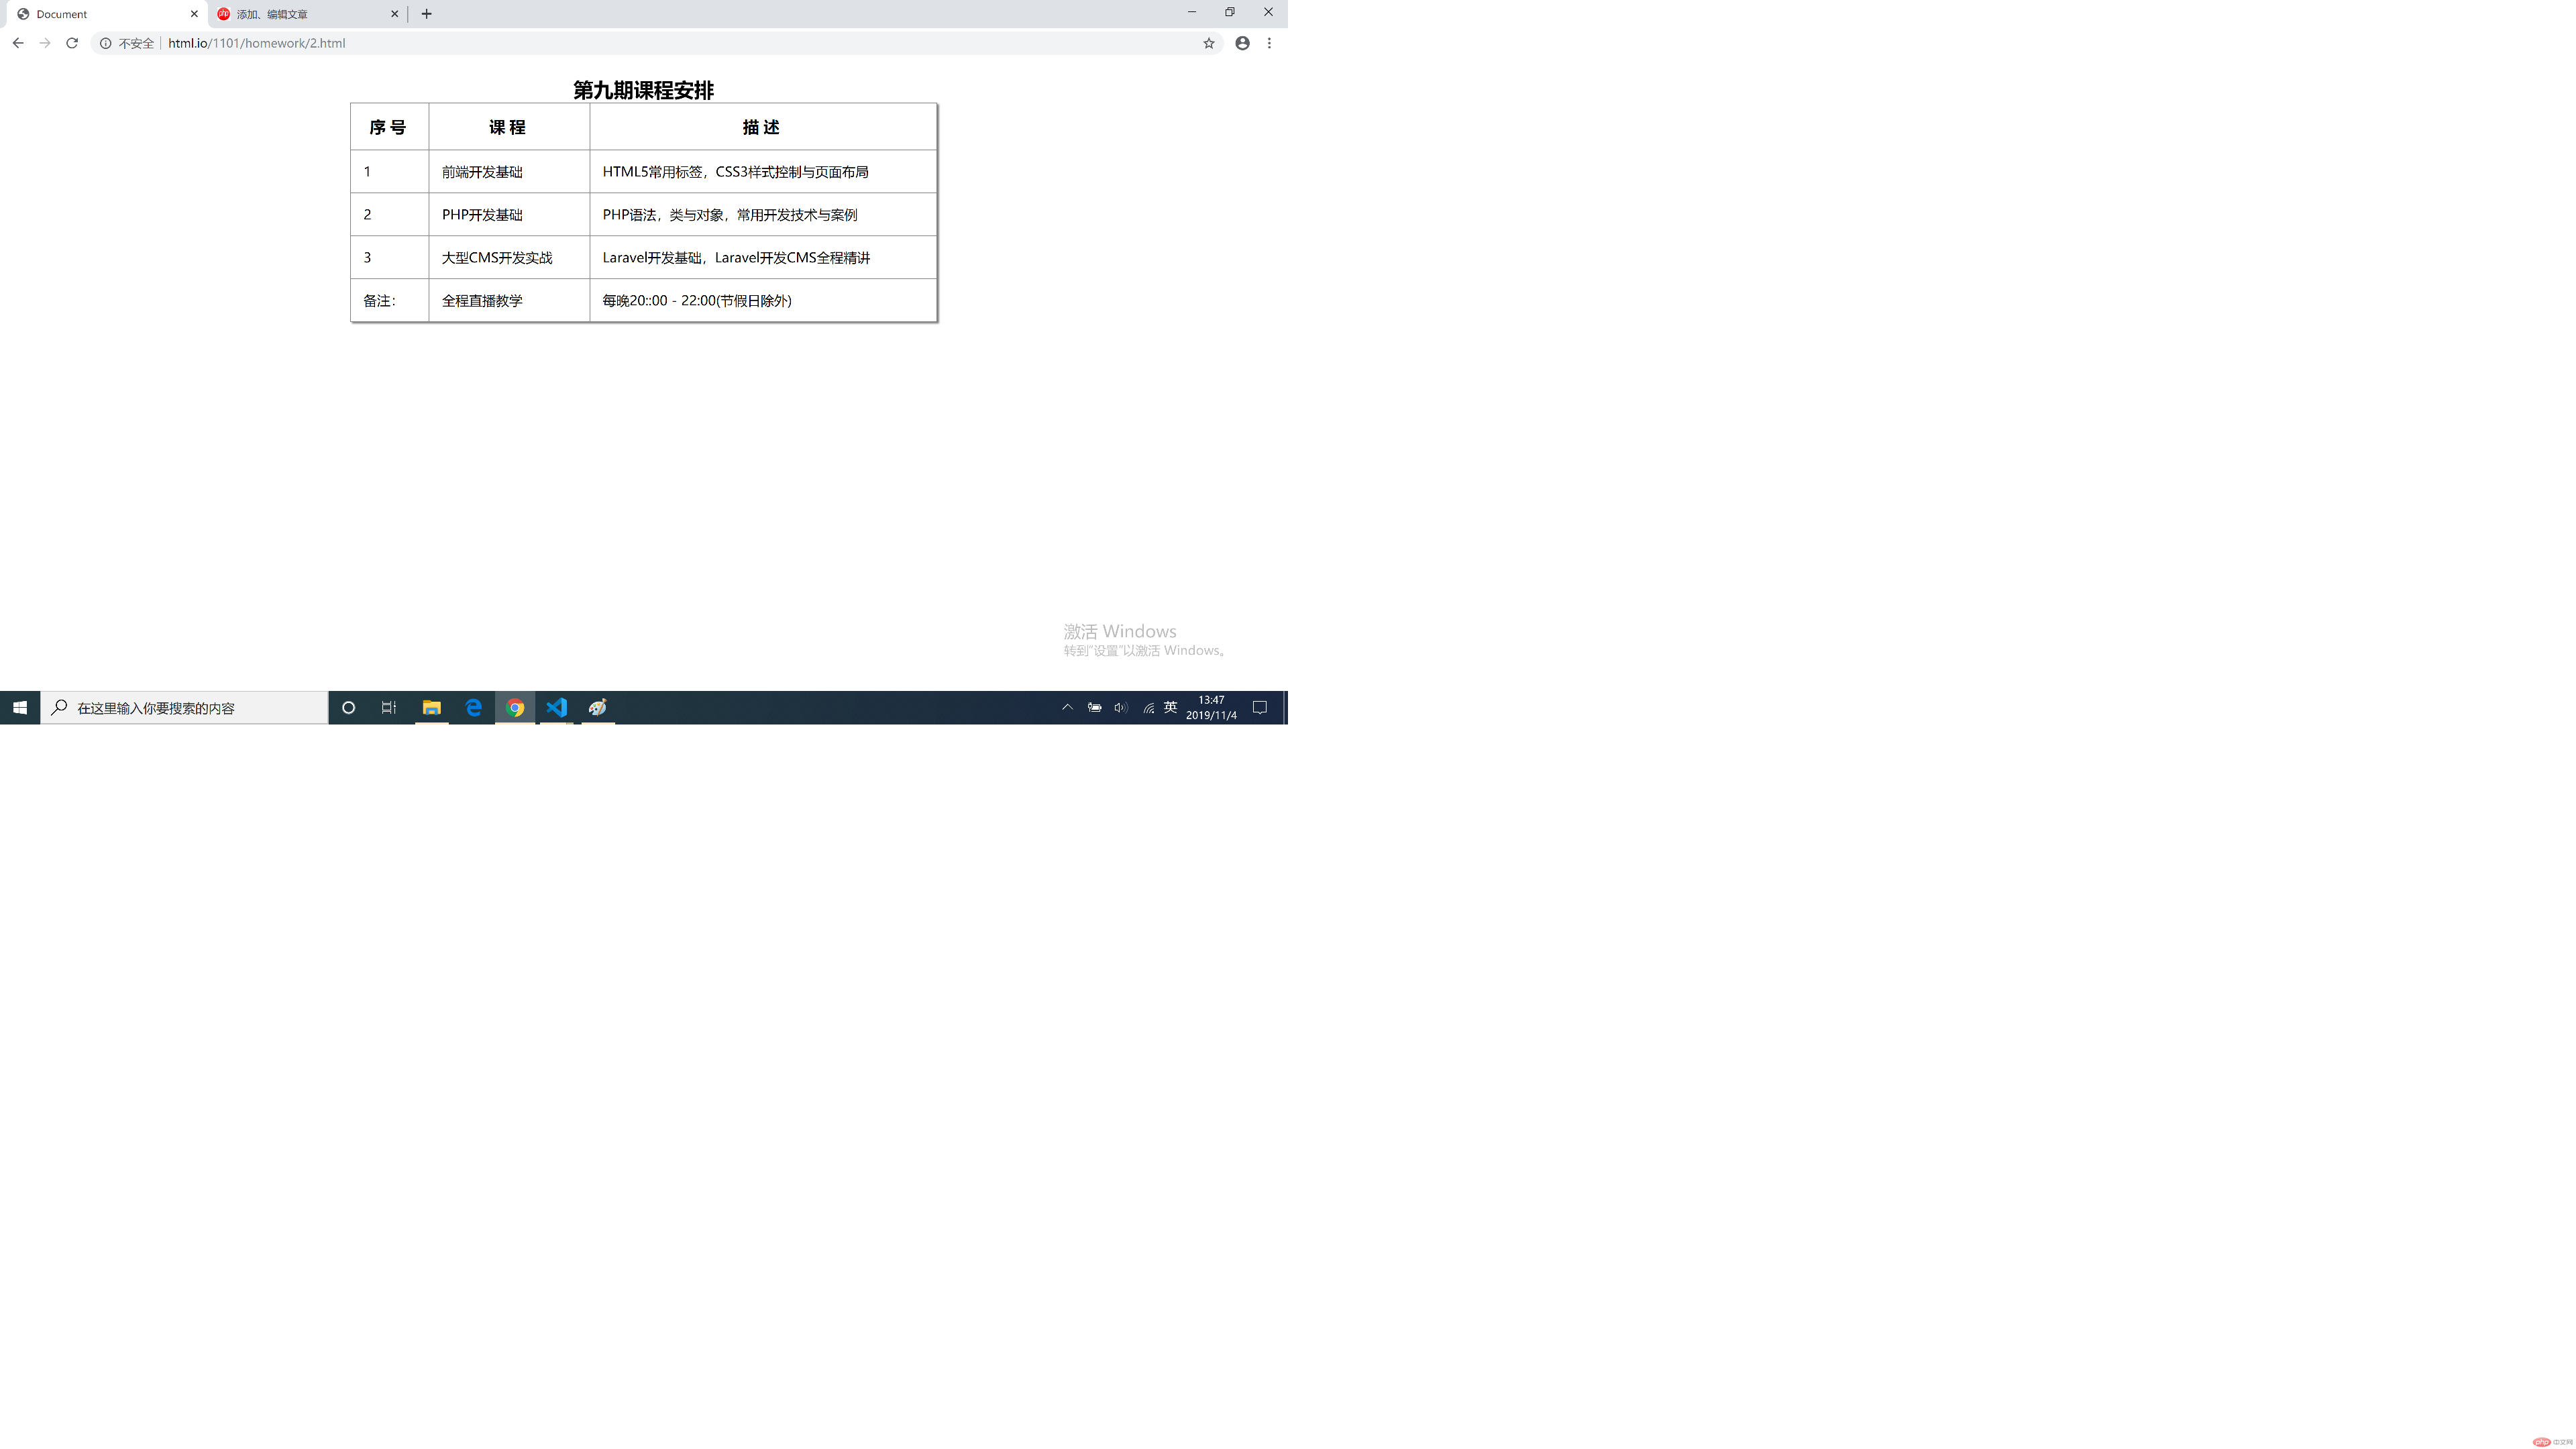
2. 使用CSS模拟表格
.table {display: table;box-sizing: border-box;width: 700px;box-shadow: 2px 2px 2px gray;border-collapse: collapse;margin: 20px auto;}.caption {display: table-caption;margin: auto;text-align: center;font-size: 1.5rem;font-weight: bold;}.thead {display: table-header-group;text-align: center;letter-spacing: 5px;}.thead span {font-weight: bold;font-size: 1.2rem;}.tbody {display: table-row-group;}.tfoot {display: table-footer-group;}ul {display: table-row;}li {display: table-cell;border: 1px solid gray;padding: 15px;}

3. 使用绝对定位,实现盒子的居中显示
.login {display: table;box-sizing: border-box;width: 300px;height: 100px;border: 1px solid gray;box-shadow: 2px 2px 2px gray;}ul {display: table-row-group;}li {display: table-row;}label {display: table-cell;}.login {margin: auto;position: absolute;top: 0;left: 0;bottom: 0;right: 0;}

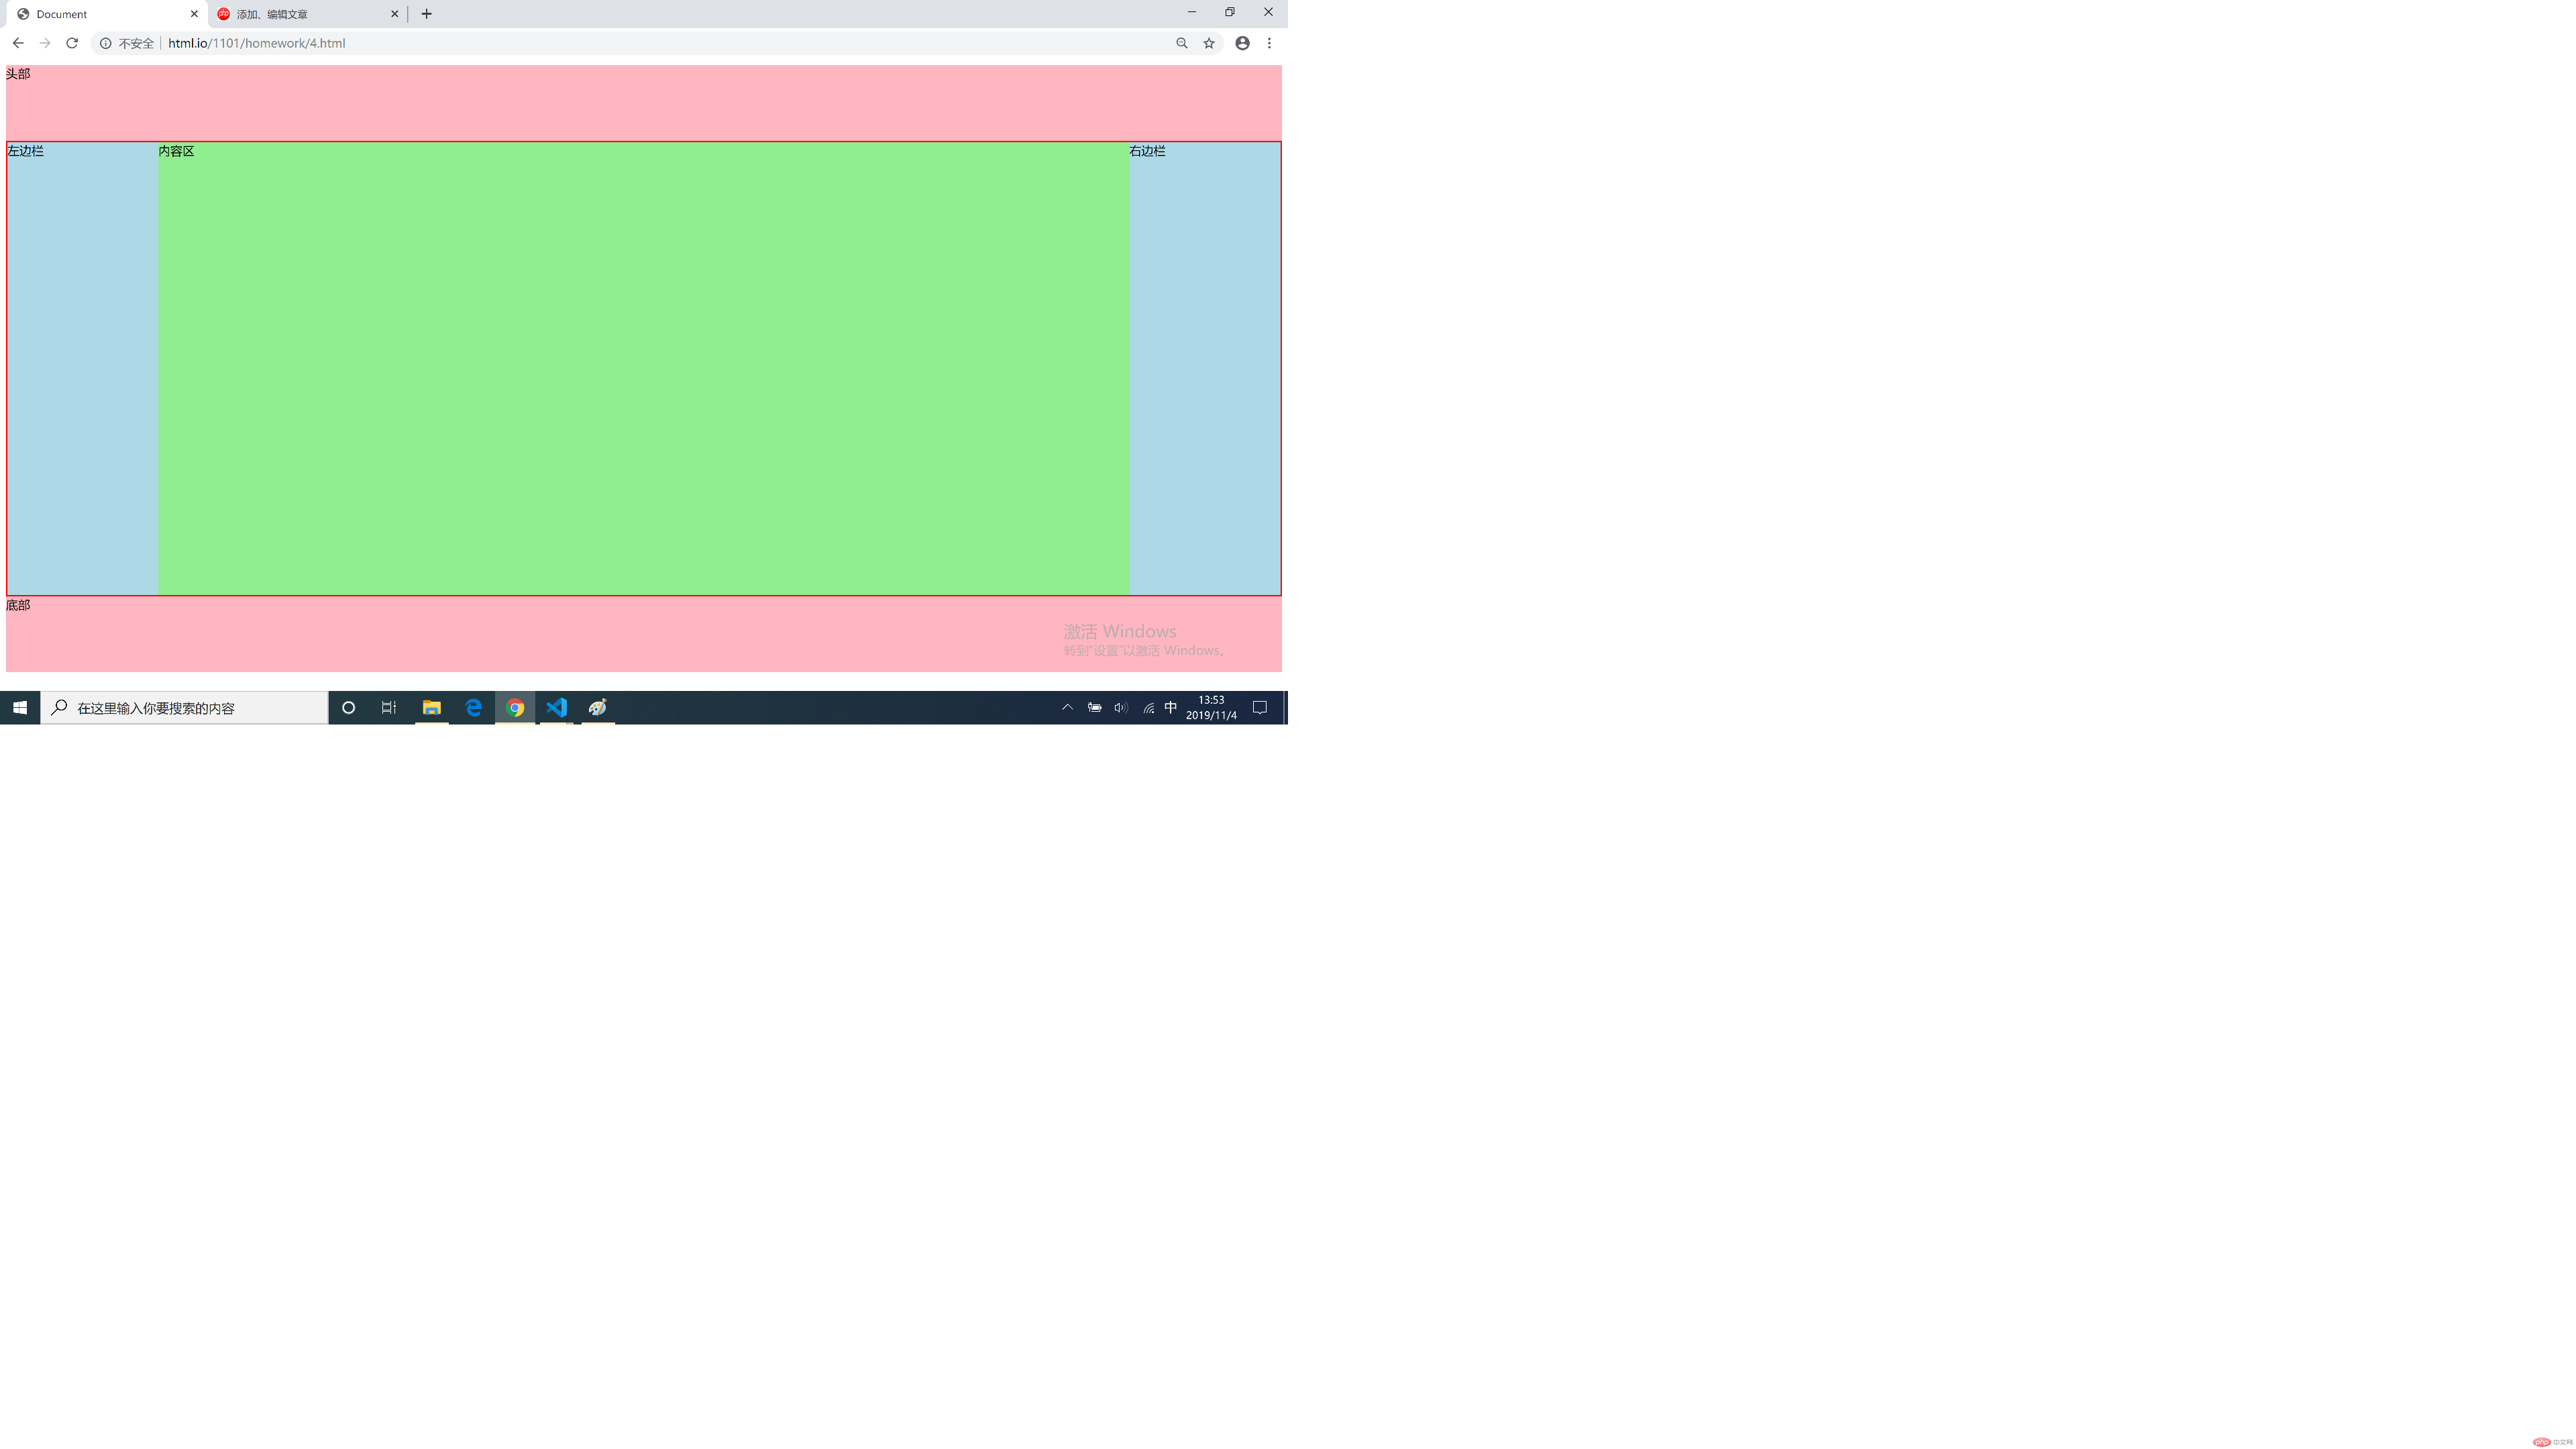
4. 圣杯布局的流程和思路
/* 实现圣杯布局的流程 *//* 圣杯布局:1. 两侧宽度固定,主体自适应2. 主体内容优先渲染*//* 步骤1:article写到aside前面,保证内容区优先渲染 *//* 步骤2:顶部和底部设置box-sizing,固定一个高度 */header,footer {box-sizing: border-box;height: 100px;background-color: lightpink;}/* 步骤3:创建内容主体区域main,设置box-sizing,给一个边框,用于测试 *//* 重点:实现圣杯布局的关键是通过padding把中间内容区挤到居中,再通过相对位置移动两个侧边 */main {box-sizing: border-box;border: 2px solid red;padding: 0 200px;}/* 步骤4:内容中间部分article的渲染,设置box-sizing,设置宽度为父元素的100%满足自适应,同时给个高度*//* 重点:通过float可以实现块元素在同一行显示 */article {box-sizing: border-box;width: 100%;height: 600px;background-color: lightgreen;float: left;}/* 步骤5:两边栏aside都float */aside {box-sizing: border-box;width: 200px;height: 600px;background-color: lightblue;float: left;}/* 步骤6:为main设置overflow *//* 重点:子元素都是float的时候,父元素会失去高度,需要把父元素转为BFC块 */main {overflow: hidden;}/* 步骤7:把左边栏放到左边 *//* 重点:现在左边栏是被article挤到下一行的,通过margin-left:-100%向左移动一个父元素宽度 *//* 重点:再通过position:relative移动最后200px */aside:first-of-type {margin-left: -100%;position: relative;left: -200px;}/* 步骤8:右边栏同理左边栏 */aside:last-of-type{margin-left: -200px;position: relative;left: 200px;}


