9月3日作业:
1. 实例演示相邻选择器与兄弟选择器,并分析异同
为了实例演示出相邻选择器和兄弟选择器的功能,我们设计了10个li标签组成的小球,其中,1、3、4、5、6号小球被定义为class=“bg-green”,2号小球被定义为id=“bg-blue”
实例
<!DOCTYPE html>
<html lang="en">

<head>
    <meta charset="UTF-8">
    <meta name="viewport" content="width=device-width, initial-scale=1.0">
    <meta http-equiv="X-UA-Compatible" content="ie=edge">
    <link rel="stylesheet" href="css/style.css">
    <title>伪类中子元素选择器和类型选择器的差异</title>
</head>

<body>
    <ul>
        <li class="bg-green">1</li>
        <li id="bg-blue">2</li>
        <li class="bg-green">3</li>
        <li class="bg-green">4</li>
        <li class="bg-green">5</li>
        <li class="bg-green">6</li>
        <li>7</li>
        <li>8</li>
        <li>9</li>
        <li>10</li>
    </ul>


</body>

</html>
运行实例 »
点击 "运行实例" 按钮查看在线实例
通过群组选择器,我们将这6个小球都定义为蓝色边框
#bg-blue, .bg-green {
    border: 2px solid blue;
}
通过定义相邻选择器
#bg-blue + * {
    background-color: yellow;
}
第2个li标签的下一个相邻标签,也就是第3个li标签背景颜色将被定义为黄色,结果如下:

我们可以看到,如果将+替换为~,与#bg-blue相邻的同级元素(第3个开始的同一级的元素,背景色全部变为灰色。)
#bg-blue ~ * {
    background-color: grey;
}
而我们这里也需要特别注意,兄弟选择器的属性优先级高于相邻选择器,我们可以注意到,#bg-blue的黄色背景被灰色背景替换了。
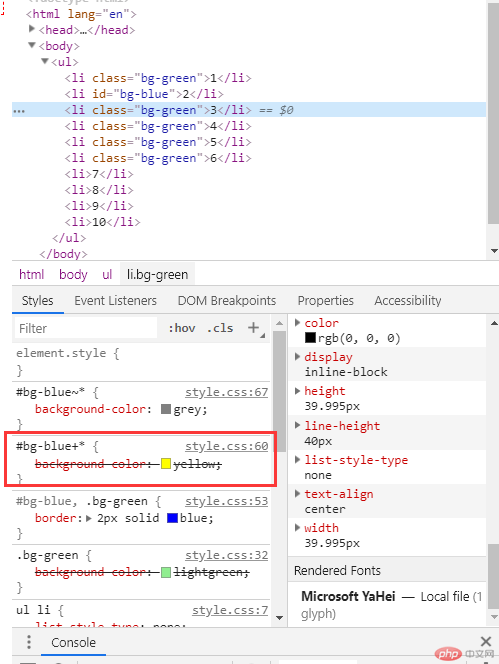
总结:相邻选择器和兄弟选择器是对相邻元素的选择定义,可以理解为与他相邻的下一个元素定义属性值,相邻选择器一般采用“ 选择器 + * { }”方式定义,只能针对下一个元素定义属性值;
兄弟选择器是对选择器相邻的(下一个的)所有同级元素的定义,一般来说,兄弟选择器采用 “ 选择器 ~ * { }”方式定义,可将属性值应用到相邻同级的全部元素上 。
2. 实例演示:nth-child() 和 :nth-of-type()选择器,并分析异同
nth-child() 和 :nth-of-type() 同属于伪类选择器,其中:
:nth-child() 属于子类选择器,从字面上看,child可以理解为对于子元素的控制,()是指定的子元素位置,从1开始;
还是以上面的小球举例,我们针对ul标签下的子元素进行定义,下面共计10个标签,我们选择将其中的第5个子元素的背景颜色改为亮粉色,只需要:
/* 伪类:子元素选择器,如果我们需要指定第几个,采用:nth-child(),其中()内填入的就是第几个,此处是从1开始 */
/* 例如,我们希望对第5个球的背景色指定为lightpink,可以改为 */
ul :nth-child(5) {
    background-color: lightpink;
}
:nth-of-type() 属于类型选择器,of-type可以从字面上理解为对于同类型的元素的选择,同样()也是对于元素的索引,从1开始,例如,我们针对li类型的第5个li元素的背景和字体颜色进行设置。
ul li:nth-of-type(5) {
    background-color: gray;
    color: white;
}
在实际使用中,如果关注点在于位置,那么采用:nth-child() 即可,如果既关注位置,又关注类型,采用:nth-of-type()。
3. 实例演示:padding 对盒子大小的影响与解决方案, 使用宽度分离或box-sizing
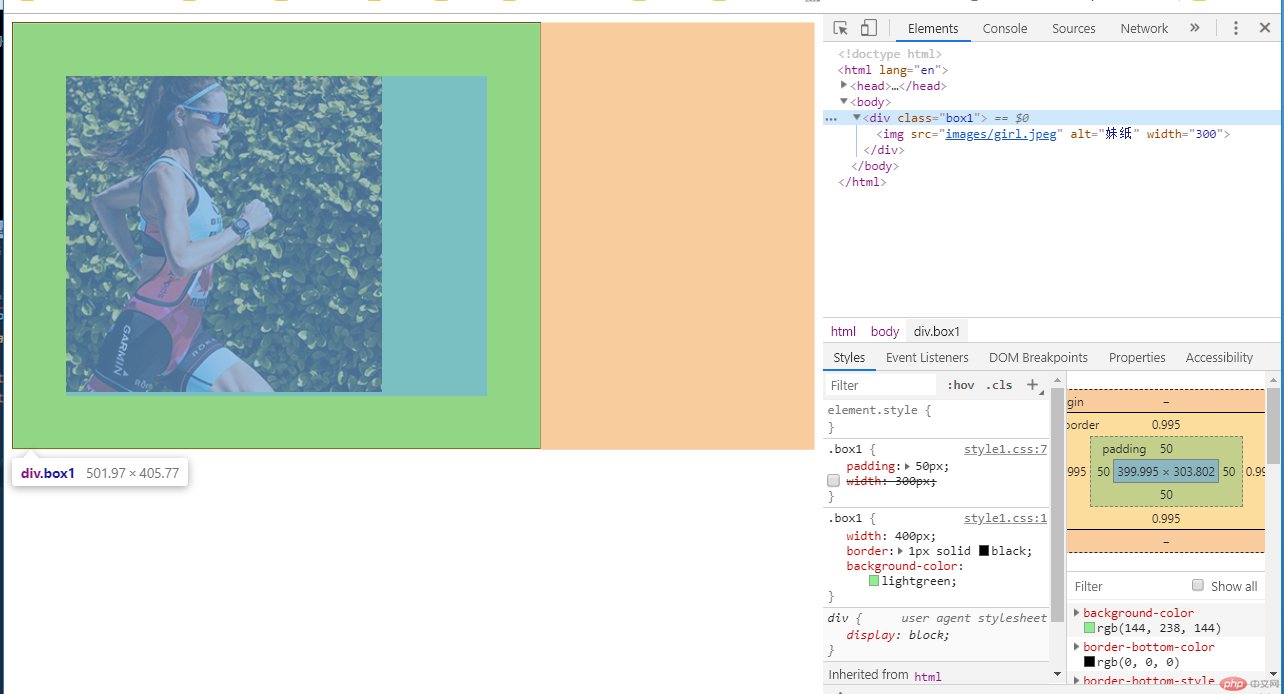
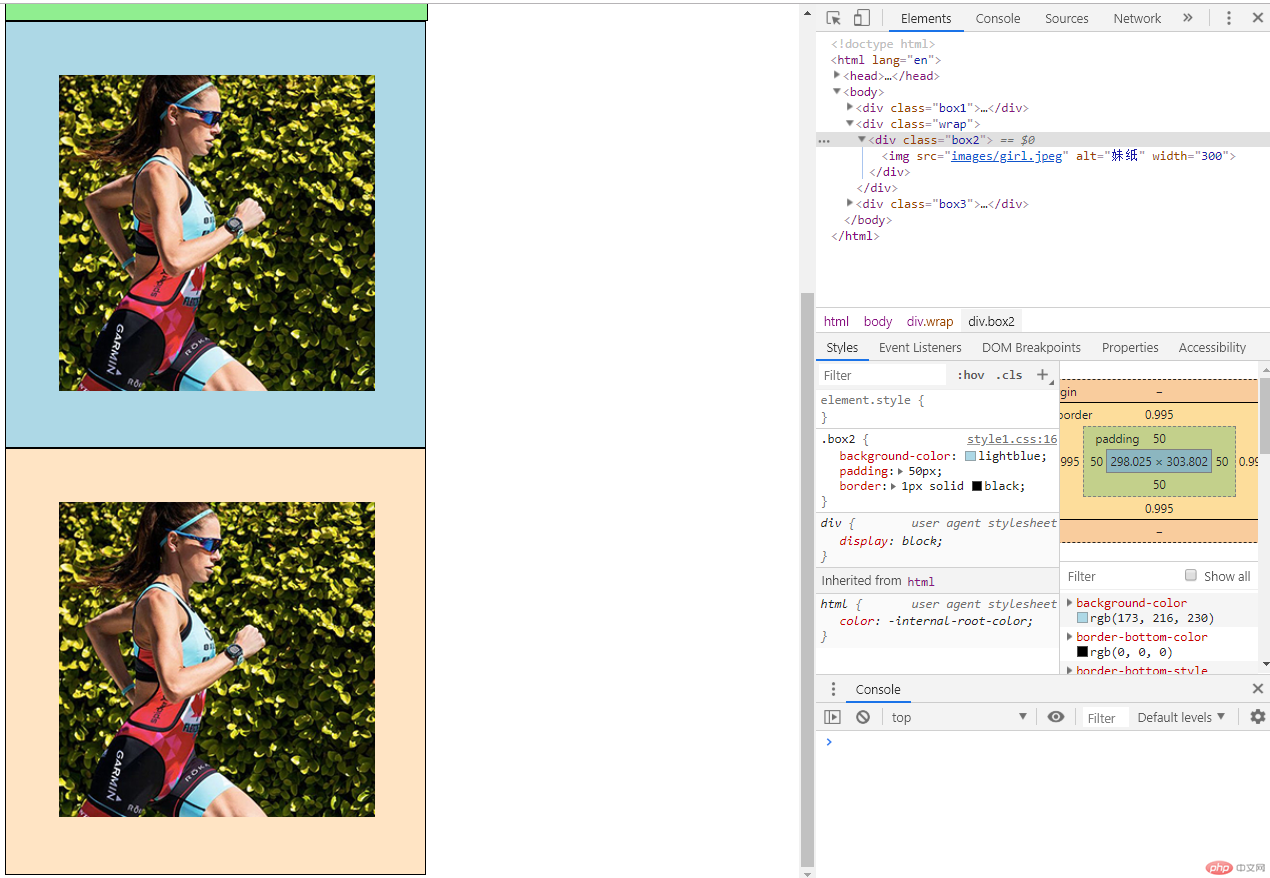
我们首先设置了一个宽度为400px的div,然后将一张300像素的图片放置到容器中,并将padding设置为50px,从理论上,图片将会居中显示,但实际情况却不是,padding将容易撑大了,增加了100个px。
<body>
    <div class="box1">
        <img src="images/girl.jpeg" alt="妹纸" width="300">
    </div>
</body>
.box1 {
    width: 400px;
    border: 1px solid black;
    background-color: lightgreen;
}
.box1 {
    padding: 50px;
    /* width: 300px; */
}
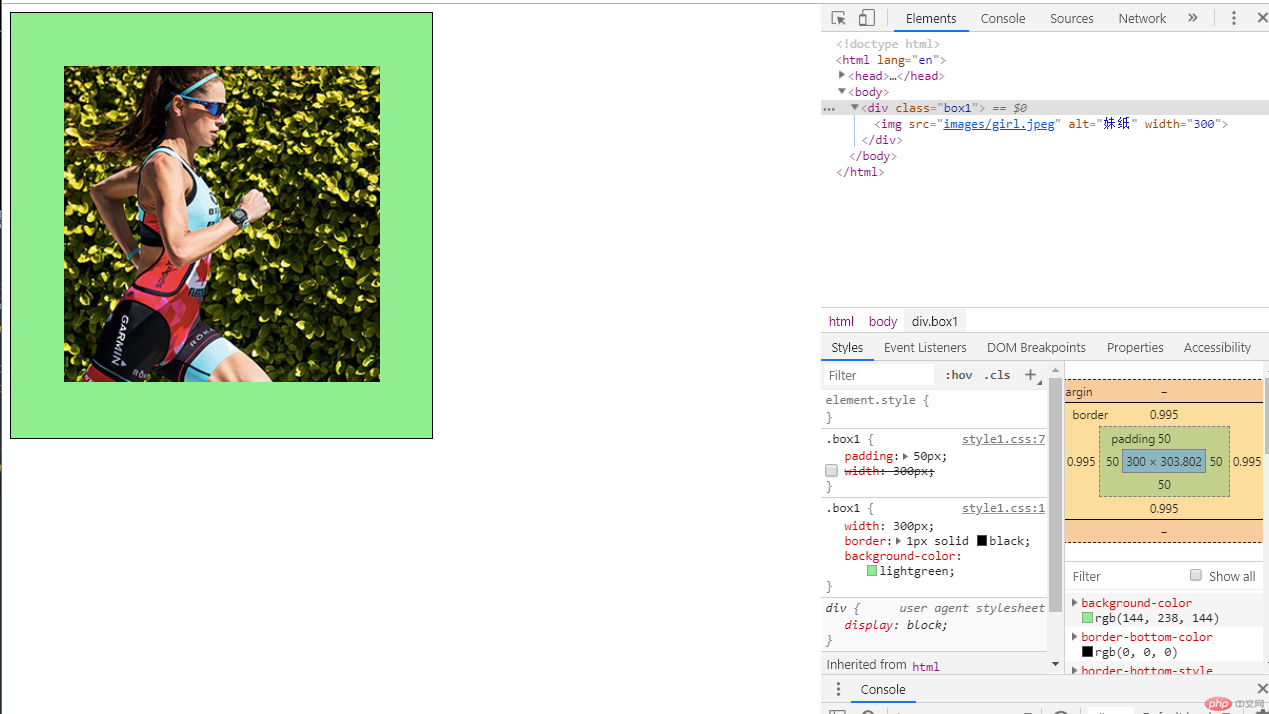
在本例中,如果我们需要将将图片居中显示,而又不改变显示效果的情况下,有三种方式:
a、采用修改div容器的大小,将box1的宽度改成300px,与图片相同,再周边增加50的padding值,最后时限400像素容器,图片居中显示的效果。
.box1 {
    width: 300px;
    border: 1px solid black;
    background-color: lightgreen;
}
.box1 {
    padding: 50px;
    /* width: 300px; */
}
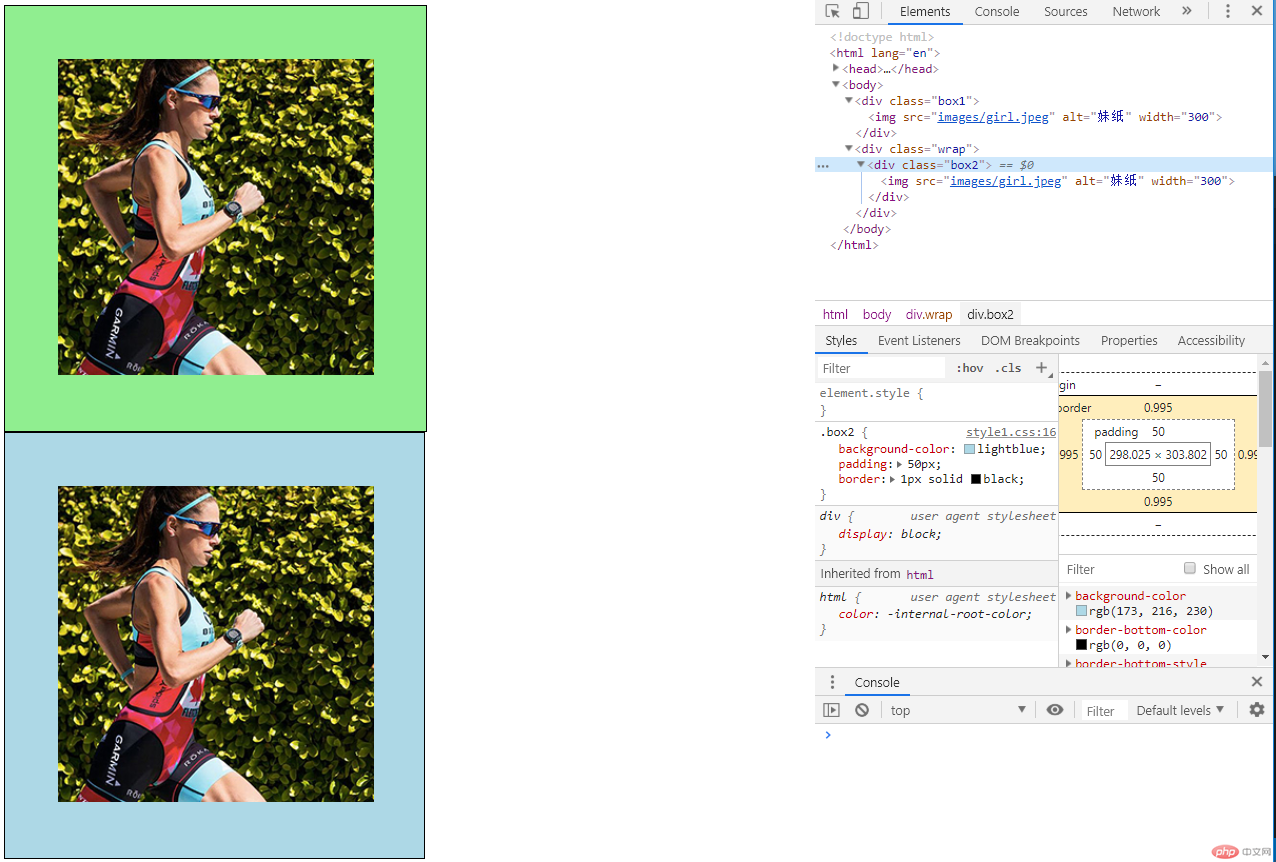
b、采用宽度分离方式,宽度分离实际是在div的外层再嵌套一个div作为中间件,设置外层div宽度,内层div仅仅设置padding值来实现宽度分离效果,这种方式已经被淘汰,并不建议使用。
    <div class="box1">
        <img src="images/girl.jpeg" alt="妹纸" width="300">
    </div>
    <div class="wrap">
        <div class="box2">
            <img src="images/girl.jpeg" alt="妹纸" width="300">
        </div>
    </div>
.wrap {
    width: 400px;
}
.box2 {
    background-color: lightblue;
    padding: 50px;
    border: 1px solid black;
}
c、采用box-sizing方法,box-sizing是一种在css3中常见的定义盒模型大小的方式,特点是一旦采用这种方式定义大小,padding和broder等都会被考虑进去,padding挤压出多余宽度高度的情况被有效避免,是一种现阶段最常用的定义大小的方式。
    <div class="box1">
        <img src="images/girl.jpeg" alt="妹纸" width="300">
    </div>
    <div class="wrap">
        <div class="box2">
            <img src="images/girl.jpeg" alt="妹纸" width="300">
        </div>
    </div>
    <div class="box3">
        <img src="images/girl.jpeg" alt="妹纸" width="300">
    </div>
/* box-sizing */
.box3 {
    width: 400px;
    box-sizing: border-box;
    padding: 50px;
    background-color: bisque;
    border: 1px solid black;
}
4. 实例演示: margin中的同级塌陷, 嵌套传递与自动挤压, 并提出解决方案或应用场景
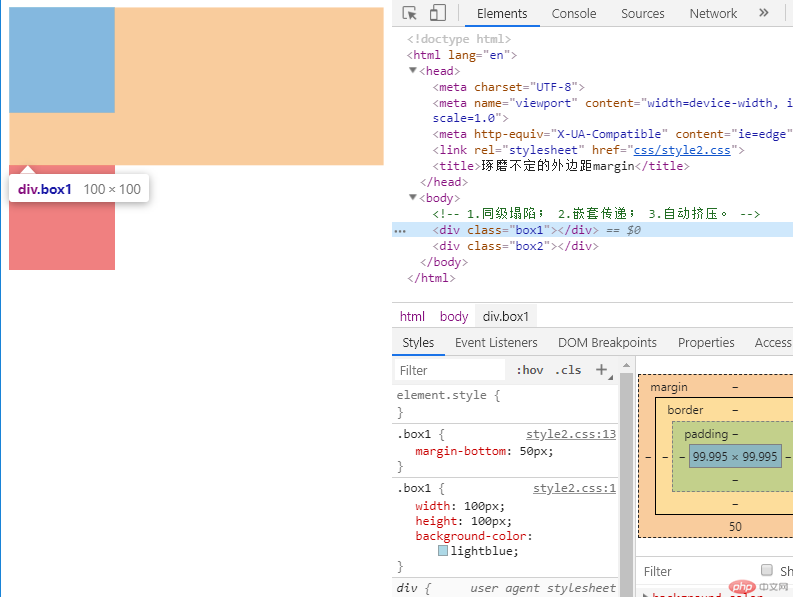
当出现上下两个并列的div块,上面div的margin-bottom和下面div的margin-top会塌陷,也就是会取上下两者margin里最大值作为显示值,例如在本例子中,当box1的外边距为50像素,box2的上外边距为30像素时,两个box之间的间距并非50+30,而是取其中最大的50px作为值。
    <!-- 1.同级塌陷; 2.嵌套传递; 3.自动挤压。 -->
    <div class="box1"></div>
    <div class="box2"></div>
.box1 {
    width: 100px;
    height: 100px;
    background-color: lightblue;
}
.box2 {
    width: 100px;
    height: 100px;
    background-color: lightcoral;
}
.box1 {
    margin-bottom: 50px;
}
.box2 {
    margin-top: 30px;
}
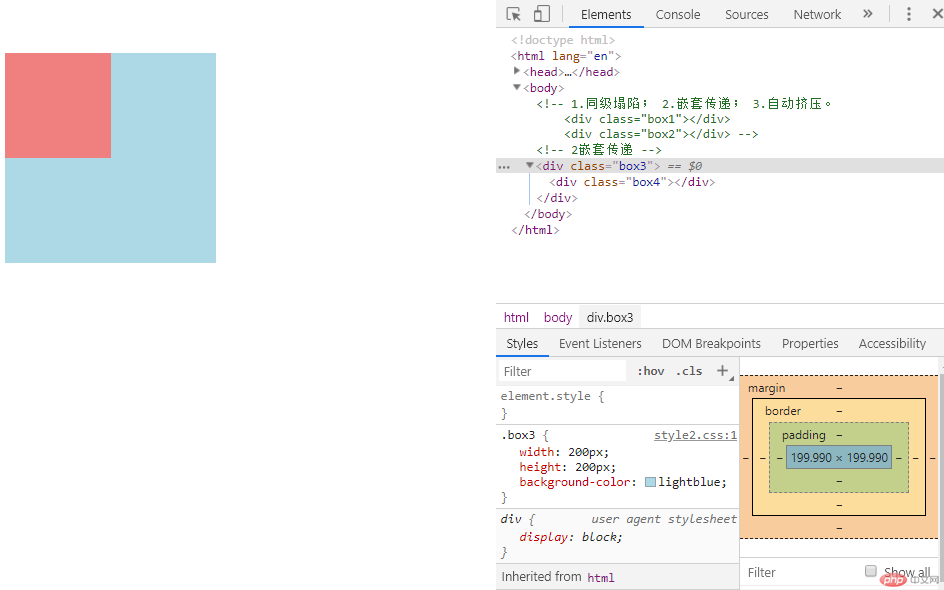
b、嵌套传递,是指在当一个div嵌套另一个div时,当设置里面子div的margin值,会传递给父div,例如本例中,div4设置的margin值,会传递给div3,当我们设置div4的margin-top为50px,div4没有如我们的期望的,距离div3的上边框50px,而是和div3一起,距离顶端出现50px。这就是margin的嵌套传递。
    <!-- 2嵌套传递 -->
    <div class="box3">
        <div class="box4"></div>
    </div>
.box3 {
    width: 200px;
    height: 200px;
    background-color: lightblue;
}
.box4 {
    width: 100px;
    height: 100px;
    background-color: lightcoral;
    margin-top: 50px;
}
如果我们希望将div4距离div3的上边距30px,我们可以采用2种方式解决:
第一种方式是设置div3的padding值,div4的外边距对于他的父级元素div3来说,就是内边距,因此,我们设置DIV3的padding-top即可实现将div4下移。
.box3 {
    width: 200px;
    height: 200px;
    background-color: lightblue;
    padding-top: 50px;
}
.box4 {
    width: 100px;
    height: 100px;
    background-color: lightcoral;
    /* margin-top: 50px; */
}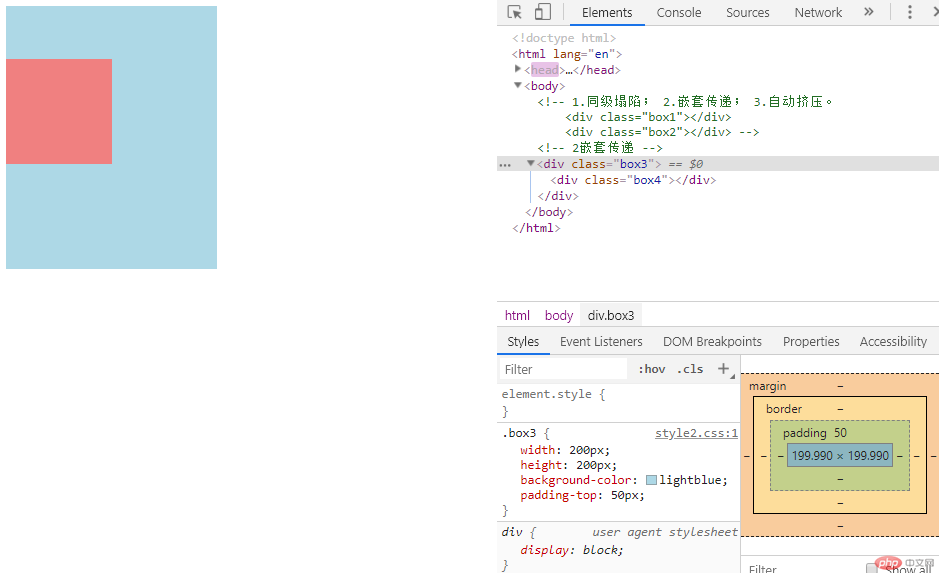
从图中我们可以看到,div4已经距离div3的上边距30px,但同时,div3被撑大,为了实现不撑大的效果,我们需要将div3的高度减去增加的50px,将高度设置为150px,可以实现我们希望的效果。
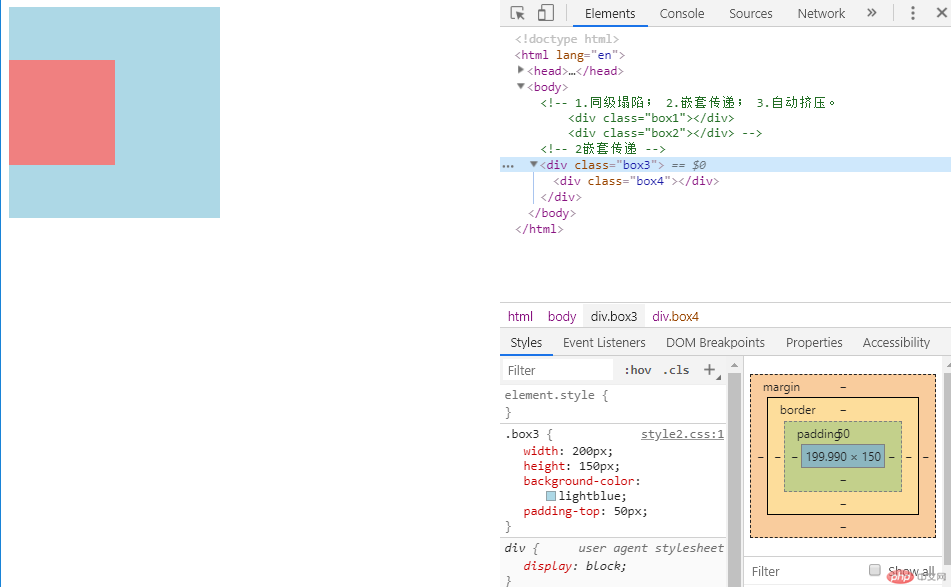
.box3 {
    width: 200px;
    height: 150px;
    background-color: lightblue;
    padding-top: 50px;
}
.box4 {
    width: 100px;
    height: 100px;
    background-color: lightcoral;
    /* margin-top: 50px; */
}
c、自动挤压,当我们对一个margin设置auto属性时,他会依据我们设置的左右来判断是给左侧还是右侧最大的数值,例如margin-left:auto时,div将会被挤到浏览器的最右侧显示,当margin-right:auto的时候,div将被挤压到最左侧显示。
当我们同时设置margin-left:auto ,margin-right:auto的时候,div将居中显示,一般此时我们会简写为margin:auto
.box5 {
    width: 150px;
    height: 150px;
    background-color: lightblue;
}
.box5 {
    /* margin: auto; 会自动居中*/
    margin-left: auto;
    margin-right: auto;
}
