一、Vue3组件的传值
1、传值
- App.vue文件
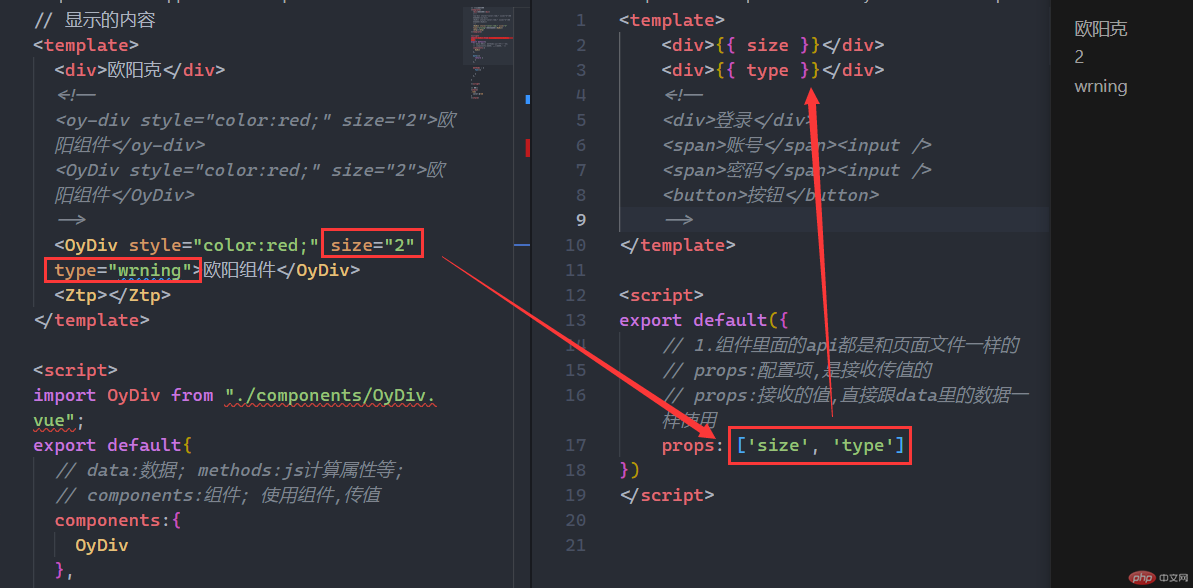
<template><div>欧阳克</div><OyDiv style="color:red;" size="2" type="wrning">欧阳组件</OyDiv><Ztp></Ztp></template><script>import OyDiv from "./components/OyDiv.vue";export default{// data:数据; methods:js计算属性等;// components:组件; 使用组件,传值components:{OyDiv},}
- OyDiv.vue组件文件(组件文件)
<template><div>{{ size }}</div><div>{{ type }}</div></template><script>export default({// 1.组件里面的api都是和页面文件一样的// props:配置项,是接收传值的// props:接收的值,直接跟data里的数据一样使用props: ['size', 'type']})</script>
2、可以多个组件
- App.vue文件
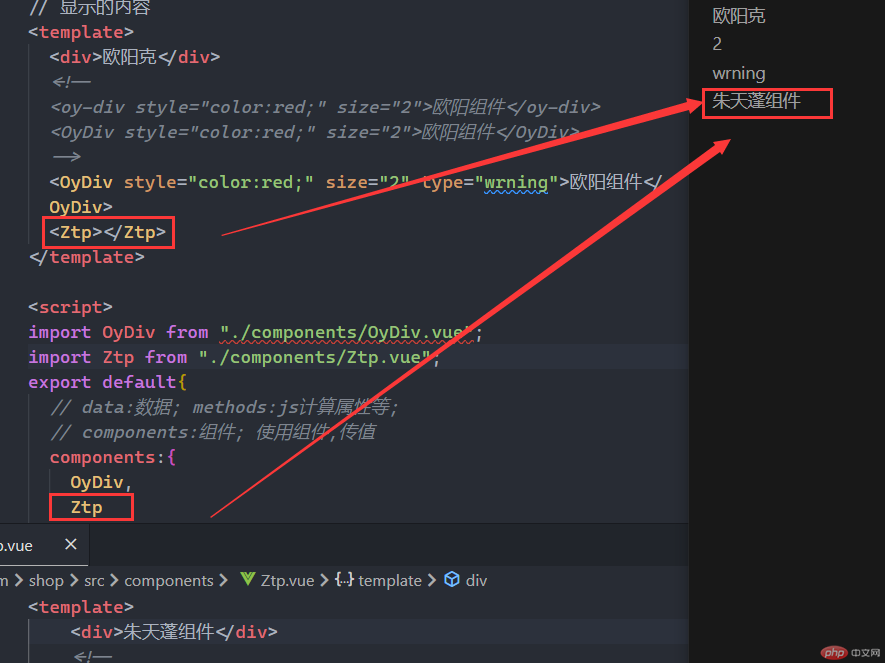
<template><div>欧阳克</div><!--<oy-div style="color:red;" size="2">欧阳组件</oy-div><OyDiv style="color:red;" size="2">欧阳组件</OyDiv>--><OyDiv style="color:red;" size="2" type="wrning">欧阳组件</OyDiv><Ztp></Ztp></template>
- Ztp.vue文件(组件文件)
<template><div>朱天蓬组件</div></template>
3、组件引入多个子组件
- App.vue组件文件
<template><div>欧阳克</div><OyDiv style="color:red;" size="2" type="wrning">欧阳组件</OyDiv></template><script>import OyDiv from "./components/OyDiv.vue";export default{// data:数据; methods:js计算属性等;// components:组件; 使用组件,传值components:{OyDiv},}
- Ztp.vue子组件
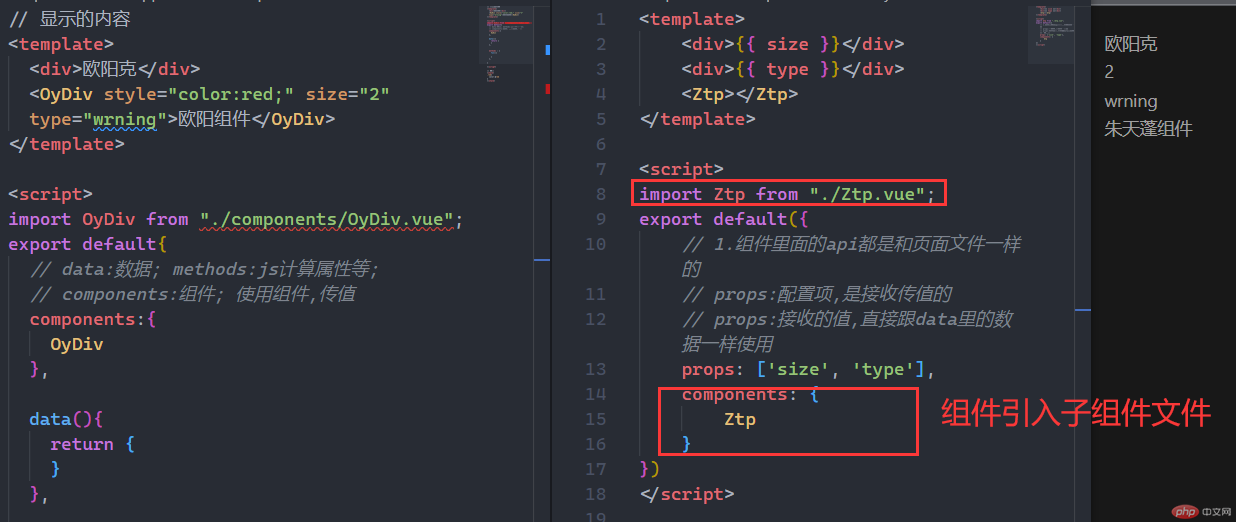
<template><div>{{ size }}</div><div>{{ type }}</div><Ztp></Ztp></template><script>import Ztp from "./Ztp.vue";export default({// 1.组件里面的api都是和页面文件一样的// props:配置项,是接收传值的// props:接收的值,直接跟data里的数据一样使用props: ['size', 'type'],components: {Ztp}})</script>
4、传值的配置项
- app.vue文件
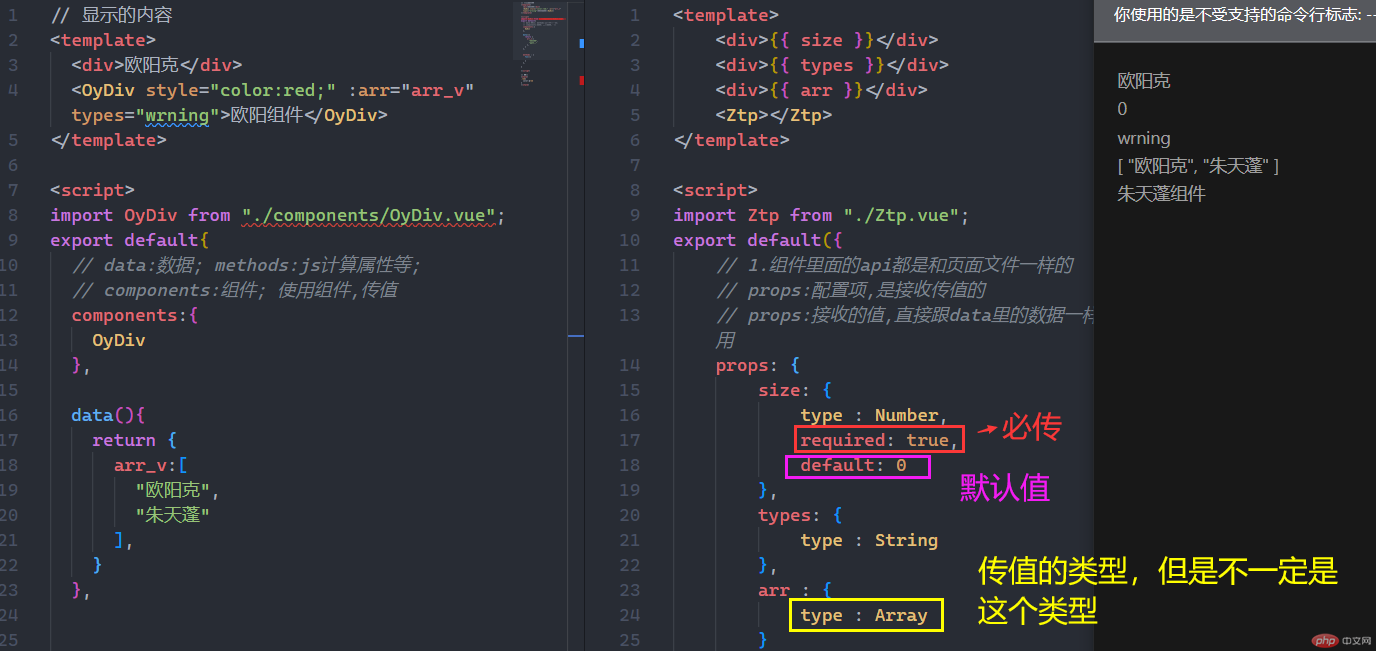
<template><div>欧阳克</div><OyDiv style="color:red;" :arr="arr_v" types="wrning">欧阳组件</OyDiv></template><script>import OyDiv from "./components/OyDiv.vue";export default{// data:数据; methods:js计算属性等;// components:组件; 使用组件,传值components:{OyDiv},data(){return {arr_v:["欧阳克","朱天蓬"],}},}
- OyDiv.vue文件
<template><div>{{ size }}</div><div>{{ types }}</div><div>{{ arr }}</div><Ztp></Ztp></template><script>import Ztp from "./Ztp.vue";export default({// 1.组件里面的api都是和页面文件一样的// props:配置项,是接收传值的// props:接收的值,直接跟data里的数据一样使用props: {size: {type : Number,required: true,default: 0},types: {type : String},arr : {type : Array}},components: {Ztp}})</script>
5、判断值赋予样式
- OyButton.vue文件
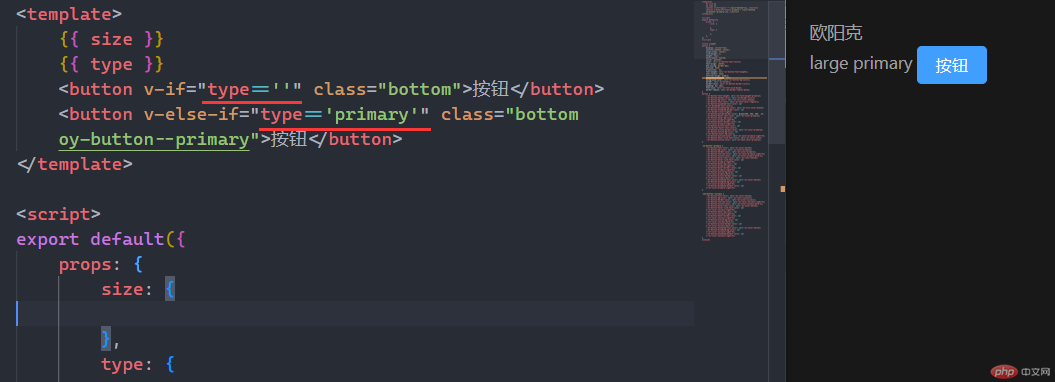
<template>{{ size }}{{ type }}<button v-if="type==''" class="bottom">按钮</button><button v-else-if="type=='primary'" class="bottom oy-button--primary">按钮</button></template><script>export default({props: {size: {},type: {},},})</script><style scoped>button { xxx }.oy-button--primary { xxx }<style>
- App.vue文件
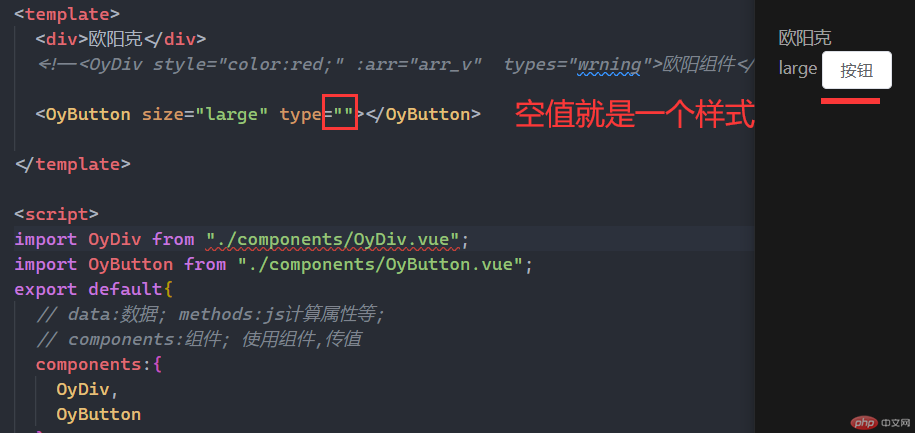
<template><div>欧阳克</div><!--<OyDiv style="color:red;" :arr="arr_v" types="wrning">欧阳组件</OyDiv>--><OyButton size="large" type=""></OyButton></template><script>import OyDiv from "./components/OyDiv.vue";import OyButton from "./components/OyButton.vue";export default{// data:数据; methods:js计算属性等;// components:组件; 使用组件,传值components:{OyDiv,OyButton},}</script>
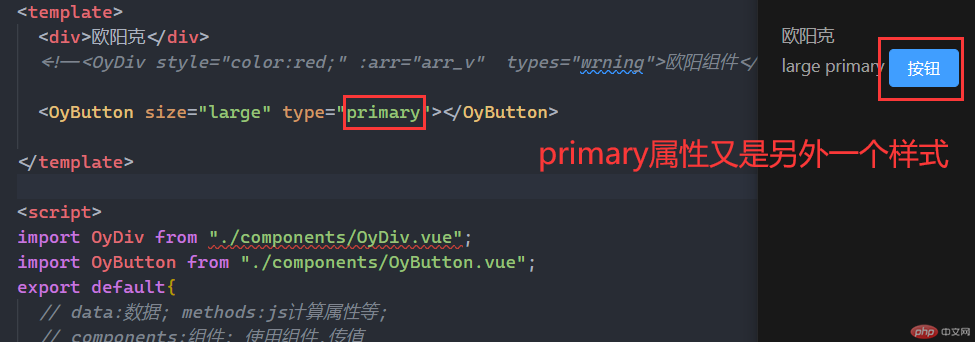
<OyButton size="large" type="primary"></OyButton>
@style scoped
- scoped:可以穿透到其他文件使用,或者本文件单独使用
6、插槽的使用方式:
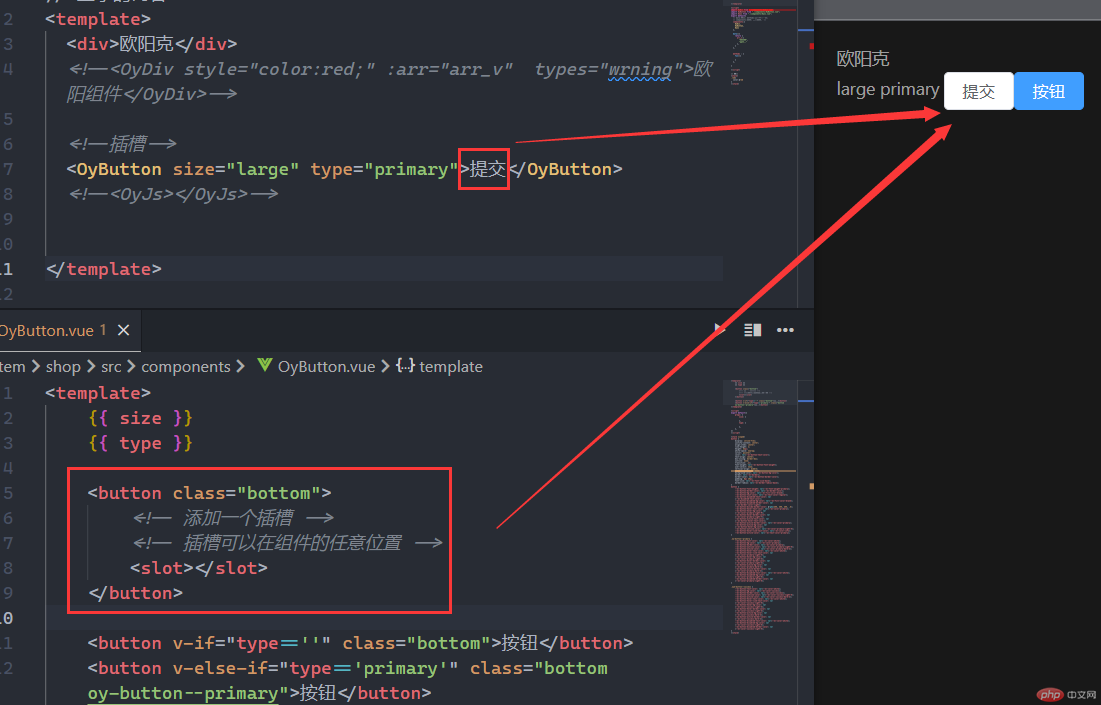
单个插槽
App.vue文件
<template><div>欧阳克</div><!--插槽--><OyButton size="large" type="primary">提交</OyButton></template>
OnButton.vue文件
<template>{{ size }}{{ type }}<button class="bottom"><!-- 添加一个插槽 --><!-- 插槽可以在组件的任意位置 --><slot></slot></button><button v-if="type==''" class="bottom">按钮</button><button v-else-if="type=='primary'" class="bottom oy-button--primary">按钮</button></template>
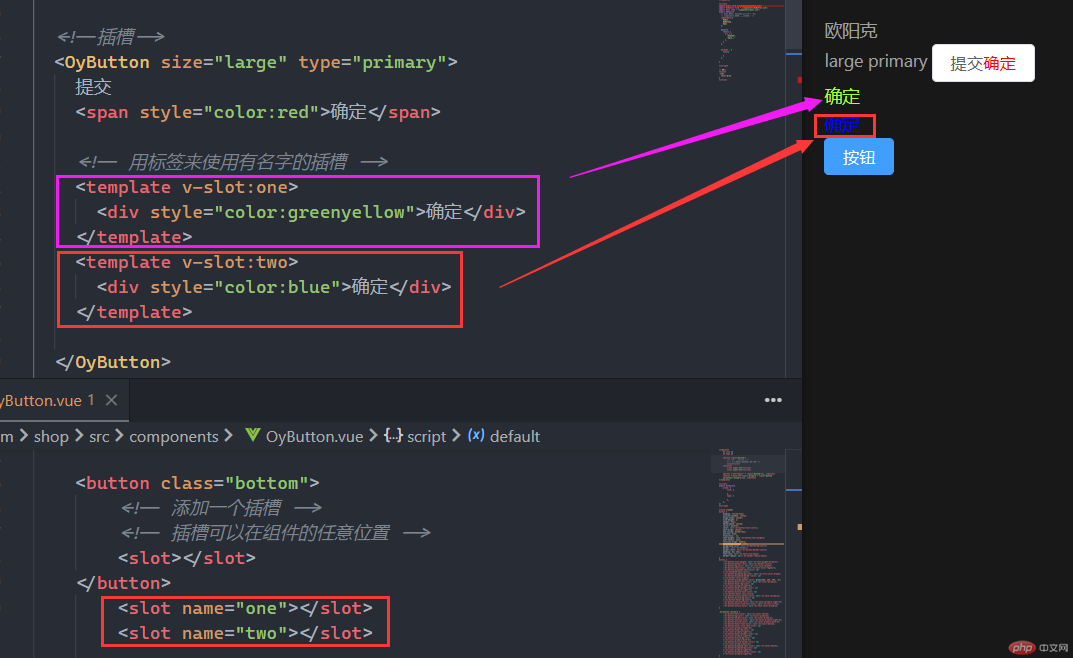
<!--插槽--><OyButton size="large" type="primary">提交<span style="color:red">确定</span><!-- 用标签来使用有名字的插槽 --><template v-slot:one><div style="color:greenyellow">确定</div></template><!-- 语法糖 # --><template #two><div style="color:blue">确定</div></template></OyButton>
- OnButton.vue文件
<template>{{ size }}{{ type }}<button class="bottom"><!-- 添加一个插槽 --><!-- 插槽可以在组件的任意位置 --><slot></slot></button><slot name="one"></slot><slot name="two"></slot><button v-if="type==''" class="bottom">按钮</button><button v-else-if="type=='primary'" class="bottom oy-button--primary">按钮</button></template>
7、子组件调用父组件方法
- App.vue文件
<template><OyJs></OyJs></template><script>import OyJs from "./components/OyJs.vue";export default{components:{OyJs},data(){return {}},methods : {fun(e){console.log('父组件方法');console.log(e);}},}</script>
- OyJs.vue文件
<template><div>OyJs</div><div>{{ OyJs_fun() }}</div><button @click="OyJs_fun(1)">按钮</button></template><script>export default({props: {},methods: {OyJs_fun(e){console.log('OyJs方法');// 使用全局属性// $parent 上一级,父级方法this.$parent.fun(e);// 最顶层,根目录this.$root.fun(e);}}})</script>
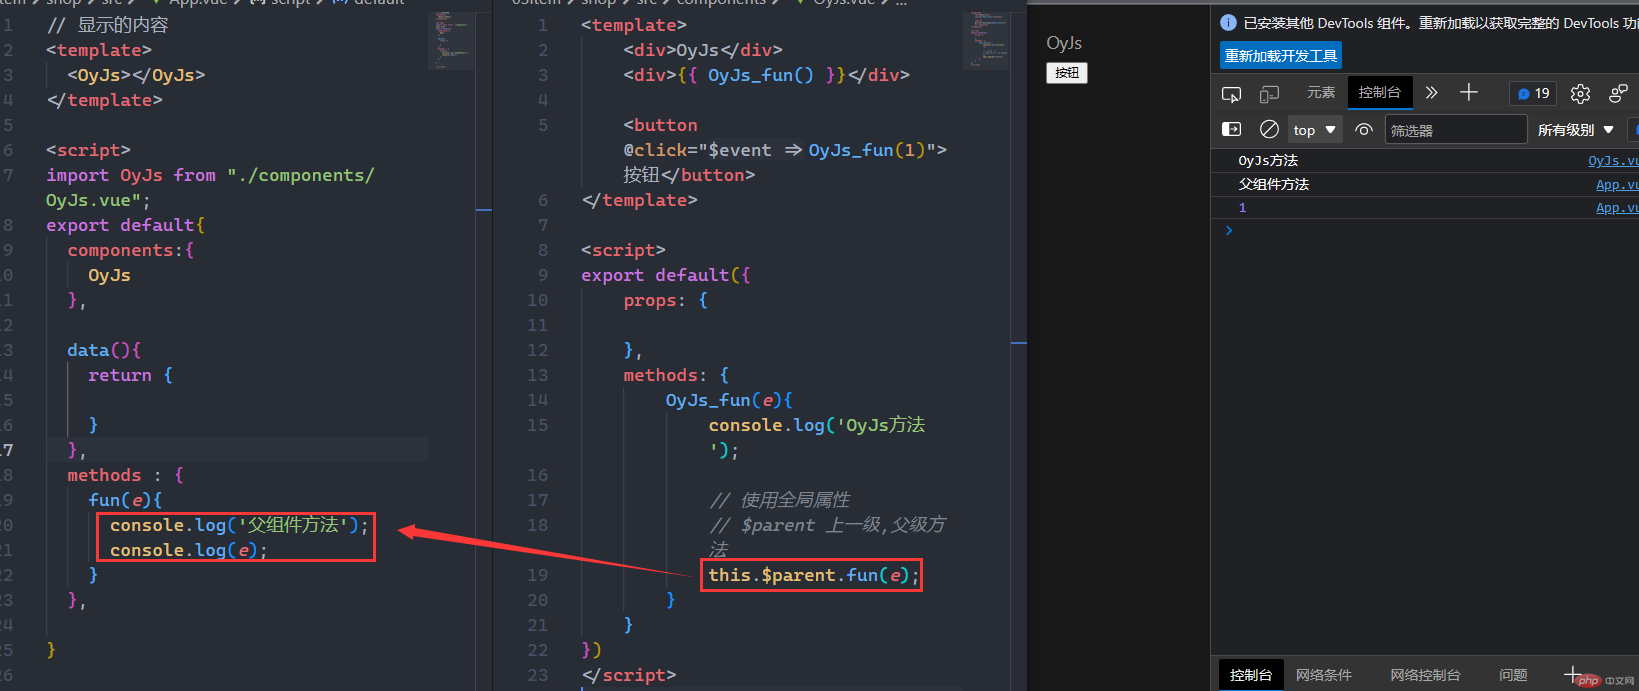
this.$parent.fun: $parent 上一级,父级方法this.$root.fun: $root 最顶层,根目录
8、组件生命周期
| 声明周期 | 作用 |
|---|---|
| beforeCreate | 在创建组件之前调用 |
| created | 组件创建完成调用 |
| beforeMount | 模板挂载之前调用 |
| mounted | 模板挂载完成调用 |
| beforeUpdate | 改变内容之前调用 |
| update | 改变内容之后调用 |
| beforeUnmout | 组件销毁之前调用 |
| unmounted | 组件销毁之后调用 |
二、Vue3路由
路由文件路径:src/router/index.js
视图文件路径:src/view/XxXxx.vue
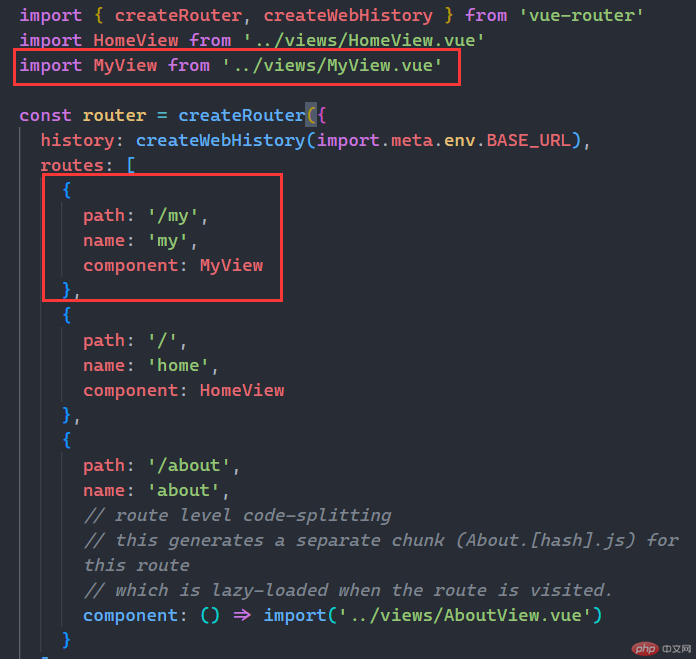
1、新增路由:
- 1.1 创建视图文件:
- 1.2 新建路由:
import MyView from '../views/MyView.vue'routes: [{path: '/my',name: 'my',component: MyView},]
2、单页面跳转
<router-link to = "/">首页</router-link> |<router-link to ="/about">帮助页面</router-link> |<router-link to = "/my">个人中心</router-link>
在页面内刷新跳转新页面,不用怎个页面刷新
3、另外一个router跳转方法
- app.vue文件
<el-button @click="go_url()">跳转</el-button>
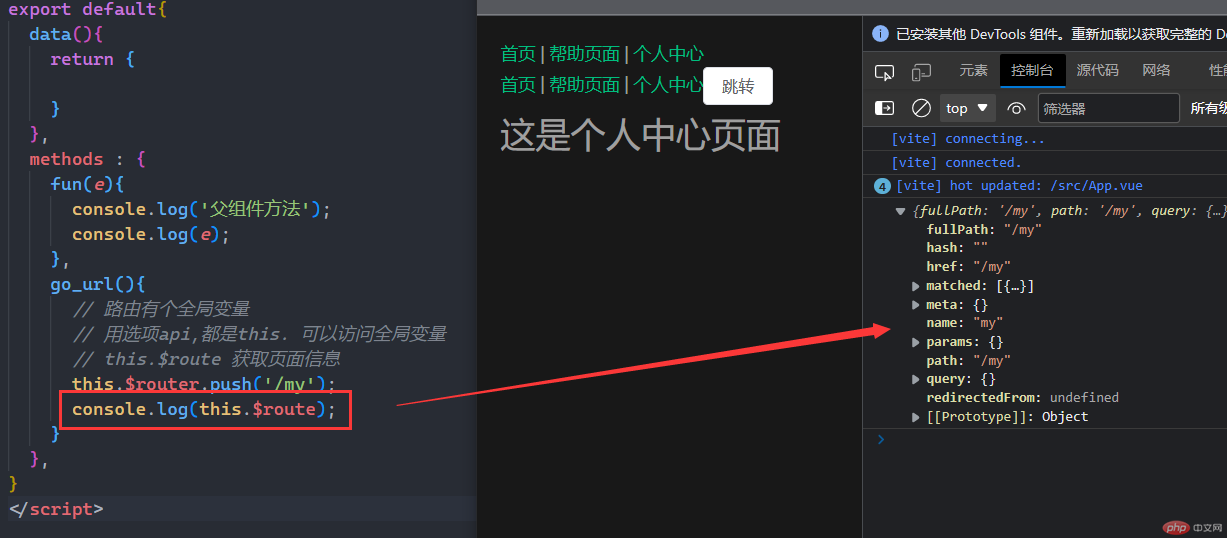
<script>methods : {},go_url(){// 路由有个全局变量// 用选项api,都是this. 可以访问全局变量// this.$route 获取页面信息this.$router.push('/my');}},}</script>
路由跳转不支持跳转至外网,如需要可用a标签this.$router.push:是跳转到新页面this.$route:是获取页面信息
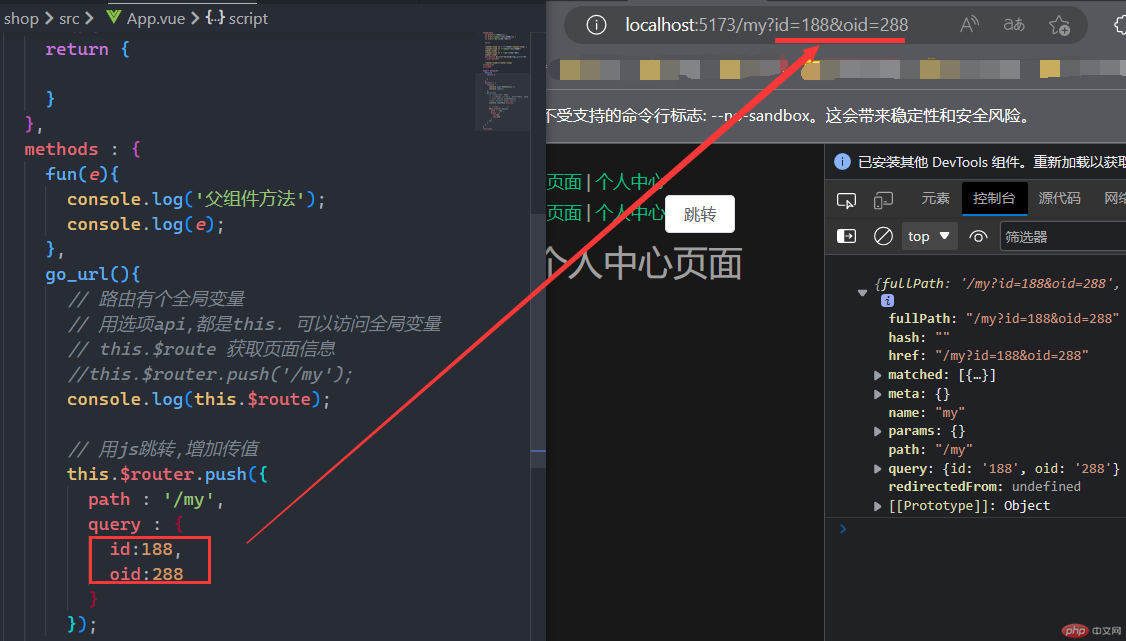
自行配置跳转参数
go_url(){// 路由有个全局变量// 用选项api,都是this. 可以访问全局变量// this.$route 获取页面信息//this.$router.push('/my');console.log(this.$route);// 用js跳转,增加传值this.$router.push({path : '/my',query : {id:188,oid:288}});
4、子路由
- 4.1 创建视图文件:
4.2 新建路由:
修改路由文件 index.js
子路由的path,不能在前面加反斜杠/
import MyOrderView from '../views/MyOrderView.vue'import MyConfigView from '../views/MyConfigView.vue'const router = createRouter({history: createWebHistory(import.meta.env.BASE_URL),routes: [{path: '/my',name: 'my',component: MyView,// 子路由的path,不能在前面加反斜杠/children: [{path: 'order',name: 'my_order',component: MyOrderView,},{path: 'config',name: 'my_config',component: MyConfigView},]},]})
- 修改附近视图文件 MyView.vue
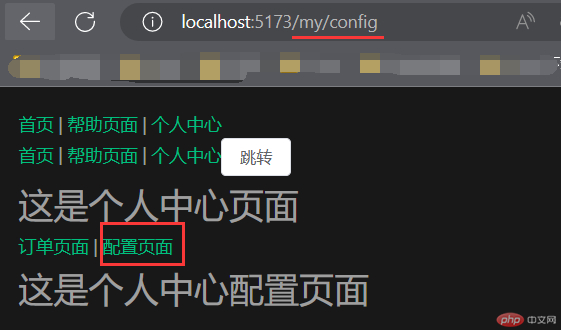
<template><div><h1>这是个人中心页面</h1><router-link to="/my/order">订单页面</router-link> |<router-link to="/my/config">配置页面</router-link><router-view></router-view></div></template>
- 增加子路由文件:MyConfigView.vue、MyOrderView.vue
<template><div><h1>这是个人中心配置页面</h1></div></template>
<template><div><h1>这是个人中心订单页面</h1></div></template>
