如何用node实现爬虫功能
- php中世界最好的语言原创
- 2018-05-23 15:29:261900浏览
这次给大家带来如何用node实现爬虫功能,用node实现爬虫功能的注意事项有哪些,下面就是实战案例,一起来看一下。
node是服务器端的语言,所以可以像python一样对网站进行爬取,下面就使用node对博客园进行爬取,得到其中所有的章节信息。
第一步: 建立crawl文件,然后npm init。
第二步: 建立crawl.js文件,一个简单的爬取整个页面的代码如下所示:
var http = require("http");
var url = "http://www.cnblogs.com";
http.get(url, function (res) {
  var html = "";
  res.on("data", function (data) {
    html += data;
  });
  res.on("end", function () {
    console.log(html);
  });
}).on("error", function () {
  console.log("获取课程结果错误!");
});
即引入http模块,然后利用http对象的get请求,即一旦运行,相当于node服务器端发送了一个get请求请求这个页面,然后通过res返回,其中on绑定data事件用来不断地接受数据,最后end时我们就在后台打印出来。
这只是整个页面的一部分,我们可以在此页面审查元素,发现确实是一样的
我们只需要将其中的章节title和每一小节的信息爬到即可。
第三步: 引入cheerio模块,如下:(在gitbash中安装即可,cmd总是出问题)
cnpm install cheerio --save-dev
这个模块的引入,就是为了方便我们操作dom,就像jQuery一样。
第四步: 操作dom,获取有用信息。
var http = require("http");
var cheerio = require("cheerio");
var url = "http://www.cnblogs.com";
function filterData(html) {
  var $ = cheerio.load(html);
  var items = $(".post_item");
  var result = [];
  items.each(function (item) {
    var tit = $(this).find(".titlelnk").text();
    var aut = $(this).find(".lightblue").text();
    var one = {
      title: tit,
      author: aut
    };
    result.push(one);
  });
  return result;
}
function printInfos(allInfos) {
  allInfos.forEach(function (item) {
    console.log("文章题目 " + item["title"] + '\n' + "文章作者 " + item["author"] + '\n'+ '\n');
  });
}
http.get(url, function (res) {
  var html = "";
  res.on("data", function (data) {
    html += data;
  });
  res.on("end", function (data) {
    var allInfos = filterData(html);
    printInfos(allInfos);
  });
}).on("error", function () {
  console.log("爬取博客园首页失败")
});
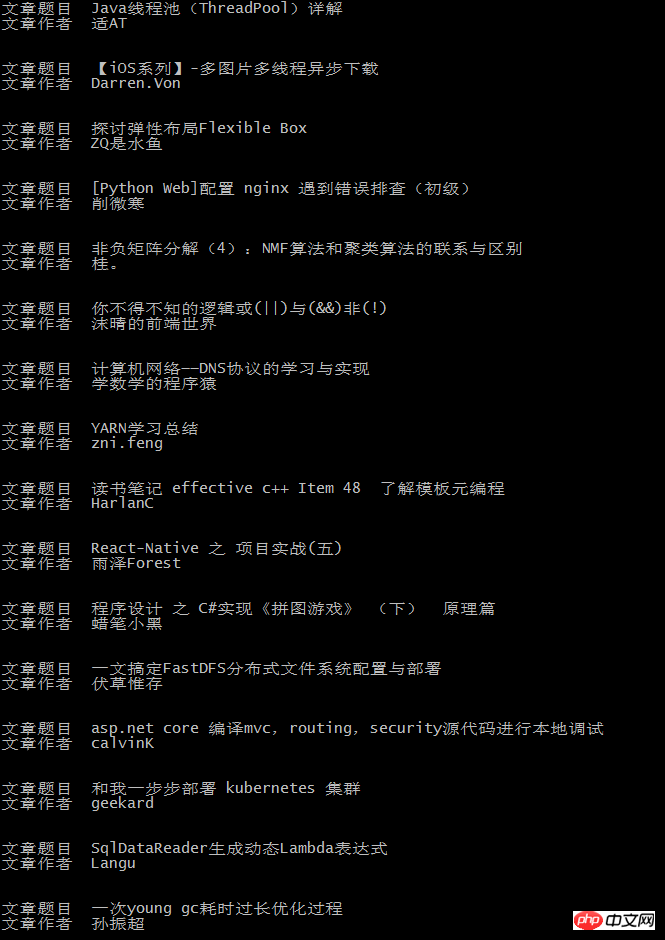
即上面的过程就是在爬取博客的题目和作者。
最终后台输出如下:

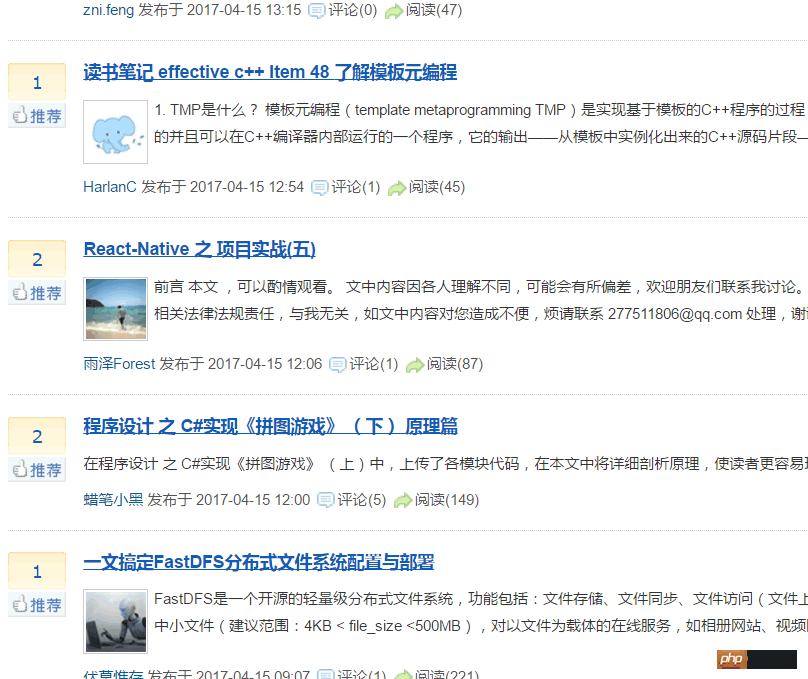
这和博客园首页的内容是一致的:

相信看了本文案例你已经掌握了方法,更多精彩请关注php中文网其它相关文章!
推荐阅读:
以上是如何用node实现爬虫功能的详细内容。更多信息请关注PHP中文网其他相关文章!
声明:
本文内容由网友自发贡献,版权归原作者所有,本站不承担相应法律责任。如您发现有涉嫌抄袭侵权的内容,请联系admin@php.cn

