原生js封装自定义滚动条的代码案例分享
- 黄舟原创
- 2017-03-25 14:49:421612浏览
本文主要介绍了原生js封装自定义滚动条的相关知识。具有很好的参考价值。下面跟着小编一起来看下吧
最近有一个关于制作在线音乐播放器的项目,需要使用一个滚动条,但是自带滚动条实在是太丑了,所以就自己琢磨了一下自定义的滚动条。
在网上看原理,说实话没怎么看懂,就趁今天上午上安卓的时候,研究了一下,结果还算是满意吧。然后就包装一个对象。
使用方法很简单,就是自定义一个p,将这个对象导入做参数,new一下就可以。也可以自己定义滚动条的样式,只要自己修改一下样式表就可以
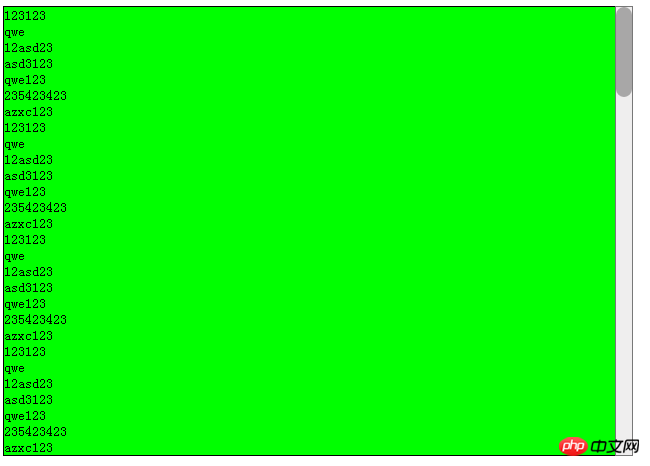
效果图:

代码如下:
<!doctype html>
<html>
<head>
<meta charset="utf-8">
<title></title>
</head>
<style type="text/css">
p{
padding:0px;
box-sizing:border-box;
margin:0px;
border:0px;
}
#p-5{
width: 700px;
height: 500px;
border:1px solid black;
position: relative;
overflow: hidden;
}
.ribbit-OF-p1{
width: 20px;
background-color: rgb(239, 238, 238);
border:1px solid rgba(0,0,0,0.5);
position: absolute;
right:0px;
top: 0px;
cursor:default;
}
.ribbit-OF-p2{
position: absolute;
top:0px;
right: 0px;
width: 100%;
height: 100px;
background-color:rgba(0,0,0,0.3);
border-radius: 10px;
}
.ribbit-OF-p3{
width: 100%;
height:auto;
background-color: lime;
}
</style>
<body>
<p id="p-1">
<p id="p-2">
</p>
</p>
<p id="p-3"><p id="p-4"></p></p>
<p id="p-5">
123123<br/>
qwe<br/>
12asd23<br/>
asd3123<br/>
qwe123<br/>
235423423<br/>
azxc123<br/>
123123<br/>
qwe<br/>
12asd23<br/>
asd3123<br/>
qwe123<br/>
235423423<br/>
azxc123<br/>
123123<br/>
qwe<br/>
12asd23<br/>
asd3123<br/>
qwe123<br/>
235423423<br/>
azxc123<br/>
123123<br/>
qwe<br/>
12asd23<br/>
asd3123<br/>
qwe123<br/>
235423423<br/>
azxc123<br/>
123123<br/>
qwe<br/>
12asd23<br/>
asd3123<br/>
qwe123<br/>
235423423<br/>
azxc123<br/>
123123<br/>
qwe<br/>
12asd23<br/>
asd3123<br/>
qwe123<br/>
235423423<br/>
azxc123<br/>123123<br/>
qwe<br/>
12asd23<br/>
asd3123<br/>
qwe123<br/>
235423423<br/>
azxc123<br/>
123123<br/>
qwe<br/>
12asd23<br/>
asd3123<br/>
qwe123<br/>
235423423<br/>
azxc123<br/>
123123<br/>
qwe<br/>
12asd23<br/>
asd3123<br/>
qwe123<br/>
235423423<br/>
azxc123<br/>
</p>
</body>
<script type="text/javascript">
var p_5 = document.getElementById('p-5');
function OverFlow(element){
this.element = element;
this.ribbit_OF_p1 = document.createElement("p");
this.ribbit_OF_p2 = document.createElement("p");
this.ribbit_OF_p3 = document.createElement("p");
this.createp = function(){
this.ribbit_OF_p1.className = "ribbit-OF-p1";
this.ribbit_OF_p2.className = "ribbit-OF-p2";
this.ribbit_OF_p3.className = "ribbit-OF-p3";
this.ribbit_OF_p3.innerHTML = this.element.innerHTML;
this.element.innerHTML="";
this.element.appendChild(this.ribbit_OF_p3);
this.ribbit_OF_p1.appendChild(this.ribbit_OF_p2);
document.body.appendChild(this.ribbit_OF_p1);
this.ribbit_OF_p1.style.height = getComputedStyle(this.element,null).height;
this.ribbit_OF_p1.style.left = (this.element.offsetLeft+(parseInt(getComputedStyle(this.element,null).width)
-parseInt(getComputedStyle(this.ribbit_OF_p1,null).width)))+"px";
this.ribbit_OF_p1.style.top = this.element.offsetTop+"px";
this.ribbit_OF_p2.style.top = "0px";
}
this.addAudo=function(){
var YY=null;//前鼠标位置
var topXX = 0;//前top位置
var topX = 0;//后top值
var vherght = parseInt(getComputedStyle(this.ribbit_OF_p3,null).height)-parseInt(getComputedStyle(this.element,null).height);//可移动
var dst = 0;
//最大top移动位置
var top_x = parseInt(getComputedStyle(this.ribbit_OF_p1,null).height)-parseInt(getComputedStyle(this.ribbit_OF_p2,null).height);
var thio = this;
window.onmousemove = function(e){
fun(e.clientY);
};
this.ribbit_OF_p2.onmousedown=function(e){
YY = e.clientY;
topXX =parseInt(this.style.top);
return false;
}
window.onmouseup=function(){
YY = null;
return true;
}
function fun(y){
if(top_x>=topX&&topX>=0&&YY!=null){
topX = y-YY+topXX;
if(topX<0)topX=0;
if(topX>top_x)topX=top_x-1;
thio.ribbit_OF_p2.style.top = (topX-1)+"px";
dst = topX*vherght/top_x;
thio.element.scrollTop = dst;
}
}
}
this.createp();
this.addAudo();
}
new OverFlow(p_5);
</script>
</html>以上是原生js封装自定义滚动条的代码案例分享的详细内容。更多信息请关注PHP中文网其他相关文章!
声明:
本文内容由网友自发贡献,版权归原作者所有,本站不承担相应法律责任。如您发现有涉嫌抄袭侵权的内容,请联系admin@php.cn
上一篇:详解JS正则替换去空格的方法下一篇:详解JS获取当前时间的方法示例代码

