例如:
Internet Explorer 6.0+
Firefox 2.0+
Opera 9.0+
Safari 3.0+
Google Chrome 1.0+
Konqueror 3.5+
使用qTip可以很轻松的定义tip的位置以及样式,同时qTip还有一个强大的API......
使用qTip前,只需引入两个JS文件即可:
下面举几个比较简单的例子。
1、Basic text
html如下所示:
JS代码:
效果如图所示:

2、Title attribute
html如下所示:
JS代码:
效果如图所示:

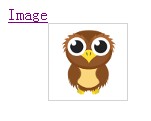
3、Image
html如下所示:
JS代码:
效果如图所示:

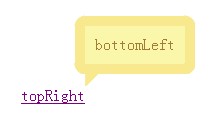
4、Corner values
html如下所示:
JS代码:
效果如图所示:

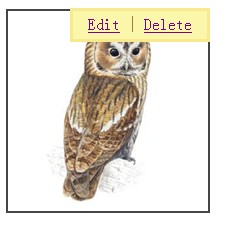
5、Fixed tooltips
html如下所示:

JS代码:
css代码:
效果如图所示:

6、Loading html
html如下所示:
JS代码:
Js代码
效果如图所示:

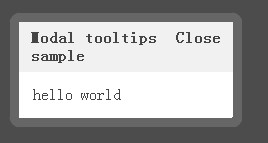
7、Modal tooltips
html如下所示:
JS代码:
效果如图所示:

 使用Next.js(后端集成)构建多租户SaaS应用程序Apr 11, 2025 am 08:23 AM
我使用您的日常技术工具构建了功能性的多租户SaaS应用程序(一个Edtech应用程序),您可以做同样的事情。 首先,什么是多租户SaaS应用程序? 多租户SaaS应用程序可让您从唱歌中为多个客户提供服务
 如何使用Next.js(前端集成)构建多租户SaaS应用程序Apr 11, 2025 am 08:22 AM
本文展示了与许可证确保的后端的前端集成,并使用Next.js构建功能性Edtech SaaS应用程序。 前端获取用户权限以控制UI的可见性并确保API要求遵守角色库
 JavaScript:探索网络语言的多功能性Apr 11, 2025 am 12:01 AM
JavaScript是现代Web开发的核心语言,因其多样性和灵活性而广泛应用。1)前端开发:通过DOM操作和现代框架(如React、Vue.js、Angular)构建动态网页和单页面应用。2)服务器端开发:Node.js利用非阻塞I/O模型处理高并发和实时应用。3)移动和桌面应用开发:通过ReactNative和Electron实现跨平台开发,提高开发效率。
 JavaScript的演变:当前的趋势和未来前景Apr 10, 2025 am 09:33 AM
JavaScript的最新趋势包括TypeScript的崛起、现代框架和库的流行以及WebAssembly的应用。未来前景涵盖更强大的类型系统、服务器端JavaScript的发展、人工智能和机器学习的扩展以及物联网和边缘计算的潜力。
 神秘的JavaScript:它的作用以及为什么重要Apr 09, 2025 am 12:07 AM
JavaScript是现代Web开发的基石,它的主要功能包括事件驱动编程、动态内容生成和异步编程。1)事件驱动编程允许网页根据用户操作动态变化。2)动态内容生成使得页面内容可以根据条件调整。3)异步编程确保用户界面不被阻塞。JavaScript广泛应用于网页交互、单页面应用和服务器端开发,极大地提升了用户体验和跨平台开发的灵活性。
 Python还是JavaScript更好?Apr 06, 2025 am 12:14 AM
Python更适合数据科学和机器学习,JavaScript更适合前端和全栈开发。 1.Python以简洁语法和丰富库生态着称,适用于数据分析和Web开发。 2.JavaScript是前端开发核心,Node.js支持服务器端编程,适用于全栈开发。
 如何安装JavaScript?Apr 05, 2025 am 12:16 AM
JavaScript不需要安装,因为它已内置于现代浏览器中。你只需文本编辑器和浏览器即可开始使用。1)在浏览器环境中,通过标签嵌入HTML文件中运行。2)在Node.js环境中,下载并安装Node.js后,通过命令行运行JavaScript文件。
 在Quartz中如何在任务开始前发送通知?Apr 04, 2025 pm 09:24 PM
如何在Quartz中提前发送任务通知在使用Quartz定时器进行任务调度时,任务的执行时间是由cron表达式设定的。现�...


热AI工具

Undresser.AI Undress
人工智能驱动的应用程序,用于创建逼真的裸体照片

AI Clothes Remover
用于从照片中去除衣服的在线人工智能工具。

Undress AI Tool
免费脱衣服图片

Clothoff.io
AI脱衣机

AI Hentai Generator
免费生成ai无尽的。

热门文章

热工具

WebStorm Mac版
好用的JavaScript开发工具

螳螂BT
Mantis是一个易于部署的基于Web的缺陷跟踪工具,用于帮助产品缺陷跟踪。它需要PHP、MySQL和一个Web服务器。请查看我们的演示和托管服务。

SecLists
SecLists是最终安全测试人员的伙伴。它是一个包含各种类型列表的集合,这些列表在安全评估过程中经常使用,都在一个地方。SecLists通过方便地提供安全测试人员可能需要的所有列表,帮助提高安全测试的效率和生产力。列表类型包括用户名、密码、URL、模糊测试有效载荷、敏感数据模式、Web shell等等。测试人员只需将此存储库拉到新的测试机上,他就可以访问到所需的每种类型的列表。

VSCode Windows 64位 下载
微软推出的免费、功能强大的一款IDE编辑器

Atom编辑器mac版下载
最流行的的开源编辑器


