
使用 NodeJs 开始使用 RabbitMq

- 王林原创
- 2024-09-07 15:00:37454浏览
Introduction to RabbitMq
RabbitMq is a message broker that allows sending and receiving messages between different services. It is a message broker that implements the Advanced Message Queuing Protocol (AMQP). Written with Erlang Programming Language.
Installing RabbitMq
RabbitMq can be installed on different operating systems Using there respective package managers. RabbitMQ requires Erlang/OTP to be installed beforehand, please refer to the official documentation for more information.
- Linux
sudo apt-get install rabbitmq-server
- Mac
brew install rabbitmq
Once installed, we can start the RabbitMq server using the following command:
sudo rabbitmq-server

Once the server is started, we can access rabbitmq from our application using the default port 5672.
To enable the RabbitMq management console, we can run the following command:
sudo rabbitmq-plugins enable rabbitmq_management
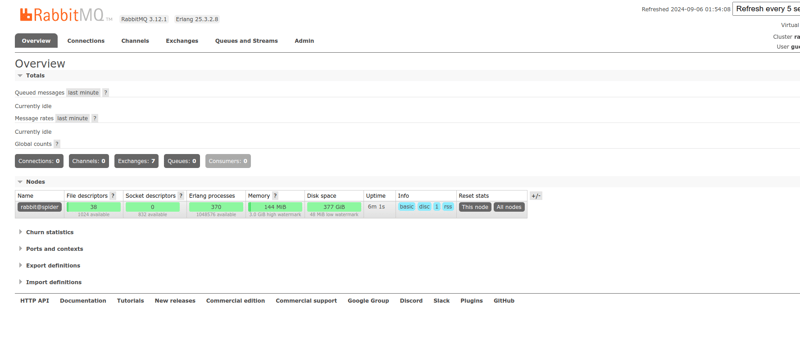
we can access the RabbitMq management console by visiting http://localhost:15672/ in your browser. The default username and password are guest.
Setting up RabbitMq with NodeJs
To interact with RabbitMq from NodeJs, we can use the amqplib library. We can install the library using the following command:
npm install amqplib
To connect to RabbitMq from NodeJs and create a channel to interact with RabbitMq, we can use the following code:
const amqp = require("amqplib");

const connect = async (url) => {
  const connection = await amqp.connect(url);
  const channel = await connection.createChannel();

  return channel;
};

connect("amqp://localhost:5672").then((channel) => {
  console.log("Connected to RabbitMQ");
  channel.close();
  process.exit(0);
});
Now, we have a channel to interact with RabbitMq. We can use this channel to send and receive messages from RabbitMq. let name our queue mq-test-queue and send a message to the queue.
connect("amqp://localhost:5672").then((channel) => {
  console.log("Connected to RabbitMQ");
  channel.assertQueue("mq-test-queue");
  console.log("Queue created");
  channel.sendToQueue("mq-test-queue", Buffer.from("Hello World!"));
  console.log("Message sent");
});
We have created a queue mq-test-queue and sent a message Hello World! to the queue. To create a Queue, we have used the assertQueue method and to send a message to the queue, we have used the sendToQueue method.
To receive a message from the queue, we can use the consume method.
connect("amqp://localhost:5672").then((channel) => {
  console.log("Connected to RabbitMQ");
  channel.assertQueue("mq-test-queue");
  console.log("Queue created");
  channel.sendToQueue("mq-test-queue", Buffer.from("Hello World!"));
  console.log("Message sent");
  channel.consume("mq-test-queue", (msg) => {
    console.log("Message received", msg.content.toString());
  });
});
The consume method takes a callback function and passes the message object to the callback function to access the message content using msg.content.toString().
After consuming the message, we need to ack or nack the message to remove the message from the queue. We can use the ack method to acknowledge the message and the nack method to reject the message.
For this example, we will ack the message after consuming the message.
const amqp = require("amqplib");

const connect = async (url) => {
  const connection = await amqp.connect(url);
  const channel = await connection.createChannel();

  return channel;
};

connect("amqp://localhost:5672").then((channel) => {
  console.log("Connected to RabbitMQ");
  channel.assertQueue("mq-test-queue");
  console.log("Queue created");
  channel.sendToQueue("mq-test-queue", Buffer.from("Hello World!"));
  console.log("Message sent");
  channel.consume("mq-test-queue", (msg) => {
    console.log("Message received", msg.content.toString());
    channel.ack(msg);
  });
});
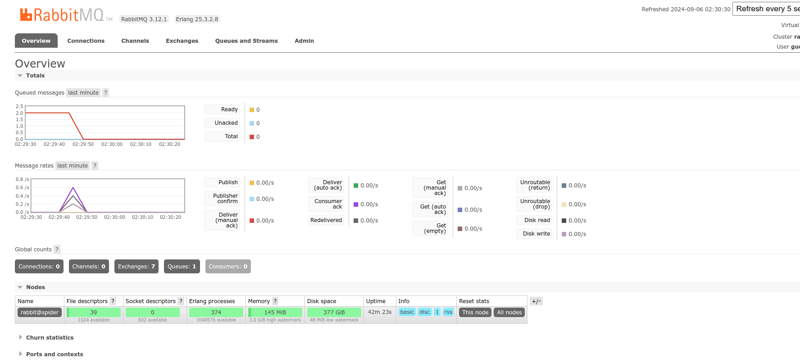
We can see messages sent and received successfully from the queue. using rabbitmq management console.
Conclusion
In this article, we have learned how to set up RabbitMq and interact with RabbitMq from NodeJs using the amqplib library. We have created a queue, sent a message to the queue, and received a message from the queue.
以上是使用 NodeJs 开始使用 RabbitMq的详细内容。更多信息请关注PHP中文网其他相关文章!