WordPress 外掛設定
在本章中,我們將研究如何在WordPress網站中使用外掛程式。 外掛允許輕鬆修改,自訂或增強WordPress部落格或貼文。 WordPress外掛程式是一個軟體,可以上傳以擴展網站的功能。 他們為WordPress部落格添加服務或功能。 插件用於使您的工作更輕鬆。 以下是添加插件的簡單步驟。
步驟(1) - 在左側欄中,點選Plugins → Installed Plugins,如圖所示。
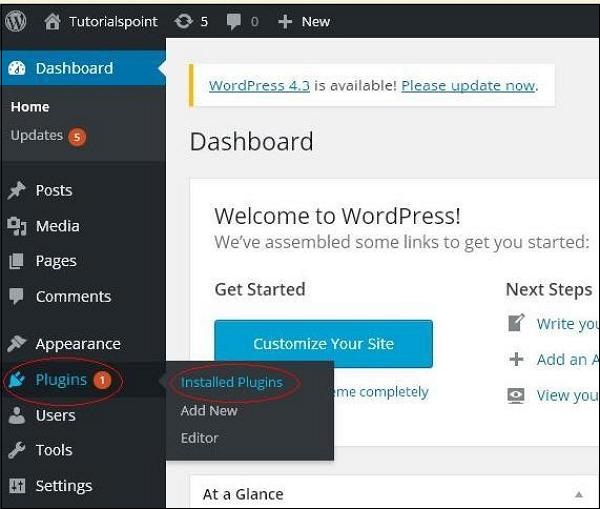
步驟(2) - 顯示下列頁面。
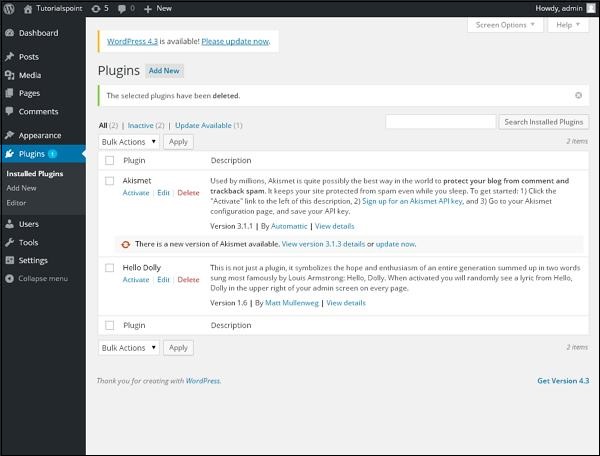
在此部分中,您可以查看已安裝的外掛程式。
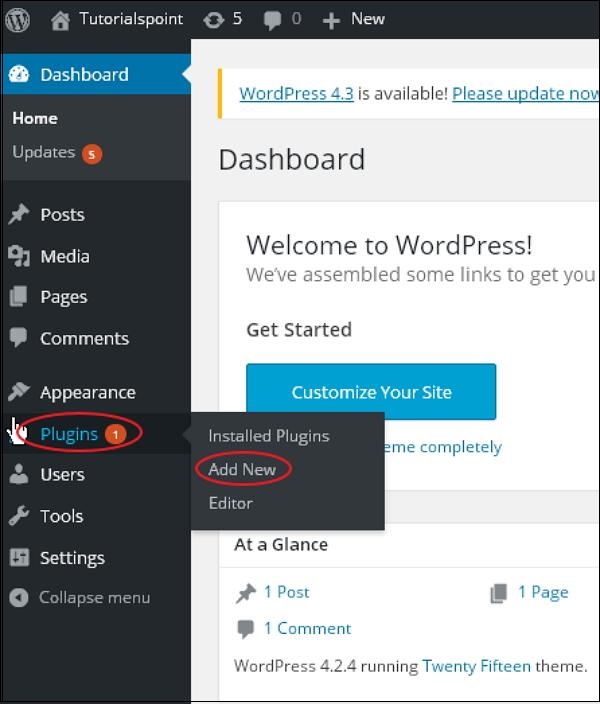
步驟(3) - 點選Plugins → Add New,如下圖所示。
步驟(4) - 出現在WordPress中使用的外掛程式清單。 您可以在這裡直接從可用的清單中安裝外掛程序,也可以按一下Upload Plugin上傳外掛程式。
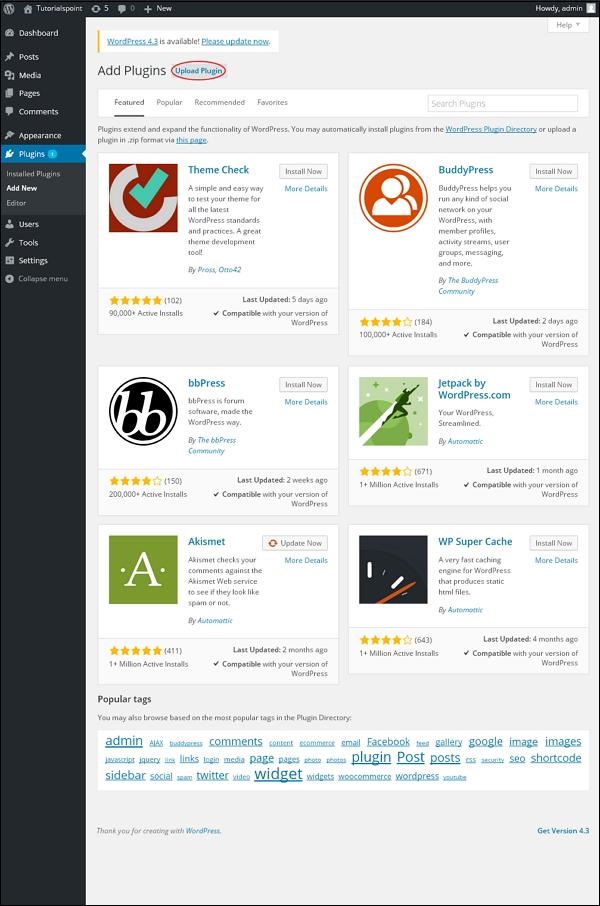
當你點擊上傳插件,你會得到以下頁面。
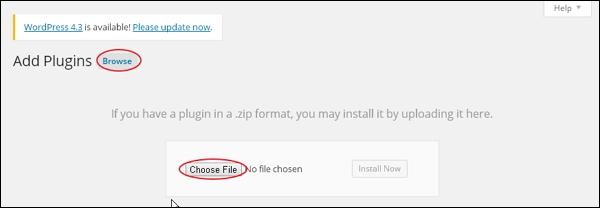
點擊Browse,它會回到您可以從WordPress網站選擇外掛程式的頁面。 如果您點擊Choose File,您可以從系統新增檔案。 否則,您可以直接選擇所需的插件,然後點擊Install now,如下面的螢幕截圖所示。
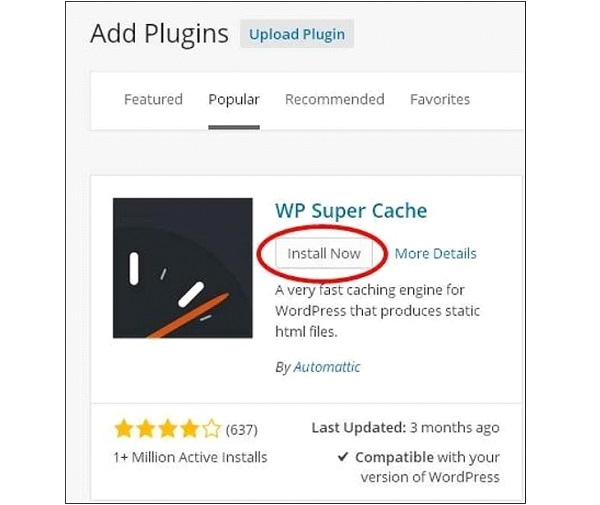
當您按一下立即安裝時,軟體包開始下載並安裝。 然後,點擊Activate plugin以啟動該外掛程式以在WordPress中使用,如下面的畫面所示。
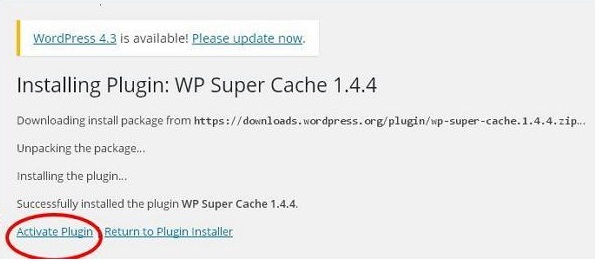
點擊啟用外掛後,您會收到一則訊息:外掛程式已啟動,您也可以在清單中找到已安裝的外掛程式。
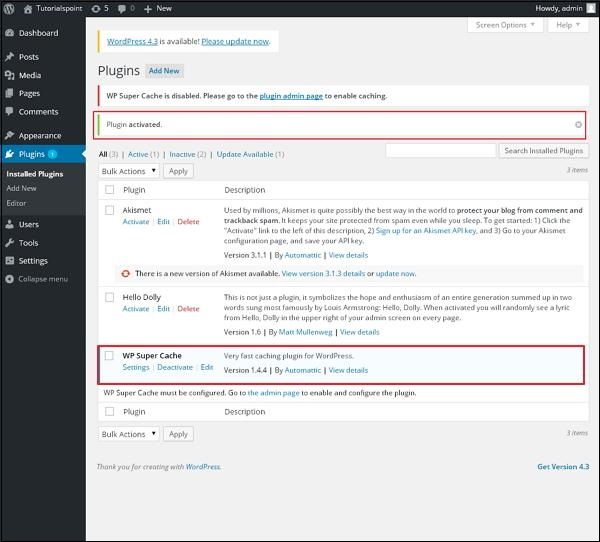
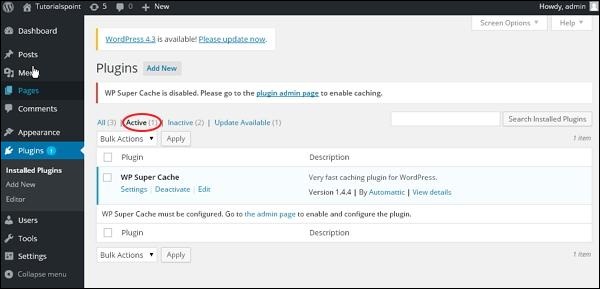
在外掛程式已啟用下方,您可以查看幾個選項,例如All, Active, Inactive 和 Update available
當您點選 Active 時,將顯示下列頁面。 在這裡您可以查看所有已啟用的插件。
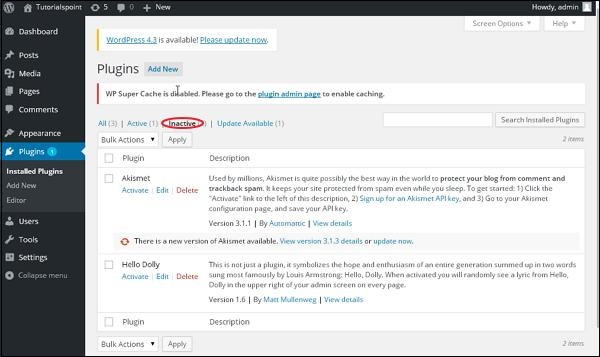
當我們點選Inactive#時,會顯示可用但未啟動的外掛程式。 您可以點擊Activate來啟動此外掛程式。
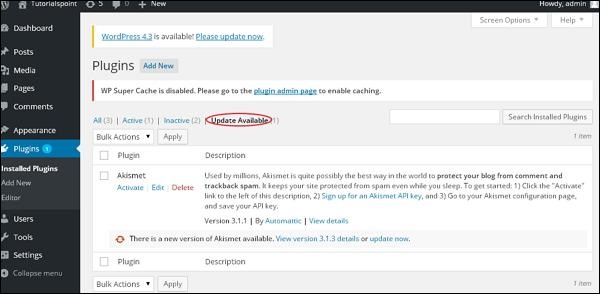
當您點擊Update available時,您會看到一個必須更新的外掛程式清單。 點擊Update,您會收到更新的訊息。
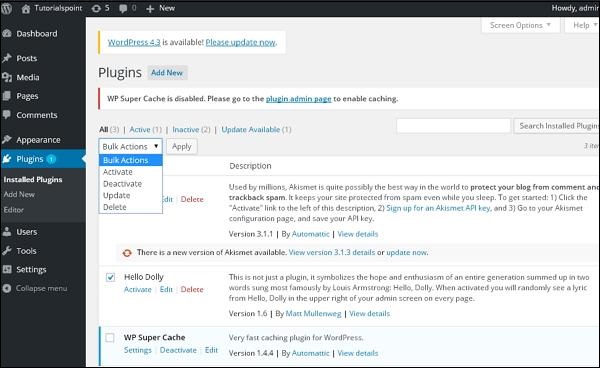
點選Bulk Actions,然後選擇任意選項。 點選Apply按鈕,透過選取對應的框框,更新,刪除,啟用或停用每個外掛程式。
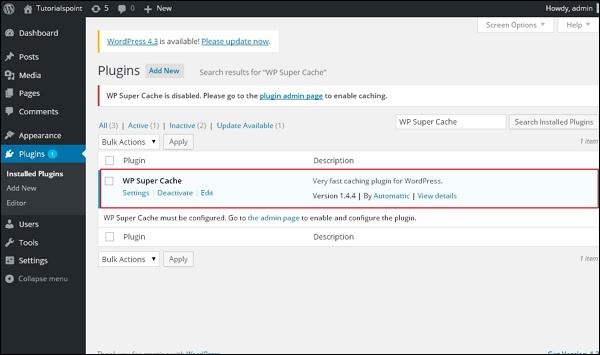
在 Search Installed Plugins 中,您只需在已安裝的文字方塊中輸入您的外掛程式名稱,然後點擊Search Installed Plugins按鈕即可。
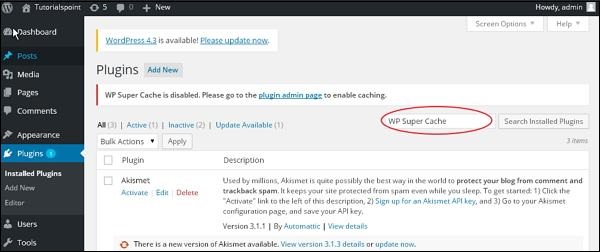
當您點擊Search installed Plugin按鈕時,您會看到以下頁面以及對應的外掛程式。
步驟(5) - 點選側邊欄中的Plugins → Editor。

步驟(6) - 顯示下列頁面。

此頁面允許您編輯外掛程式。 解釋幾個選項。
Select plugin to edit (選擇要編輯的外掛程式) - 允許您從下拉清單中選擇一個外掛程式並進行編輯。
Documentation(文件) - 允許您從下拉清單中選擇工具來編輯外掛程式。
Plugin files(外掛程式檔案) - 允許您從清單中選擇文件,並進行相應編輯。
最後,編輯外掛檔後,點選Update檔。


