自訂主題:調整配色方案設定和控件
- PHPz原創
- 2023-09-03 15:13:011470瀏覽
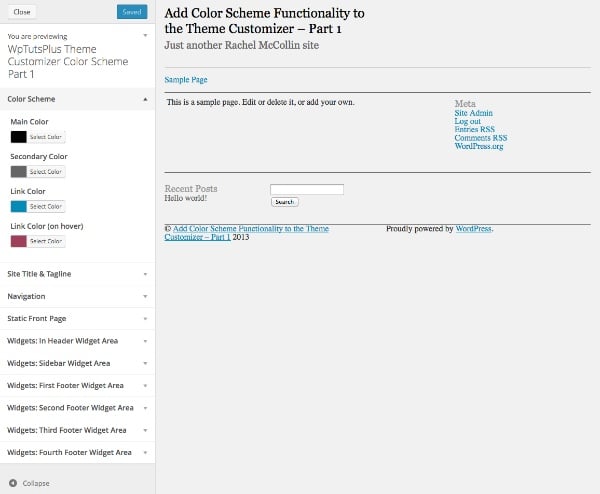
#主題自訂器是一個很棒的工具,可以讓您的使用者更自由地調整主題,而無需編輯程式碼。但如果您想讓用戶更改其網站的顏色,事情可能會變得複雜。為他們可以更改的每個元素添加一個控制項將使事情變得很麻煩,並且用戶最終可能會得到一個看起來花哨混亂的網站。
您可以簡單地創建一個配色方案,允許用戶選擇幾種顏色,然後將它們應用到主題中的一系列元素,而不是為您希望用戶能夠更改的所有元素添加大量控制項.
在本教學中,我將帶您完成此過程的第一部分,即設定主題自訂器控制項。在下一部分中,我將向您展示如何將這些控制項連結到您的主題,以便當使用者選擇顏色時,它們會被帶入主題。
起點
首先安裝啟動主題並啟動它。主題定制器將如下所示:
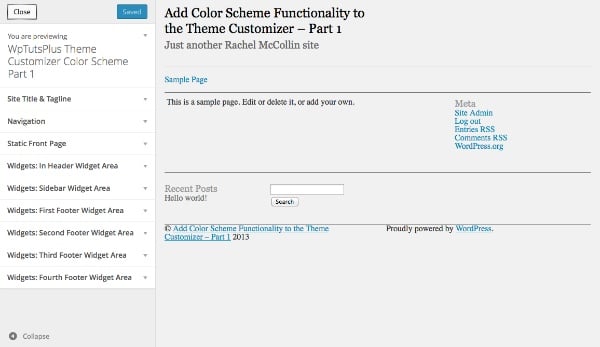
完成本教學後,您的自訂工具將有兩個額外的部分。
設定主題定制器
第一步是在主題中建立一個檔案來儲存自訂器功能。我將使用一個基本的起始主題,該主題基於我在從靜態 HTML 建立 WordPress 主題系列中建立的主題。我對其進行了一些修改,以便它可以與配色方案功能一起使用,因此如果您想完成本教程,我建議您下載起始主題。
在主題的主資料夾中,建立一個名為 inc 的資料夾,並在其中建立一個名為 customizer.php 的檔案。
開啟 functions.php 檔案並新增以下內容,其中將包含您剛剛建立的新檔案:
include_once( 'inc/customizer.php' );
現在在您的 customizer.php 檔案中,加入以下函數:
function wptutsplus_customize_register( $wp_customize ) {

}
add_action( 'customize_register', 'wptutsplus_customize_register' );
這將建立一個包含所有設定和控制項的函數,並將其掛鉤到 customize_register 操作掛鉤。您的主題已準備就緒!
建立配色方案設定和控制項
第一步是加入配色方案的設定和控制項。您將新增四個顏色選擇器的控制:主顏色、輔助顏色和兩個連結顏色。
新增部分
在您剛剛建立的函數中,加入以下內容:
/*******************************************
Color scheme
********************************************/

// add the section to contain the settings
$wp_customize->add_section( 'textcolors' , array(
    'title' =>  'Color Scheme',
) );
這會為您的配色方案控制項建立一個空白部分。
定義顏色參數
緊接著在下面加上:
// main color ( site title, h1, h2, h4. h6, widget headings, nav links, footer headings )
$txtcolors[] = array(
	'slug'=>'color_scheme_1',
	'default' => '#000',
	'label' => 'Main Color'
);

// secondary color ( site description, sidebar headings, h3, h5, nav links on hover )
$txtcolors[] = array(
	'slug'=>'color_scheme_2',
	'default' => '#666',
	'label' => 'Secondary Color'
);

// link color
$txtcolors[] = array(
	'slug'=>'link_color',
	'default' => '#008AB7',
	'label' => 'Link Color'
);

// link color ( hover, active )
$txtcolors[] = array(
	'slug'=>'hover_link_color',
	'default' => '#9e4059',
	'label' => 'Link Color (on hover)'
);
這會為主題自訂器新增一個名為「配色方案」的新部分。然後,它為您將使用的四種顏色設定參數:slug、預設值和標籤。預設值是主題中使用的顏色,因此您可能需要將其變更為主題中的顏色。
建立顏色設定
接下來,您需要使用剛剛定義的參數來建立顏色設定。在最後一個程式碼區塊下方,鍵入:
// add the settings and controls for each color
foreach( $txtcolors as $txtcolor ) {

    // SETTINGS
	$wp_customize->add_setting(
		$txtcolor['slug'], array(
			'default' => $txtcolor['default'],
			'type' => 'option',
			'capability' =>	'edit_theme_options'
		)
	);

}
這使用 foreach 語句來處理您剛剛定義的每種顏色,並使用您定義的參數為每種顏色建立一個設定。但您仍然需要添加控件,以便用戶可以使用主題定制器與這些設定進行互動。
新增控制項
在 foreach 大括號內以及剛剛新增的 add_setting() 函數下方,插入以下內容:
// CONTROLS
$wp_customize->add_control(
    new WP_Customize_Color_Control(
		$wp_customize,
		$txtcolor['slug'],
		array('label' => $txtcolor['label'],
		'section' => 'textcolors',
		'settings' => $txtcolor['slug'])
	)
);
這會使用 WP_Customize_Color_Control() 函數為每種顏色添加一個顏色選擇器,該函數為主題定制器建立顏色選擇器。
整個 foreach 語句現在將如下所示:
// add the settings and controls for each color
foreach( $txtcolors as $txtcolor ) {

    // SETTINGS
	$wp_customize->add_setting(
		$txtcolor['slug'], array(
			'default' => $txtcolor['default'],
			'type' => 'option',
			'capability' =>
			'edit_theme_options'
		)
	);
	// CONTROLS
	$wp_customize->add_control(
		new WP_Customize_Color_Control(
			$wp_customize,
			$txtcolor['slug'],
			array('label' => $txtcolor['label'],
			'section' => 'textcolors',
			'settings' => $txtcolor['slug'])
		)
	);
}
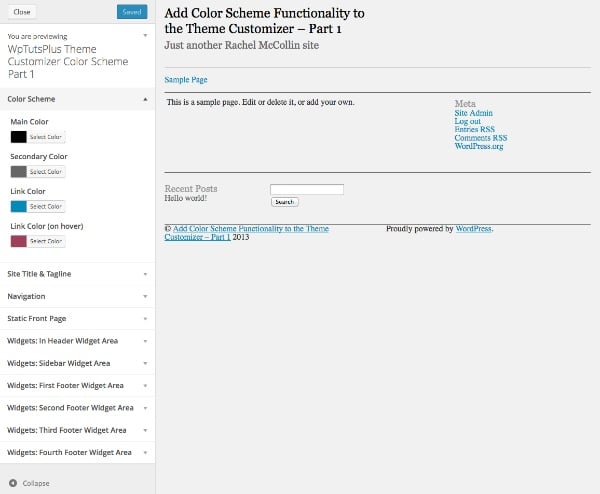
現在,當您打開主題自訂器並啟動主題時,您將能夠看到新部分:
當您展開其中一個控制項時,您將能夠看到顏色選擇器:
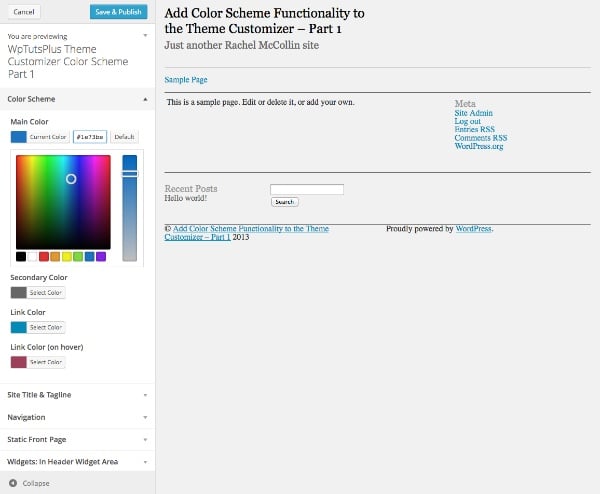
目前,您對顏色選擇器所做的任何操作都不會實際反映在您的主題中,因為您尚未添加任何CSS使其發揮作用- 我們將在本在系列的第2 部分中討論這一點。現在,我們將添加另一個部分,以便用戶更好地控制他們的配色方案。
建立純色背景設定和控制項
下一部分將不允許使用者選擇顏色,而是為他們提供向其網站的頁首和/或頁尾添加純色背景的選項。如果他們選擇此選項,這些元素的背景和文字顏色將會改變。
在您刚刚添加的代码下方,但仍在 wptutsplus_customize_register() 函数内,添加以下内容:
/**************************************
Solid background colors
***************************************/
// add the section to contain the settings
$wp_customize->add_section( 'background' , array(
    'title' =>  'Solid Backgrounds',
) );


// add the setting for the header background
$wp_customize->add_setting( 'header-background' );

// add the control for the header background
$wp_customize->add_control( 'header-background', array(
	'label'      => 'Add a solid background to the header?',
	'section'    => 'background',
	'settings'   => 'header-background',
	'type'       => 'radio',
	'choices'    => array(
		'header-background-off'   => 'no',
		'header-background-on'  => 'yes',
) ) );


// add the setting for the footer background
$wp_customize->add_setting( 'footer-background' );

// add the control for the footer background
$wp_customize->add_control( 'footer-background', array(
	'label'      => 'Add a solid background to the footer?',
	'section'    => 'background',
	'settings'   => 'footer-background',
	'type'       => 'radio',
	'choices'    => array(
		'footer-background-off'   => 'no',
		'footer-background-on'  => 'yes',
		)
	)
);
这将添加第二个名为“纯色背景”的新部分,然后向其中添加两个控件,这两个控件都是单选框。在每种情况下都有两种选择:是和否。在本系列的第二部分中,我将向您展示如何根据这些选择定义变量并使用它们来更改主题中的 CSS。
您现在可以在主题定制器中看到新部分:
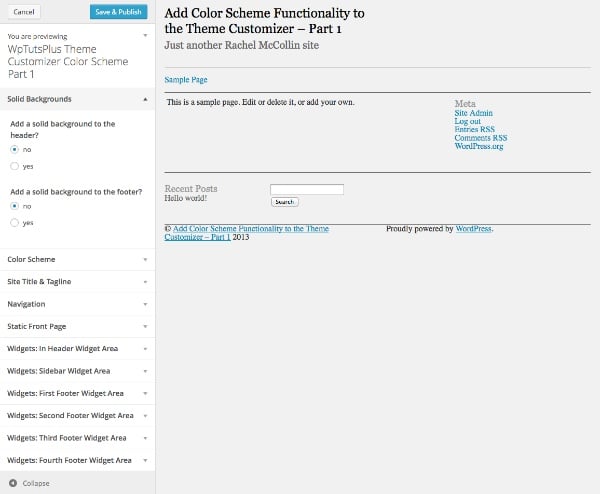
同样,如果您选择其中一个单选框,则不会发生任何事情,因为您尚未将其链接到主题的 CSS ,但这终将到来。
摘要
在第一部分中,您添加了为您的配色方案创建主题定制器界面所需的设置和控件。
在下一部分中,我将向您展示如何根据用户在主题定制器中所做的选择来定义变量,然后使用这些变量来设置 CSS。
以上是自訂主題:調整配色方案設定和控件的詳細內容。更多資訊請關注PHP中文網其他相關文章!

