淺談React+Storeon進行狀態管理的方法
- 青灯夜游轉載
- 2021-04-15 12:48:262674瀏覽
本篇文章為大家介紹React中使用事件驅動程式進行狀態管理的方法。有一定的參考價值,有需要的朋友可以參考一下,希望對大家有幫助。

自 Hook 被引入 React 以來,Context API 與 Hook 函式庫在應用程式狀態管理中被一起使用。但把 Context API 和 Hooks(許多基於 Hooks 的狀態管理函式庫建立在其基礎上)組合的用法對於大規模應用來說可能效率不高。
由於必須建立一個自訂的 Hook 才能啟用對狀態及其方法的訪問,然後才能在元件中使用它,所以在實際開發中很繁瑣。這違反了 Hook 的真正目的:簡單。但對於較小的應用,Redux 可能會顯得太重了。
今天我們將討論 Context API 的替代方法:Storeon。 Storeon 是一個微型的、事件驅動的 React 狀態管理函式庫,其原理類似於 Redux。用 Redux DevTools 可以查看並視覺化狀態操作。 Storeon 內部使用 Context API 來管理狀態,並採用事件驅動的方法進行狀態操作。
【相關教學推薦:React影片教學】
#Store
store 是在應用程式狀態下儲存的數據的集合。它是透過從 Storeon 庫導入的 createStoreon() 函數建立的。
createStoreon() 函數接受模組列表,其中每個模組都是接受 store 參數並綁定其事件監聽器的函數。這是一個store 的例子:
import { createStoreon } from 'storeon/react'
// todos module
const todos = store => {
  store.on(event, callback)
}

export default const store = createStoreon([todos])
模組化
Storeon 中的store 是模組化的,也就是說,它們是獨立定義的,並且沒有被綁定到Hook 或元件。每個狀態及其操作方法均在稱為模組的函數中定義。這些模組會傳遞到 createStoreon() 函數中,然後將其註冊為全域 store。
store 有三種方法:
store.get()– 用於擷取狀態中的目前資料。store.on(event, callback)– 用來把事件偵聽器註冊到指定的事件名稱。store.dispatch(event, data)– 用於發出事件,並根據定義的事件要求將可選資料傳遞進來。
Events
Storeon 是基於事件的狀態管理庫,狀態變更由狀態模組中定義的事件發出。 Storeon 中有三個內建事件,它們以 @ 開頭。其他事件不帶 @ 前綴定義。三個內建事件是:
@init– 在套用載入時觸發此事件。它用於設定應用程式的初始狀態,並執行傳遞給它的回呼中的所有內容。@dispatch– 此事件在每個新動作上觸發。這對於調試很有用。@changed– 當應用程式狀態發生變更時,將觸發此事件。
注意:store.on(event,callback) 用於在我們的模組中新增事件監聽器。
示範程式
為了示範在 Storeon 中如何執行應用程式狀態操作,我們將建立一個簡單的 notes 程式。也會用 Storeon 的另一個軟體套件把狀態資料保存在 localStorage 中。
假設你有 JavaScript 和 React 的基本知識。你可以在 https://github.com/Youngestde... 上找到本文中使用的程式碼。
設定
在深入探討之前,讓我們先勾勒出 Notes 程式所需的專案結構和相依性的安裝。從建立專案資料夾開始。
mkdir storeon-app && cd storeon-app
mkdir {src,public,src/Components}
touch public/{index.html, style.css} && touch src/{index,store,Components/Notes}.js
接下來,初始化目錄並安裝所需的依賴項。
npm init -y
npm i react react-dom react-scripts storeon @storeon/localstorage uuidv4
接下來就是在 index.js檔案中寫父元件了。
index.js
這個檔案負責渲染我們的筆記元件。首先導入所需的包。
import React from 'react'
import { render } from 'react-dom';
function App() {
return (
<>
Hello!
</>
);
}
const root = document.getElementById('root');
render(<App />, root);接下來透過在 store.js 中編寫用於狀態的初始化和操作的程式碼來建立 store。
store.js
此檔案負責處理應用程式中的狀態和後續狀態管理作業。我們必須建立一個模組來儲存狀態以及支援事件,以處理操作變更。
首先,從 Storeon 匯入 createStoreon 方法和唯一隨機ID產生器 UUID。
createStoreon 方法負責將我們的 狀態 註冊到全域 store 。
import { createStoreon } from 'storeon';
import { v4 as uuidv4 } from 'uuid'
import { persistState } from '@storeon/localstorage';

let note = store => {}
我們將狀態儲存在陣列變數 notes 中,該變數包含以下格式的註解:
{
  id: 'note id',
  item: 'note item'
},
接下来,我们将用两个注释(在首次启动程序时会显示)来初始化状态,从而首先填充注释模块。然后,定义状态事件。
let note = store => {
  store.on('@init', () => ({
    notes: [
      { id: uuidv4(), item: 'Storeon is a React state management library and unlike other state management libraries that use Context, it utilizes an event-driven approach like Redux.' },
      { id: uuidv4(), item: 'This is a really short note. I have begun to study the basic concepts of technical writing and I'\'m optimistic about becoming one of the best technical writers.' },
    ]
  });
  store.on('addNote', ({ notes }, note) => {
    return {
      notes: [...notes, { id: uuidv4(), item: note }],
    }
  });
  store.on('deleteNote', ({ notes }, id) => ({
    notes: notes.filter(note => note.id !== id),
  });
}
在上面的代码中,我们定义了状态,并用两个简短的注释填充了状态,并定义了两个事件和一个从 dispatch(event, data) 函数发出事件后将会执行的回调函数。
在 addNote 事件中,我们返回添加了新 note 的更新后的状态对象,在 deleteNote 事件中把 ID 传递给调度方法的 note 过滤掉。
最后,把模块分配给可导出变量 store ,将其注册为全局 store,以便稍后将其导入到上下文 provider 中,并将状态存储在 localStorage 中。
const store = createStoreon([
  notes,
  // Store state in localStorage
  persistState(['notes']),
]);
export default store;
接下来,在 Notes.js 中编写 Notes 应用组件。
Notes.js
此文件包含 Notes 程序的组件。我们将从导入依赖项开始。
import React from 'react';
import { useStoreon } from 'storeon/react';
接下来,编写组件。
const Notes = () => {
  const { dispatch, notes } = useStoreon('notes');
  const [ value, setValue ] = React.useState('');
}在上面的代码的第二行中,useStoreon() hook 的返回值设置为可破坏的对象。 useStoreon() hook 使用模块名称作为其参数,并返回状态和调度方法以发出事件。
接下来定义在组件中发出状态定义事件的方法 。
const Notes = () => {
...
  const deleteNote = id => {
    dispatch('deleteNote', id)
  };
  const submit = () => {
    dispatch('addNote', value);
    setValue('');
  };
  const handleInput = e => {
    setValue(e.target.value);
  };
}
Let’s review the three methods we defined the above:
让我们回顾一下上面定义的三种方法:
deleteNote(id)– 此方法在触发时调度deleteNote事件。submit()– 该方法通过传递输入状态的值来调度addNote事件,该状态在Notes组件中本地定义。handleInput()– 此方法将本地状态的值设置为用户输入。
Next, we’ll build the main interface of our app and export it.
接下来,我们将构建应用程序的主界面并将其导出。
const Notes = () => {
...
return (
<section>
<header>Quick Notes</header>
<div className='addNote'>
<textarea onChange={handleInput} value={value} />
<button onClick={() => submit()}> Add A Note </button>
</div>
<ul>
{notes.map(note => (
<li key={note.id}>
<div className='todo'>
<p>{note.item}</p>
<button onClick={() => deleteNote(note.id)}>Delete note</button>
</div>
</li>
))}
</ul>
</section>
);
}这样就构成了我们的 Notes 组件。接下来为我们的应用和 index.html 文件编写样式表。
index.html
<!DOCTYPE html>
<html>

<head>
    <meta charset="UTF-8">
    <meta name="viewport" content="width=device-width, initial-scale=1.0">
    <meta http-equiv="X-UA-Compatible" content="ie=edge">
    <link rel="stylesheet" href="style.css">
    <title>Storeon Todo App</title>
</head>

<body>
    <div id="root"></div>
</body>

</html>
接下来,填充我们的 style.css 文件。
style.css
* {
  box-sizing: border-box;
  margin: 0;
  padding: 0;
}

section {
  display: flex;
  justify-content: center;
  align-items: center;
  flex-direction: column;
  width: 300px;
  margin: auto;
}

header {
  text-align: center;
  font-size: 24px;
  line-height: 40px;
}

ul {
  display: block;
}

.todo {
  display: block;
  margin: 12px 0;
  width: 300px;
  padding: 16px;
  box-shadow: 0 8px 12px 0 rgba(0, 0, 0, 0.3);
  transition: 0.2s;
  word-break: break-word;
}

li {
  list-style-type: none;
  display: block;
}

textarea {
  border: 1px double;
  box-shadow: 1px 1px 1px #999;
  height: 100px;
  margin: 12px 0;
  width: 100%;
  padding: 5px 10px;
}

button {
  margin: 8px 0;
  border-radius: 5px;
  padding: 10px 25px;
}

.box:hover {
  box-shadow: 0 8px 16px 0 rgba(0, 0, 0, 0.2);
}
运行
现在我们已经成功编写了组件和样式表,但是还没有更新 index.js 中的父组件来渲染 Notes 组件。接下来让我们渲染 Notes 组件。
index.js
要访问我们的全局 store,必须导入 store 和 Storeon store 上下文组件。我们还将导入 notes 组件来进行渲染。
用以下代码替换组件的内容:
import React from 'react';
import { render } from 'react-dom';
import { StoreContext } from 'storeon/react';
import Notes from './Components/Notes';
import store from '../src/store';
function App() {
return (
<>
<StoreContext.Provider value={store}>
<Notes />
</StoreContext.Provider>
</>
);
}
const root = document.getElementById('root');
render(<App />, root);在第 8-10 行,调用 store 上下文提供程序组件,并将 notes 组件作为使用者传递。store 上下文提供程序组件将全局 store 作为其上下文值。
接下来把 package.json 文件中的脚本部分编辑为以下内容:
"scripts": {
  "start": "react-scripts start",
}
然后运行我们的程序:
npm run start
让我们继续添加和删除注释:
Storeon devtools
Storeon 与 Redux 有着相似的属性,可以在 Redux DevTools 中可视化和监视状态的更改。为了可视化 Storeon 程序中的状态,我们将导入 devtools 包,并将其作为参数添加到我们 store.js 文件的 createStoreon() 方法中。
...
import { storeonDevtools } from 'storeon/devtools';
...
const store = createStoreon([
  ...,
  process.env.NODE_ENV !== 'production' && storeonDevtools,
]);
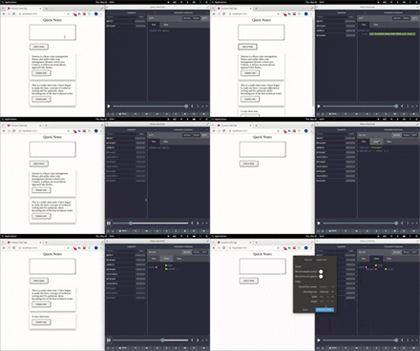
这是用 Redux DevTools 可视化状态变化的演示:

结论
Storeon 是一个非常有用的状态管理库,它用事件驱动和 Redux 改编的模块化样式来管理状态。你可以在https://github.com/Youngestdev/storeon-app上找到本文中的代码。
原文地址:https://blog.logrocket.com/event-driven-state-management-in-react-using-storeon/
作者:Abdulazeez Abdulazeez Adeshina
更多编程相关知识,请访问:编程视频!!
以上是淺談React+Storeon進行狀態管理的方法的詳細內容。更多資訊請關注PHP中文網其他相關文章!


