css如何使用利用border和border-radius繪製一些小圖形(程式碼實例)
- 青灯夜游原創
- 2018-09-21 17:45:424342瀏覽
在頁面開發中,常常需要一些小圖形來美化頁面。這些圖形可以用圖片形式展現,但頁面每次載入圖片都需要花費時間,那麼用css如何實現這些圖形?本章就跟大家介紹css如何使用利用border和border-radius繪製一些小圖形(程式碼實例)。有一定的參考價值,有需要的朋友可以參考一下,希望對你們有幫助。
大都知道border屬性有四個參數,那麼border-radius必然也是有四個參數
我們知道border屬性的四個參數分別是border-top,border-right,border -bottom,border-left.(按順時針方向)
那麼border-radius四個參數是什麼了?
border-radius:上左,上右,下右,下左;
下面我們利用border-radius繪製一些大家平時常見的圖片。
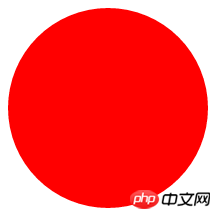
1.簡單的圓形
<!DOCTYPE html>
<html>
    <head>
        <meta charset="utf-8">
        <title></title>
        <style type="text/css">
            #div{
                width: 200px;
                height: 200px;
                background: red;
                border-radius: 50%;
            }
        </style>
    </head>
    <body>
        <div id="div">

        </div>
    </body>
</html>
效果圖:

#2.橢圓
<!DOCTYPE html>
<html>
    <head>
        <meta charset="utf-8">
        <title></title>
        <style type="text/css">
            #div{
                width: 100px;
                height: 200px;
                background: red;
                border-radius: 50%;
            }
        </style>
    </head>
    <body>
        <div id="div">

        </div>
    </body>
</html>
效果圖:
3.心型
<!DOCTYPE html>
<html>
    <head>
        <meta charset="utf-8">
        <title></title>
        <style type="text/css">
            #div{
                position: relative;
                width: 200px;
                height: 180px;
                border: 1px solid black;
            }
            .left{
                position: absolute;
                top: 0;
                left: 100px;
                width: 100px;
                height: 170px;
                background: red;
                /*左下角为旋转基点*/
                transform-origin: 0 100%;
                transform: rotate(-45deg);
                border-radius: 50% 50% 0 0;
                /*让left的上左和上右变成圆形就可以*/
            }
            .right{
                position: absolute;
                top: 0;
                left: 0px;
                width: 100px;
                height: 170px;
                background: red;
                /*右下角为旋转基点*/
                transform-origin: 100% 100%;
                transform: rotate(45deg);
                border-radius: 50% 50% 0 0;
                /*让right的上左和上右变成圆形就可以*/
            }
        </style>
    </head>
    <body>
        <div id="div">
            <div class="left"></div>
            <div class="right"></div>
        </div>
    </body>
</html>
效果圖:

<!DOCTYPE html>
<html>
    <head>
        <meta charset="utf-8">
        <title></title>
        <style type="text/css">
            #div{
                position: relative;
                width: 100px;
                height: 180px;
                background: red;
                border-radius: 50% 50% 50% 50%/60% 60% 40% 40%;
                /*border-radius参数在/左右的区别,/左边是四个圆角的水平半径/右边是四个圆角垂直半径*/
            }

        </style>
    </head>
    <body>
        <div id="div">
        </div>
    </body>
</html>
效果圖:
5.對話框
<!DOCTYPE html>
<html>
    <head>
        <meta charset="utf-8">
        <title></title>
        <style type="text/css">
            #div {
                width: 120px;
                height: 80px;
                background: red;
                position: relative;
                border-radius: 10px;
                margin-left: 50px;
                }
                #div:before {
                content:"";
                position: absolute;
                right: 100%;
                top: 26px;
                width: 0;
                height: 0;
                border-top: 13px solid transparent;
                border-right: 26px solid red;
                border-bottom: 13px solid transparent;
                }
        </style>
    </head>
    <body>
        <div id="div">
        </div>
    </body>
</html>
效果圖:
<!DOCTYPE html>
<html>
    <head>
        <meta charset="utf-8">
        <title></title>
        <style type="text/css">
            #baGua {
                width: 96px;
                height: 48px;
                background: #eee;
                border-color: red;
                border-style: solid;
                border-width: 2px 2px 50px 2px;
                border-radius: 100%;
                position: relative;
            }
            #baGua:before {
                content: "";
                position: absolute;
                top: 50%;
                left: 0;
                background: #eee;
                border: 18px solid red;
                border-radius: 50%;
                width: 12px;
                height: 12px;
            }
            #baGua:after {
                content: "";
                position: absolute;
                top: 50%;
                left: 50%;
                background: red;
                border: 18px solid #eee;
                border-radius:100%;
                width: 12px;
                height: 12px;
            }
        </style>
    </head>
    <body>
        <div id="baGua">
        </div>
    </body>
</html>
###效果圖:# #################7.無窮符號###<!DOCTYPE html>
<html>
<head>
<meta charset="utf-8">
<title></title>
<style type="text/css">
#wuQ{
position: relative;
width: 212px;
height: 100px;
}
#wuQ:before{
content: "";
position: absolute;
top: 0;
left: 0;
width: 60px;
height: 60px;
border: 20px solid red;
border-radius: 50px 50px 0 50px;
/*下右不变圆弧*/
transform: rotate(-45deg);
}
#wuQ:after{
content: "";
position: absolute;
top: 0;
right: 0;
width: 60px;
height: 60px;
border: 20px solid red;
border-radius: 50px 50px 50px 0;
/*下左不变圆弧*/
transform: rotate(45deg);
}
</style>
</head>
<body>
<div id="wuQ">
</div>
</body>
</html>###效果圖:###############以上是css如何使用利用border和border-radius繪製一些小圖形(程式碼實例)的詳細內容。更多資訊請關注PHP中文網其他相關文章!
陳述:
本文內容由網友自願投稿,版權歸原作者所有。本站不承擔相應的法律責任。如發現涉嫌抄襲或侵權的內容,請聯絡admin@php.cn


