微信小程式 scroll-view實作上拉載入與下拉刷新的實例
- 不言原創
- 2018-06-23 14:50:038431瀏覽
這篇文章主要介紹了微信小程式scroll-view實作上拉加載與下拉刷新的實例的相關資料,需要的朋友可以參考下
微信小程式scroll-view實作上拉加載與下拉刷新的實例
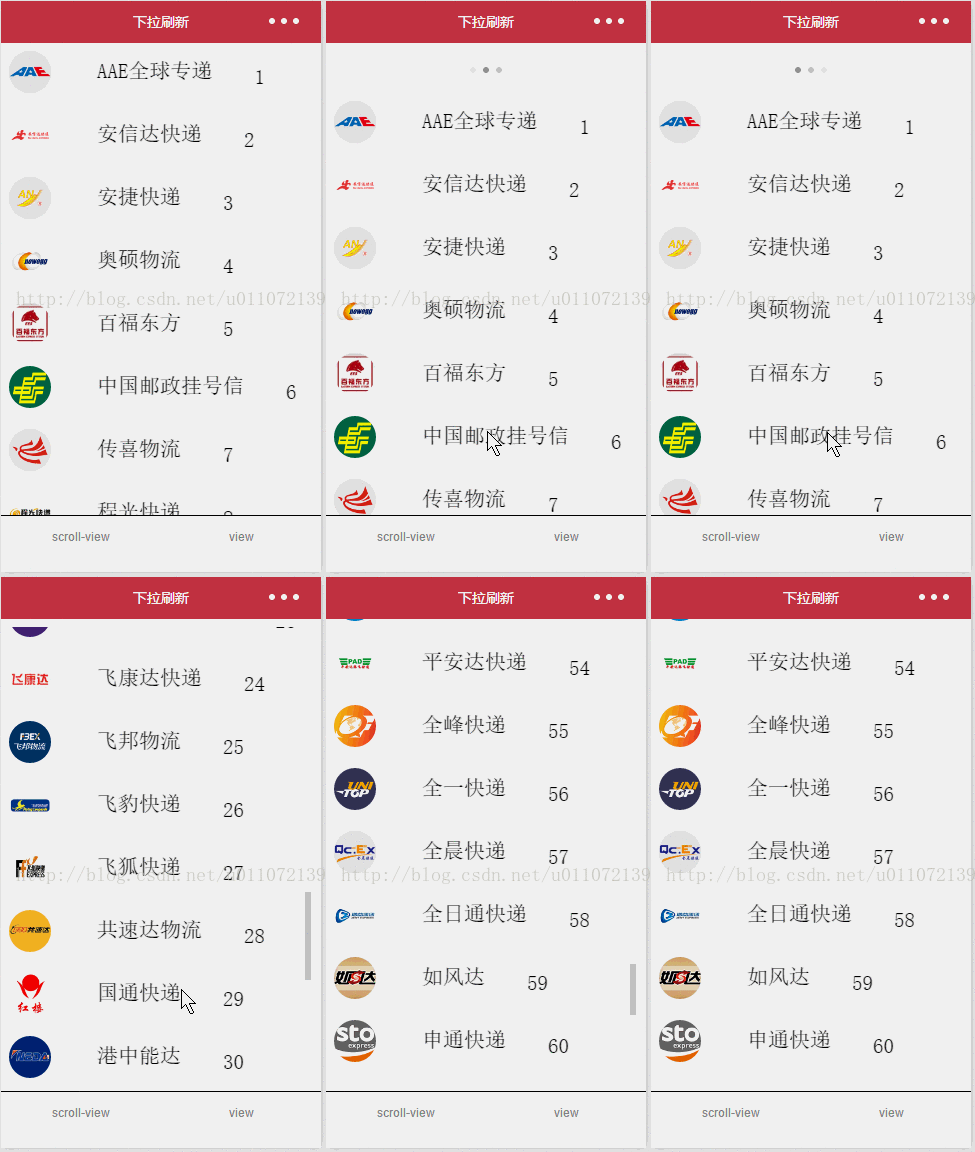
實現效果圖:

如圖,使用小程式的scroll-view實現的上拉載入數據,下拉刷新數據,試下程式碼如下:
js檔案程式碼:
var url = "http://192.168.30.4:8080/gtxcx/carrier/getCarrier.action";
var page = 1;

var GetList = function (that) {
 that.setData({
 hidden: false
 });
 wx.request({
 url: url,
 data: {
  pageSize: 10,
  pageNo: page
 },
 success: function (res) {
  var l = that.data.list
  for (var i = 0; i < res.data.length; i++) {
  l.push(res.data[i])
  }
  that.setData({
  list: l
  });
  page++;
  that.setData({
  hidden: true
  });
 }
 });
}
Page({
 data: {
 hidden: true,
 list: [],
 scrollTop: 0,
 scrollHeight: 0
 },
 onLoad: function () {
 var that = this;
 wx.getSystemInfo({
  success: function (res) {
  console.info(res.windowHeight);
  that.setData({
   scrollHeight: res.windowHeight
  });
  }
 });
 },
 onShow: function () {
 var that = this;
 GetList(that);
 },
 bindDownLoad: function () {
 var that = this;
 GetList(that);
 },
 scroll: function (event) {
 this.setData({
  scrollTop: event.detail.scrollTop
 });
 },
 refresh: function (event) {
 page = 1;
 this.setData({
  list: [],
  scrollTop: 0
 });
 GetList(this)
 },
 onPullDownRefresh: function () {
 console.log("下拉")
 },
 onReachBottom: function () {
 console.log("上拉");
 }
})
json檔案程式碼
{
 "navigationBarTitleText": "下拉刷新",
 "enablePullDownRefresh": true,
 "backgroundTextStyle": "dark"
}
wxml檔案程式碼:
<view class="container">
 <scroll-view scroll-top="{{scrollTop}}" scroll-y="true" style="height:{{scrollHeight}}px;"
 class="list" bindscrolltolower="bindDownLoad" bindscroll="scroll" bindscrolltoupper="refresh">
 <view class="item" wx:for="{{list}}">
  <image class="img" src="https://cdn.kuaidi100.com/images/all/56/zhongtong.png"></image>
  <view class="text">
  <text class="title">{{item.carrierName}}</text>
  <text class="description">{{item.carrierTelphone}}</text>
  <text class="description">{{item.carrierId}}</text>
  </view>
 </view>
 </scroll-view>
 <view class="body-view">
 <loading hidden="{{hidden}}" bindchange="loadingChange">
  加载中...
 </loading>
 </view>
</view>
#wxss檔案代碼
##
.container{
 height: 100%;
 padding: 20rpx;
}

.item{
 display: flex;
 margin-bottom: 50rpx;
width:100%;
background:#f0f0f0;
overflow:hidden;
}

.img{
 height: 100rpx;
 width: 100rpx;
 border-radius: 50%;
}

.text{
 display: flex;
 flex-shrink:1;
 flex-grow:1;
 padding: 10rpx;
 flex-wrap: wrap;
 font-size: 50rpx;
}

.title{
 font-size: 50rpx;
 margin:10rpx 100rpx 10rpx 100rpx;
}
.description{
 font-size: 50rpx;
 align-self:flex-end;
}
############## ##注意,#########
http://192.168.30.4:8080/gtxcx/carrier/getCarrier.action这个接口就是更具传入的页数,每次返回不同数据。#########以上就是本文的全部內容,希望對大家的學習有所幫助,更多相關內容請關注PHP中文網! ######相關推薦:#########微信小程式清單的上拉載入和下拉刷新的實作############微信小程式實作點擊按鈕修改字體顏色的功能###################
以上是微信小程式 scroll-view實作上拉載入與下拉刷新的實例的詳細內容。更多資訊請關注PHP中文網其他相關文章!
陳述:
本文內容由網友自願投稿,版權歸原作者所有。本站不承擔相應的法律責任。如發現涉嫌抄襲或侵權的內容,請聯絡admin@php.cn

