
使用AngularJS2與D3.js整合如何實現自訂視覺化
- 亚连原創
- 2018-06-22 18:32:261685瀏覽
本篇文章主要介紹了ANGULAR2 與 D3.js整合實作自訂視覺化的方法,小編覺得挺不錯的,現在分享給大家,也給大家做個參考。一起跟著小編過來看看吧
本文介紹了ANGULAR2 與D3.js整合實作自訂視覺化的方法,分享給大家,具體如下:
目標
展現層與邏輯層分離
資料與視覺化元件相分離
資料與視圖雙向綁定,即時更新
程式碼結構清晰,易於維護與修改
#基本原理
##angular2 的元件生命週期鉤子方法\父子元件互動機制\模板語法源碼解析
#程式碼結構很簡單,其中除主頁index.html和main.ts之外的程式碼結構如下所示: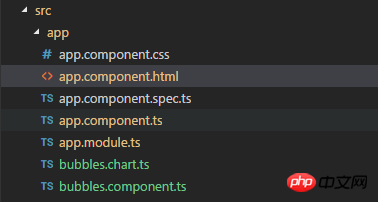
import { BrowserModule } from '@angular/platform-browser';
import { NgModule } from '@angular/core';
import { FormsModule } from '@angular/forms';
//components
import { AppComponent } from './app.component';
import { Bubbles } from './bubbles.component';

@NgModule({
 declarations: [
  AppComponent,
  Bubbles
 ],
 imports: [
  BrowserModule,
  FormsModule
 ],
 providers: [],
 bootstrap: [AppComponent]
})
export class AppModule { }app.component.html實現宿主視圖定義,2個按鈕,按鈕可以綁定了2點點擊事件,執行對應的動作,刷新數組,同時完成汽泡圖的更新;1個汽泡圖子組件,其中values為子組件的輸入屬性,實現父子組件之間的通信,numArray為汽泡圖的輸入數據數組,後續為隨機生成的數組<h1> <button (click)="refreshArr()" >开始刷新气泡图</button> <button (click)="stopRefresh()" >停止刷新气泡图</button> <bubbles [values]="numArray"></bubbles> </h1>app.component .ts透過指定一個3秒刷新一次的定時器,刷新數據,這裡需要注意,需要先清空數組,再添加元素,直接修改數組元素值而不改變引用,則無法刷新汽泡圖
import { Component, OnDestroy, OnInit } from '@angular/core';
@Component({
 selector: 'app-root',
 templateUrl: './app.component.html',
 styleUrls: ['./app.component.css']
})
export class AppComponent implements OnInit, OnDestroy {
 intervalId = 0;
 numArray = [];
 // 清除定时器
 private clearTimer() {
  console.log('stop refreshing');
  clearInterval(this.intervalId);
 }
 // 生成指定范围内的随机数
 private getRandom(begin, end) {
  return Math.floor(Math.random() * (end - begin));
 }
 ngOnInit() {
  for (let i in this.numArray) {
   this.numArray[i] = this.getRandom(0, 100000000); // "0", "1", "2",
  };
 }
 // 元素关闭清除定时器
 ngOnDestroy() { this.clearTimer(); }
 // 启动定时刷新数组
 refreshArr() {
  this.clearTimer()
  this.intervalId = window.setInterval(() => {
   this.numArray = [];
   for (let i=0;i<8;i++)
   {
    this.numArray.push(this.getRandom(0, 100000000));
   }
  }, 3000);
 }
 // 停止定时刷新数组
 stopRefresh() {
  this.clearTimer();
 }
}
bubbles.component.ts 汽泡圖組件類別
- ngOnChanges() 生命週期方法,可以在輸入屬性values發生變化時,自動被呼叫;
- @ViewChild 可以取得子元素svg的引用,其中#target自訂變數用於標識svg子元素
import { Component, Input, OnChanges, AfterViewInit, ViewChild} from '@angular/core';
import {BubblesChart} from './bubbles.chart';
declare var d3;
@Component({
selector: 'bubbles',
template: '<svg #target width="900" height="300"></svg>',
})
export class Bubbles implements OnChanges, AfterViewInit {
@Input() values: number[];
chart: BubblesChart;
@ViewChild('target') target;//获得子组件的引用
constructor() {
}
// 每当元素对象上绑定的数据 输入属性值 values 发生变化时,执行下列函数,实现图表动态变化
ngOnChanges(changes) {
if (this.chart) {
// 先清空汽泡图,再重新调用汽泡图对象的render方法,根据变动后的值绘制图形
this.chart.destroy();
this.chart.render(changes.values.currentValue);
}
}
ngAfterViewInit() {
// 初始化汽泡图
this.chart = new BubblesChart(this.target.nativeElement);
this.chart.render(this.values);
}
}- d3.js 語法定義的汽泡圖類,自帶一個繪製方法和擦除方法
- 需要在index.html當中先引入bd36a97ef732e252716ac5494b5d06f62cacc6d41bbb37262a98f745aa00fbf0
declare var d3;
// define a bubble chart class
// Exports the visualization module
export class BubblesChart {
  target: HTMLElement;
  //构造函数, 基于一个 HTML元素对象内部来绘制
  constructor(target: HTMLElement) {
    this.target = target;
  }
  // 渲染 入参为数值 完成基于一个数组的 汽泡图的绘制
  render(values: number[]) {
    console.log('start rendering');
    console.log(values);
    d3.select(this.target)
      // Get the old circles
      .selectAll('circle')
      .data(values)
      .enter()
      // For each new data point, append a circle to the target SVG
      .append('circle')
      // Apply several style attributes to the circle
      .attr('r', d => Math.log(d)) // 半径
      .attr('fill', '#5fc') // 颜色
      .attr('stroke', '#333') // 轮廓颜色
      .attr('transform', (d, i) => { // 移动位置
        var offset = i * 30 + 3 * Math.log(d);
        return `translate(${offset}, ${offset})`;
      });
  }

  destroy() {
    d3.select(this.target).selectAll('circle').remove();
  }
}
在webpack中有關於jquery外掛程式的環境配置(詳細教程)
以上是使用AngularJS2與D3.js整合如何實現自訂視覺化的詳細內容。更多資訊請關注PHP中文網其他相關文章!
陳述:
本文內容由網友自願投稿,版權歸原作者所有。本站不承擔相應的法律責任。如發現涉嫌抄襲或侵權的內容,請聯絡admin@php.cn