關於php製作動態隨機驗證碼的方法
- 不言原創
- 2018-06-19 17:56:411982瀏覽
這篇文章主要介紹了php製作動態隨機驗證碼的方法的相關資料,需要的朋友可以參考下
驗證碼(CAPTCHA)是「Completely Automated Public Turing test to tell Computers and Humans Apart」(全自動區分電腦和人類的圖靈測試)的縮寫,是一種區分使用者是電腦還是人的公共全自動程式。可以防止:惡意破解密碼、刷票、論壇灌水,有效防止某個駭客對某一個特定註冊用戶用特定程序暴力破解方式進行不斷的登陸嘗試,實際上用驗證碼是現在很多網站通行的方式,我們利用比較簡易的方式實現了這個功能。
這個問題可以由電腦產生並評判,但必須只有人類才能解答。由於電腦無法解答CAPTCHA的問題,所以回答出問題的使用者就可以被認為是人類。
Php製作動態驗證碼是基於php的影像處理,以下先介紹一下php的影像處理。
一.php影像處理簡介
在PHP5中,動態圖象的處理比以前容易得多。 PHP5在php.ini檔案中包含了GD擴充包,只要去掉GD擴充包的對應註解就可以正常使用了。 PHP5包含的GD庫正是升級的GD2庫,其中包含支援真彩影像處理的一些有用的JPG功能。
一般產生的圖形,透過PHP的文件格式存放,但可透過HTML的圖片插入方式SRC來直接取得動態圖形。例如,驗證碼、浮水印、微縮圖等。
建立影像的一般流程:
1).設定標頭,並告訴瀏覽器你要產生的MIME型別。
2).建立一個影像區域,以後的操作都將基於此影像區域。
3).在空白影像區域繪製填滿背景。
4).在背景上繪製圖形輪廓輸入文字。
5).輸出最終圖形。
6).清除所有資源。
7).其他頁面呼叫圖像。
第一步,設定檔MIME類型,輸出類型將輸出類型改成圖片流
header('Content-Type: image/png;');
一般產生的圖片可以是png,jpeg,gif,wbmp
第二步,建立一個圖形區域,圖像背景
imagecreatetruecolor() 傳回一個圖像標識符,代表了一個大小為x_size 和y_size 的黑色圖像。語法:resource imagecreatetruecolor ( int $width , int $height )
$im = imagecreatetruecolor(200,200);
第三步,在空白圖像區域繪製填充背景
要有顏色填充器;imagecolorallocate -- 為一幅圖像分配顏色;語法:int imagecolorallocate ( resource $image , int $red , int $green , int $blue )
$blue = imagecolorallocate($im,0,102,255);
將這個blue顏色填入背景去;imagefill -- 區域填入;語法:bool imagefill ( resource $image , int $x , int $y , int $color )
imagefill($im,0,0,$blue);
第四步,在藍色的背景上輸入一些線條,文字等
顏色填充器
$white = imagecolorallocate($im,255,255,255);
畫兩條線段:imageline
imageline() 用color 顏色在圖片image 中從座標x1,y1 到x2,y2(圖片左上角為0, 0)畫一條線段。語法:bool imageline ( resource $image , int $x1 , int $y1 , int $x2 , int $y2 , int $color )
imageline($im,0,0,200,200,$white);
imageline($im,200,0,0,200,$white);
水平畫一行字串:imagestring
## imagestring() 用col 顏色將字串s 畫到image 所代表的圖像的x,y 座標處(這是字串左上角座標,整幅圖像的左上角為0,0)。如果font 是 1,2,3,4 或 5,則使用內建字體。語法:bool imagestring ( resource $image , int $font , int $x , int $y , string $s , int $col )
imagestring($im,5,66,20,'jingwhale',$white);
第五步,輸出最終圖形
imagepng () 將GD 影像流(image)以PNG 格式輸出到標準輸出(通常為瀏覽器),或者如果用filename 給出了檔案名稱則將其輸出到該檔案。語法:bool imagepng ( resource $image [, string $filename ] )
imagepng($im);
第六步,我要將所有的資源全部清空
imagedestroy() 釋放與 image 關聯的記憶體。語法:bool imagedestroy ( resource $image )
imagedestroy($im);
其他頁面(html)呼叫所建立的圖形
<img src="Demo4.php" alt="PHP创建的图片" />
範例程式碼如下:
顯示效果:

二.建立動態驗證碼
#1. 建立帶有驗證碼的圖片,並模糊背景
隨機碼採用16進位;模糊背景即在圖片背景加上線條、雪花等。
1)建立隨機碼
for ($i=0;$i<$_rnd_code;$i++) {
        $_nmsg .= dechex(mt_rand(0,15));
    }
string dechex ( int $number ),傳回一字串,包含有給定 number 參數的十六進位表示。
2)儲存在session
$_SESSION['code'] = $_nms
3)建立圖片
rrreee4)模糊背景
//创建一张图像
$_img = imagecreatetruecolor($_width,$_height);
//白色
$_white = imagecolorallocate($_img,255,255,255);
//填充
imagefill($_img,0,0,$_white);
if ($_flag) {
//黑色,边框
    $_black = imagecolorallocate($_img,0,0,0);
    imagerectangle($_img,0,0,$_width-1,$_height-1,$_black);
}
5)輸出及銷毀
//随机画出6个线条
for ($i=0;$i<6;$i++) {
$_rnd_color = imagecolorallocate($_img,mt_rand(0,255),mt_rand(0,255),mt_rand(0,255));
imageline($_img,mt_rand(0,$_width),mt_rand(0,$_height),mt_rand(0,$_width),mt_rand(0,$_height),$_rnd_color);
}
//随机雪花
for ($i=0;$i<100;$i++) {
$_rnd_color = imagecolorallocate($_img,mt_rand(200,255),mt_rand(200,255),mt_rand(200,255));
imagestring($_img,1,mt_rand(1,$_width),mt_rand(1,$_height),'*',$_rnd_color);
}將其封裝在global.func.php全域函數庫中,函數名為_code(),以便呼叫。我們將設定$_width ,$_height ,$_rnd_code,$_flag 四個參數,以增強函數的彈性。
* @param int $_width 验证码的长度:如果要6位长度推荐75+50;如果要8位,推荐75+50+50,依次类推
* @param int $_height 验证码的高度
* @param int $_rnd_code 验证码的位数
* @param bool $_flag 验证码是否需要边框:true有边框, false无边框(默认)
封装后的代码如下:
2.创建验证机制
创建php验证页面,通过session来检验验证码是否一致。
1)创建verification-code.php验证页面
<?php
/**
* [verification-code] (C)2015-2100 jingwhale.
*
* This is a freeware
* $Id: verification-code.php 2015-02-05 20:53:56 jingwhale$
*/
//设置字符集编码
header('Content-Type: text/html; charset=utf-8');
?>
<!DOCTYPE html>
<html>
<head>
<meta charset="UTF-8">
<title>verification code</title>
<link rel="stylesheet" type="text/css" href="style/basic.css" />
</head>
<body>
<p id="testcode">
<form method="post" name="verification" action="verification-code.php?action=verification">
<dl>
<dd>验证码:<input type="text" name="code" class="code" /><img src="codeimg.php" id="codeimg" /></dd>
<dd><input type="submit" class="submit" value="验证" /></dd>
</dl>
</form>
</p>
</body>
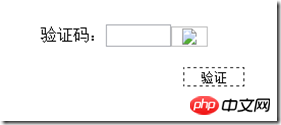
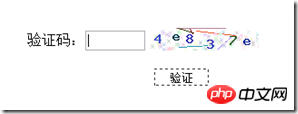
</html>显示如下:

2)创建产生验证码图片页面
创建codeimg.php为verification-code.php html代码里的img提供验证码图片
首先必须在codeimg.php页面开启session;
其次,将我们封装好的global.func.php全局函数库引入进来;
最后,运行_code();
<?php /** * [verification-code] (C)2015-2100 jingwhale. * * This is a freeware * $Id: codeimg.php 2015-02-05 20:53:56 jingwhale$ */ //开启session session_start(); //引入全局函数库(自定义) require dirname(__FILE__).'/includes/global.func.php'; //运行验证码函数。通过数据库的_code方法,设置验证码的各种属性,生成图片 _code(125,25,6,false); ?>

3)创建session检验机制
首先必须在verification-code.php页面也开启session;
其次,设计提交验证码的方式,本文以get方式提交,当action=verification时提交成功;
最后,创建验证函数,原理是将客户端用户提交的验证码同服务器codeimg.php中session的验证码是否一致;这里有一个js弹窗函数_alert_back(),我们也把它封装在global.func.php里;
修改verification-code.php中php代码如下:
<?php
/**
* [verification-code] (C)2015-2100 jingwhale.
*
* This is a freeware
* $Id: verification-code.php 2015-02-05 20:53:56 jingwhale$
*/
//设置字符集编码
header('Content-Type: text/html; charset=utf-8');
//开启session
session_start();
//引入全局函数库(自定义)
require dirname(__FILE__).'/includes/global.func.php';
//检验验证码
if ($_GET['action'] == 'verification') {
if (!($_POST['code'] == $_SESSION['code'])) {
_alert_back('验证码不正确!');
}else{
_alert_back('验证码通过!');
}
}
?>
<!DOCTYPE html>
<html>
<head>
<meta charset="UTF-8">
<title>verification code</title>
<link rel="stylesheet" type="text/css" href="style/basic.css" />
<script type="text/javascript" src="js/codeimg.js"></script>
</head>
<body>
<p id="testcode">
<form method="post" name="verification" action="verification-code.php?action=verification">
<dl>
<dd>验证码:<input type="text" name="code" class="code" /><img src="codeimg.php" id="codeimg" /></dd>
<dd><input type="submit" class="submit" value="验证" /></dd>
</dl>
</form>
</p>
</body>
</html>
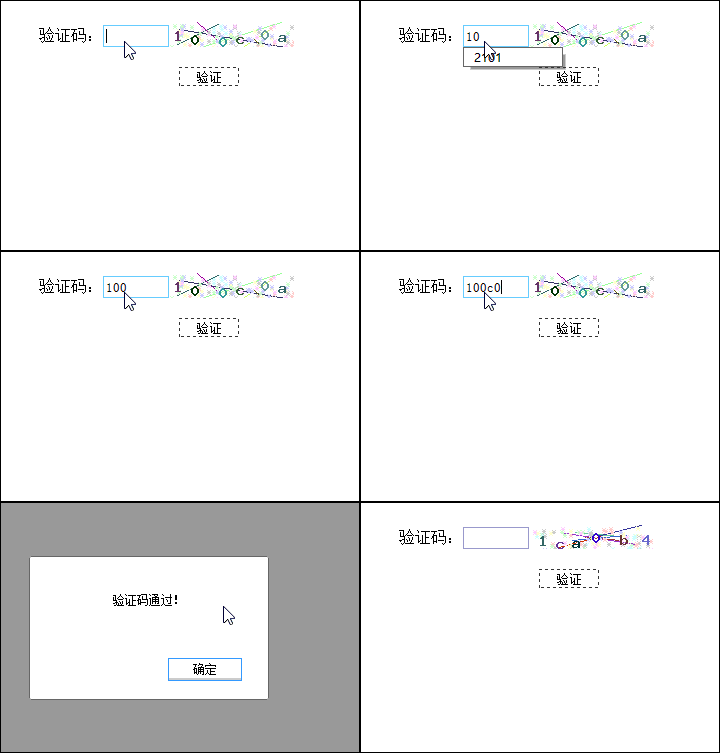
3.实现点击验证码图片更新验证码
上面若想实现验证码更新,必须刷新页面;我们写一个codeimg.js函数实现点击验证码图片更新验证码
window.onload = function () {
    var code = document.getElementById('codeimg');//通过id找到html中img标签
    code.onclick = function () {//为标签添加点击事件
        this.src='codeimg.php?tm='+Math.random();//修改时间,重新指向codeimg.php
    };
}
然后在verification-code.php html代码head里2cdf5bf648cf2f33323966d7f58a7f3f它即可。

以上就是本文的全部内容,希望对大家的学习有所帮助,更多相关内容请关注PHP中文网!
相关推荐:
以上是關於php製作動態隨機驗證碼的方法的詳細內容。更多資訊請關注PHP中文網其他相關文章!

