
SpringMVC詳解

- 大家讲道理原創
- 2017-08-19 13:58:592112瀏覽
本系列教學我們將詳細的對SpringMVC進行介紹,相信你在學完本系列教程後,一定能在實際開發中運用自如。
1、什麼是 SpringMVC ?
在介紹什麼是 SpringMVC 之前,我們先來看看 Spring 的基本架構。如下圖:
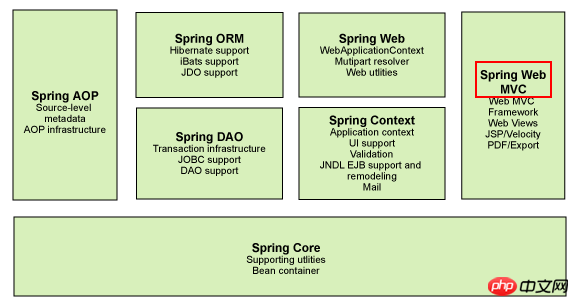
我們可以看到,在Spring 的基本架構中,紅色圈起來的Spring Web MVC ,也就是本系列的主角SpringMVC,它是屬於Spring基本架構裡面的一個組成部分,屬於SpringFrameWork的後續產品,已經融合在Spring Web Flow裡面,所以我們在後期和Spring 進行整合的時候,幾乎不需要別的什麼配置。
SpringMVC 是類似於 Struts2 的一個 MVC 框架,在實際開發中,接收瀏覽器的請求回應,對資料進行處理,然後返回頁面進行顯示,但是上手難度卻比 Struts2 簡單多了。而且由於 Struts2 所揭露的安全問題,SpringMVC 已經成為了大多數企業優先選擇的框架。
那麼多的不說,我們直接透過一個實例來看看 SpringMVC 的魔力。
ps:本篇部落格原始碼下載連結:http://pan.baidu.com/s/1c1OJi5E 密碼:9hnc
2、建立web 工程,並導入對應的jar 包。
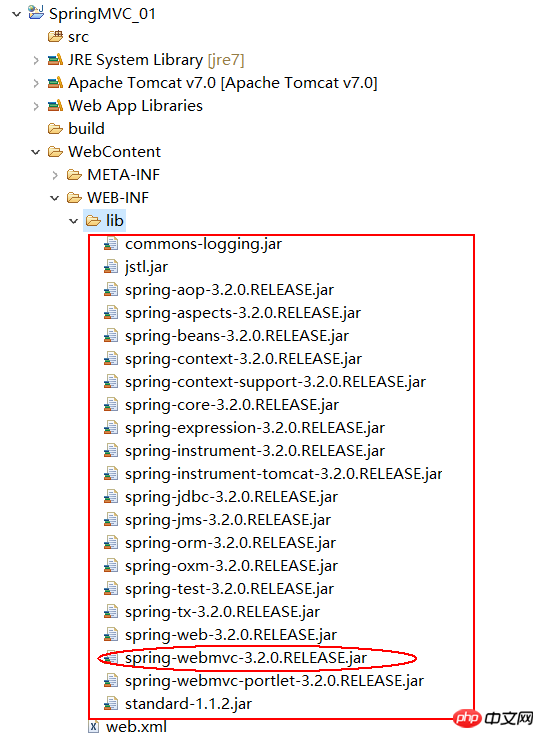
這裡我們加入了Spring 3.2 的所有jar 包,正好也佐證了上面所說的SpringMVC 是Spring 架構的一部分,注意:一定要包括紅色橢圓圈起來的spring-webmvc-3.2.0.RELEASE.jar
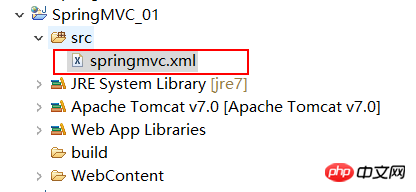
3、新建 SpringMVC 全域設定檔
在src 目錄下新建springmvc.xml 文件,並新增如下程式碼:
<?xml version="1.0" encoding="UTF-8"?>
<beans xmlns="http://www.springframework.org/schema/beans"
       xmlns:xsi="http://www.w3.org/2001/XMLSchema-instance"
       xmlns:mvc="http://www.springframework.org/schema/mvc"
       xmlns:context="http://www.springframework.org/schema/context"
       xmlns:aop="http://www.springframework.org/schema/aop"
       xmlns:tx="http://www.springframework.org/schema/tx"
       xsi:schemaLocation="http://www.springframework.org/schema/beans
        http://www.springframework.org/schema/beans/spring-beans-4.2.xsd
        http://www.springframework.org/schema/mvc
        http://www.springframework.org/schema/mvc/spring-mvc-4.2.xsd
        http://www.springframework.org/schema/context
        http://www.springframework.org/schema/context/spring-context.xsd
        http://www.springframework.org/schema/aop
        http://www.springframework.org/schema/aop/spring-aop-4.2.xsd
        http://www.springframework.org/schema/tx
        http://www.springframework.org/schema/tx/spring-tx.xsd">


</beans>
4、在web.xml 檔案中設定前端過濾器
<?xml version="1.0" encoding="UTF-8"?>
<web-app xmlns:xsi="http://www.w3.org/2001/XMLSchema-instance"
	 xmlns="http://java.sun.com/xml/ns/javaee"
	 xsi:schemaLocation="http://java.sun.com/xml/ns/javaee
	 http://java.sun.com/xml/ns/javaee/web-app_3_0.xsd" id="WebApp_ID" version="3.0">
  <display-name>SpringMVC_01</display-name>
  <!-- 配置前端控制器DispatcherServlet -->
  <servlet>
    <servlet-name>springmvc</servlet-name>
    <servlet-class>org.springframework.web.servlet.DispatcherServlet</servlet-class>
    <init-param>
        <param-name>contextConfigLocation</param-name>
        <!-- 对应上一步创建全局配置文件的文件名以及目录 -->
        <param-value>classpath:springmvc.xml</param-value>
    </init-param>
  </servlet>

  <servlet-mapping>
    <servlet-name>springmvc</servlet-name>
    <url-pattern>*.do</url-pattern>
  </servlet-mapping>
</web-app>
#
5、寫處理器 Handler
#package com.ys.controller;
import javax.servlet.http.HttpServletRequest;
import javax.servlet.http.HttpServletResponse;
import org.springframework.web.servlet.ModelAndView;
import org.springframework.web.servlet.mvc.Controller;
public class HelloController implements Controller{
@Override
public ModelAndView handleRequest(HttpServletRequest request,
HttpServletResponse response) throws Exception {
ModelAndView modelView = new ModelAndView();
//类似于 request.setAttribute()
modelView.addObject("name","张三");
modelView.setViewName("/WEB-INF/view/index.jsp");
return modelView;
}
} #
6、在springmvc.xml 檔案中設定Handler,處理器映射器,處理器適配器,以及試圖解析器
# 在springmvc.xml文件中加入以下程式碼:
<!-- 配置Handler -->
<bean name="/hello.do" class="com.ys.controller.HelloController" />
   <!-- 配置处理器映射器
   	将bean的name作为url进行查找,需要在配置Handler时指定bean name(就是url)-->
<bean class="org.springframework.web.servlet.handler.BeanNameUrlHandlerMapping" />
   <!-- 配置处理器适配器,所有适配器都得实现 HandlerAdapter接口 -->
   <bean class="org.springframework.web.servlet.mvc.SimpleControllerHandlerAdapter" />

<!-- 配置视图解析器
   	进行jsp解析,默认使用jstl标签,classpath下得有jstl的包-->
<bean class="org.springframework.web.servlet.view.InternalResourceViewResolver" />
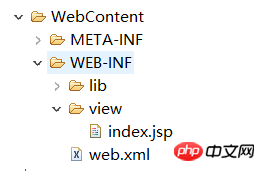
7、在 /WEB-INF/view 目錄下建立index.jsp 檔案
<%@ page language="java" contentType="text/html; charset=UTF-8"
    pageEncoding="UTF-8"%>
<!DOCTYPE html PUBLIC "-//W3C//DTD HTML 4.01 Transitional//EN" "http://www.w3.org/TR/html4/loose.dtd">
<html>
<head>
<meta http-equiv="Content-Type" content="text/html; charset=UTF-8">
<title>Insert title here</title>
</head>
<body>
hello:${name}
</body>
</html>
#
8、在瀏覽器輸入 http://localhost:8080/SpringMVC_01/hello.do
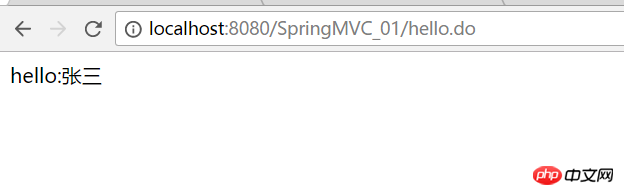
跟著上面的步驟,相信你已經搭建了一個SpringMVC 的簡單實例,那麼為什麼要這麼寫呢?請看下一篇部落格分解! ! !
以上是SpringMVC詳解的詳細內容。更多資訊請關注PHP中文網其他相關文章!