.net core版上傳檔案/ 批次上傳拖曳及預覽功能(bootstrap fileinput上傳檔案)的實例詳解
- Y2J原創
- 2017-04-26 10:19:024043瀏覽
這篇內容主要解決.net core中文件上傳的問題 開發環境:ubuntu+vscode.本文給大家介紹的非常詳細,有興趣的朋友一起看看吧
上篇文章給大家介紹了MVC檔案上傳支援批次上傳拖曳及預覽檔案內容校驗功能
本篇內容主要解決.net core中檔案上傳的問題 開發環境:ubuntu+vscode
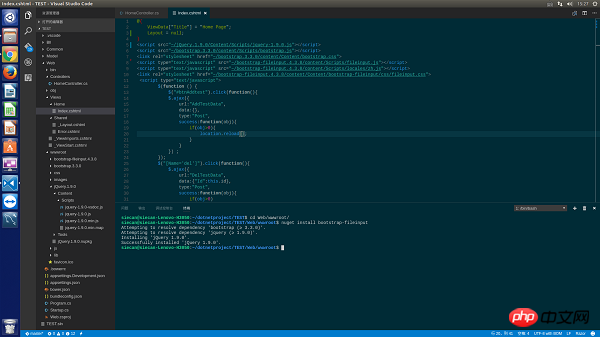
#1.導入所需的套件:nuget install bootstrap-fileinput
注意:這裡的導包需要在終端導入【需要在wwwroot資料夾下執行nuget指令】如下圖

如果發現沒有nuget指令,則需要透過apt-get 或yum 給系統安裝nuge套件管理工具,這個nuget和vscode中的外掛不是一回事
2前台頁面編寫:
index.cshtml:
@{
ViewData["Title"] = "Home Page";
Layout = null;
}
<script src="~/jQuery.1.9.0/Content/scripts/jquery-1.9.0.js"></script>
<script src="~/bootstrap.3.3.0/content/scripts/bootstrap.js"></script>
<link rel="stylesheet" href="~/bootstrap.3.3.0/content/Content/bootstrap.css" rel="external nofollow" >
<script type="text/javascript" src="~/bootstrap-fileinput.4.3.8/content/scripts/fileinput.js"></script>
<script type="text/javascript" src="~/bootstrap-fileinput.4.3.8/content/scripts/locales/zh.js"></script>
<link rel="stylesheet" href="~/bootstrap-fileinput.4.3.8/content/Content/bootstrap-fileinput/css/fileinput.css" rel="external nofollow" >
<script type="text/javascript">
$(function () {
var control = $("#txt_file");
var uploadrul = "/Home/UploadFile";
control.fileinput({
language: 'zh', //设置语言
uploadUrl: uploadrul, //上传的地址
allowedFileExtensions: ['png'],//接收的文件后缀
showUpload: true, //显示批量上传按钮
showCaption: false,//是否显示标题
browseClass: "btn btn-primary", //按钮样式
dropZoneEnabled: true,//是否显示拖拽区域
//minImageWidth: 50, //图片的最小宽度
//minImageHeight: 50,//图片的最小高度
//maxImageWidth: 1000,//图片的最大宽度
//maxImageHeight: 1000,//图片的最大高度
//maxFileSize: 0,//单位为kb,如果为0表示不限制文件大小
//minFileCount: 0,
maxFileCount: 100,
enctype: 'multipart/form-data',
validateInitialCount: true,
previewFileIcon: "<i class='glyphicon glyphicon-king'></i>",
msgFilesTooMany: "选择上传的文件数量({n}) 超过允许的最大数值{m}!",
});
//导入文件上传完成之后的事件
$("#txt_file").on("fileuploaded", function (event, data, previewId, index) {
});
});
</script>
</table>
<p>
<form>
<p>
<p class="modal-header">
<h4 class="modal-title" id="myModalLabel">请选择xml文件</h4>
</p>
<p class="modal-body">
<input type="file" name="txt_file" id="txt_file" multiple class="file-loading" />
</p>
</p>
</form>
</p>基本上和asp.net mvc下邊沒有區別,只有一個地方需要特別注意一下,外部的script和css檔案的引用檔案需要放到wwwroot檔案中,而不是專案的根目錄下。
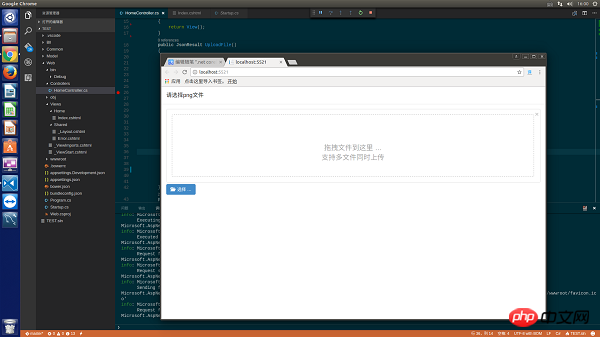
預覽圖:

3.主要的區別,後台
程式碼如下:
public JsonResult UploadFile()
  {
   uploadResult result = new uploadResult();
   try
   {
    var oFile = Request.Form.Files["txt_file"];
    Stream sm=oFile.OpenReadStream();
    result.fileName = oFile.FileName;
    if(!Directory.Exists(AppContext.BaseDirectory+"/Image/"))
    {
     Directory.CreateDirectory(AppContext.BaseDirectory+"/Image/");
    }
    string filename=AppContext.BaseDirectory+"/Image/" + DateTime.Now.ToString("yyyymmddhhMMssss")+Guid.NewGuid().ToString() + ".png";
    FileStream fs=new FileStream(filename,FileMode.Create);
    byte[] buffer =new byte[sm.Length];
    sm.Read(buffer,0,buffer.Length);
    fs.Write(buffer,0,buffer.Length);
    fs.Dispose();
   }
   catch(Exception ex)
   {
    result.error = ex.Message;
   }
   return Json(result);
  }
  public class uploadResult
  {
   public string fileName { get; set; }
   public string error { get; set; }
  }
在netcore中無法再透過Request.Files物件取得從前台傳遞的文件,這裡需要使用Request.Form.Files來取得來自客戶端提交的文件,接下來需要一個uploadResult結構體,給前台傳回json物件 這個結構中必須包含error字段,用來給前台返回錯誤數據,詳情查看官方文件-官網地址
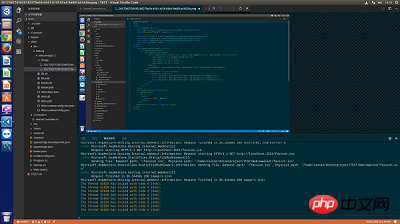
附一張最終的上傳成功保存到本地的圖片:
 ##
##
以上是.net core版上傳檔案/ 批次上傳拖曳及預覽功能(bootstrap fileinput上傳檔案)的實例詳解的詳細內容。更多資訊請關注PHP中文網其他相關文章!
陳述:
本文內容由網友自願投稿,版權歸原作者所有。本站不承擔相應的法律責任。如發現涉嫌抄襲或侵權的內容,請聯絡admin@php.cn

