


Object detection is pivotal in artificial intelligence, serving as the backbone for numerous cutting-edge applications. From autonomous vehicles and surveillance systems to medical imaging and augmented reality, the ability to identify and locate objects in images and videos is transforming industries worldwide. TensorFlow’s Object Detection API, a powerful and versatile tool, simplifies building robust object detection models. By leveraging this API, developers can train custom models tailored to specific needs, significantly reducing development time and complexity.
In this guide, we will explore the step-by-step process of training an object detection model using TensorFlow,focusing on integrating datasets fromRoboflow Universe,a rich repository of annotated datasets designed to accelerate AI development.
Learning Objectives
- Learn to set up and configure TensorFlow‘s Object Detection API environment for efficient model training.
- Understand how to prepare and preprocess datasets for training, using the TFRecord format.
- Gain expertise in selecting and customizing a pre-trained object detection model for specific needs.
- Learn to adjust pipeline configuration files and fine-tune model parameters to optimize performance.
- Master the training process, including handling checkpoints and evaluating model performance during training.
- Understand how to export the trained model for inference and deployment in real-world applications.
This article was published as a part of theData Science Blogathon.
Table of contents
- Step-By-Step Implementation of Object Detection with TensorFlow
- Step1: Setting Up the Environment
- Step2: Verify Environment and Installations
- Step3: Prepare the Training Data
- Step4: Set Up the Training Configuration
- Step5: Modify the Pipeline Configuration File
- Step6: Train the Model
- Step7: Save the Trained Model
- Conclusion
- Frequently Asked Questions
Step-By-Step Implementation of Object Detection with TensorFlow
In this section, we’ll walk you through a step-by-step implementation of object detection using TensorFlow, guiding you from setup to deployment.
Step1: Setting Up the Environment
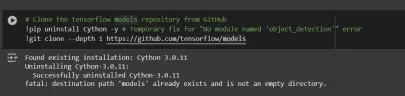
The TensorFlow Object Detection API requires various dependencies. Begin by cloning the TensorFlow models repository:
# Clone the tensorflow models repository from GitHub
!pip uninstall Cython -y # Temporary fix for "No module named 'object_detection'" error
!git clone --depth 1 https://github.com/tensorflow/models
- Uninstall Cython: This step ensures there are no conflicts with the Cython library during setup.
- Clone TensorFlow Models Repository: This repository contains TensorFlow’s official models, including the Object Detection API.
Copy the Setup Files andModify the setup.py File
# Copy setup files into models/research folder
%%bash
cd models/research/
protoc object_detection/protos/*.proto --python_out=.
#cp object_detection/packages/tf2/setup.py .

# Modify setup.py file to install the tf-models-official repository targeted at TF v2.8.0
import re
with open('/content/models/research/object_detection/packages/tf2/setup.py') as f:
    s = f.read()

with open('/content/models/research/setup.py', 'w') as f:
    # Set fine_tune_checkpoint path
    s = re.sub('tf-models-official>=2.5.1',
               'tf-models-official==2.8.0', s)
    f.write(s)
Why is This Necessary?
- Protocol Buffers Compilation: The Object Detection API uses .proto files to define model configurations and data structures. These need to be compiled into Python code to function.
- Dependency Version Compatibility: TensorFlow and its dependencies evolve. Using tf-models-official>=2.5.1 may inadvertently install an incompatible version for TensorFlow v2.8.0.
- Explicitly setting tf-models-official==2.8.0 avoids potential version conflicts and ensures stability.
Installing dependency libraries
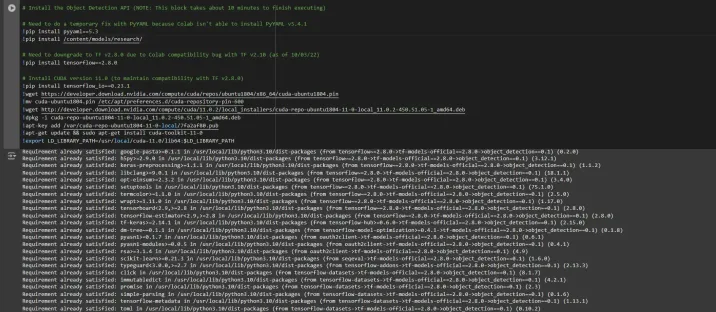
TensorFlow models often rely on specific library versions. Fixing the TensorFlow version ensures smooth integration.
# Install the Object Detection API

# Need to do a temporary fix with PyYAML because Colab isn't able to install PyYAML v5.4.1
!pip install pyyaml==5.3
!pip install /content/models/research/

# Need to downgrade to TF v2.8.0 due to Colab compatibility bug with TF v2.10 (as of 10/03/22)
!pip install tensorflow==2.8.0

# Install CUDA version 11.0 (to maintain compatibility with TF v2.8.0)
!pip install tensorflow_io==0.23.1
!wget https://developer.download.nvidia.com/compute/cuda/repos/ubuntu1804/x86_64/cuda-ubuntu1804.pin
!mv cuda-ubuntu1804.pin /etc/apt/preferences.d/cuda-repository-pin-600
!wget http://developer.download.nvidia.com/compute/cuda/11.0.2/local_installers/cuda-repo-ubuntu1804-11-0-local_11.0.2-450.51.05-1_amd64.deb
!dpkg -i cuda-repo-ubuntu1804-11-0-local_11.0.2-450.51.05-1_amd64.deb
!apt-key add /var/cuda-repo-ubuntu1804-11-0-local/7fa2af80.pub
!apt-get update && sudo apt-get install cuda-toolkit-11-0
!export LD_LIBRARY_PATH=/usr/local/cuda-11.0/lib64:$LD_LIBRARY_PATH
While running this block you need to restart the sessions again and run this block of code again to successfully install all dependencies. This will install all the dependencies successfully.
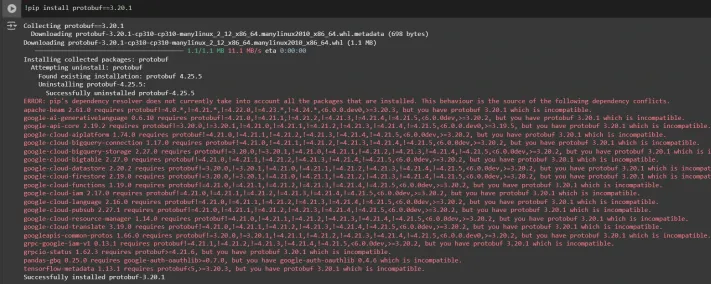
Installing an appropriate version of protobuf library for resolving dependency issues
!pip install protobuf==3.20.1
Step2: Verify Environment and Installations
To confirm the installation works, run the following test:
# Run Model Bulider Test file, just to verify everything's working properly
!python /content/models/research/object_detection/builders/model_builder_tf2_test.py
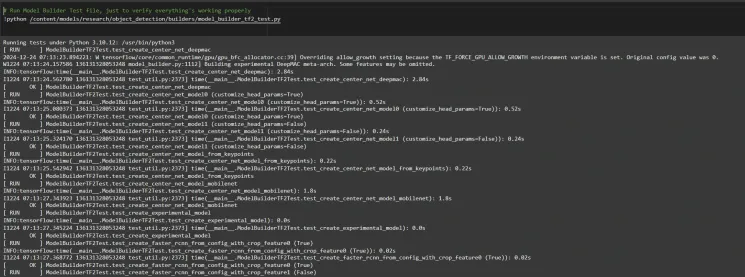
If no errors appear, your setup is complete. So now we have completed the setup successfully.
Step3: Prepare the Training Data
For this tutorial, we’ll use the “People Detection” dataset from Roboflow Universe. Follow these steps to prepare it:
Visit the dataset page:
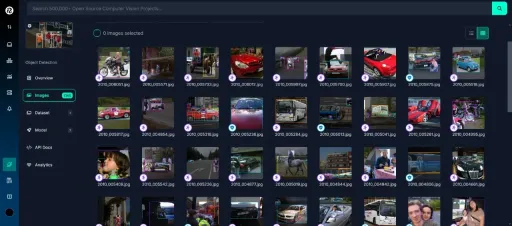
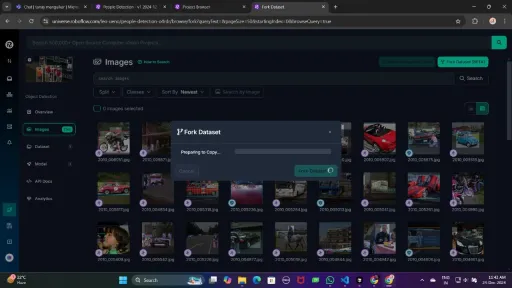
Fork the dataset into your workspace to make it accessible for customization.
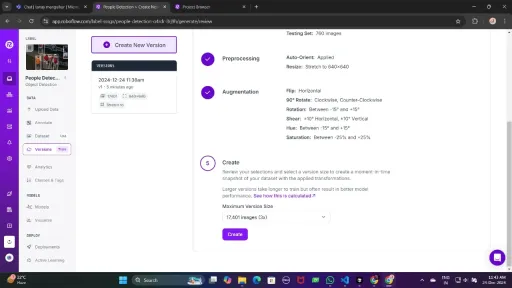
Generate a version of the dataset to finalize its preprocessing configurations such as augmentation and resizing.
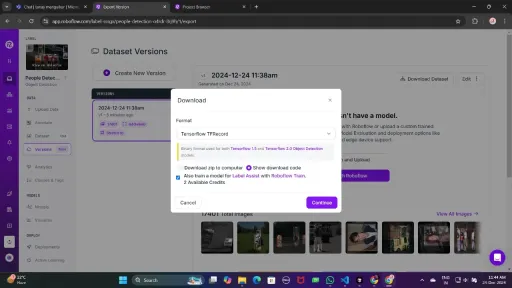
Now , Download it in TFRecord format, which is a binary format optimized for TensorFlow workflows. TFRecord stores data efficiently and allows TensorFlow to read large datasets during training with minimal overhead.
Once downloaded, place the dataset files in your Google Drive mount your code to your drive, and load those files in the code to use it.
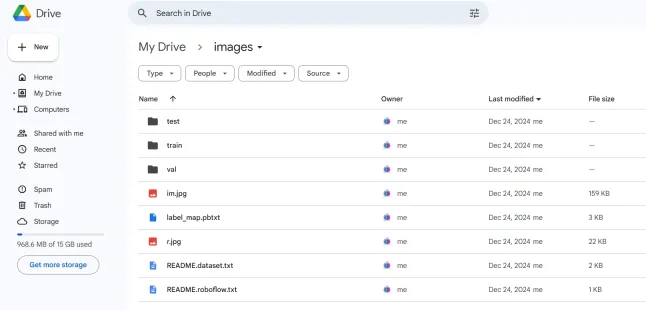
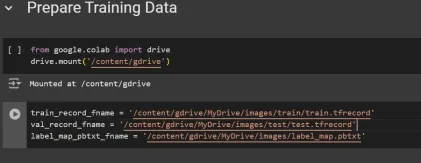
from google.colab import drive
drive.mount('/content/gdrive')


train_record_fname = '/content/gdrive/MyDrive/images/train/train.tfrecord'
val_record_fname = '/content/gdrive/MyDrive/images/test/test.tfrecord'
label_map_pbtxt_fname = '/content/gdrive/MyDrive/images/label_map.pbtxt'
Step4: Set Up the Training Configuration
Now, it’s time to set up the configuration for the object detection model. For this example, we’ll use the efficientdet-d0 model. You can choose from other models like ssd-mobilenet-v2 or ssd-mobilenet-v2-fpnlite-320, but for this guide, we’ll focus on efficientdet-d0.
# Change the chosen_model variable to deploy different models available in the TF2 object detection zoo
chosen_model = 'efficientdet-d0'

MODELS_CONFIG = {
    'ssd-mobilenet-v2': {
        'model_name': 'ssd_mobilenet_v2_320x320_coco17_tpu-8',
        'base_pipeline_file': 'ssd_mobilenet_v2_320x320_coco17_tpu-8.config',
        'pretrained_checkpoint': 'ssd_mobilenet_v2_320x320_coco17_tpu-8.tar.gz',
    },
    'efficientdet-d0': {
        'model_name': 'efficientdet_d0_coco17_tpu-32',
        'base_pipeline_file': 'ssd_efficientdet_d0_512x512_coco17_tpu-8.config',
        'pretrained_checkpoint': 'efficientdet_d0_coco17_tpu-32.tar.gz',
    },
    'ssd-mobilenet-v2-fpnlite-320': {
        'model_name': 'ssd_mobilenet_v2_fpnlite_320x320_coco17_tpu-8',
        'base_pipeline_file': 'ssd_mobilenet_v2_fpnlite_320x320_coco17_tpu-8.config',
        'pretrained_checkpoint': 'ssd_mobilenet_v2_fpnlite_320x320_coco17_tpu-8.tar.gz',
    },
}

model_name = MODELS_CONFIG[chosen_model]['model_name']
pretrained_checkpoint = MODELS_CONFIG[chosen_model]['pretrained_checkpoint']
base_pipeline_file = MODELS_CONFIG[chosen_model]['base_pipeline_file']
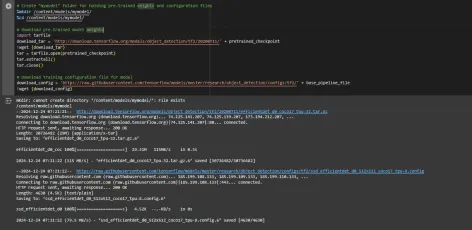
We then download the pre-trained weights and the corresponding configuration file for the chosen model:
# Create "mymodel" folder for holding pre-trained weights and configuration files
%mkdir /content/models/mymodel/
%cd /content/models/mymodel/

# Download pre-trained model weights
import tarfile
download_tar = 'http://download.tensorflow.org/models/object_detection/tf2/20200711/' + pretrained_checkpoint
!wget {download_tar}
tar = tarfile.open(pretrained_checkpoint)
tar.extractall()
tar.close()

# Download training configuration file for model
download_config = 'https://raw.githubusercontent.com/tensorflow/models/master/research/object_detection/configs/tf2/' + base_pipeline_file
!wget {download_config}
After this, we set up the number of steps for training and batch size based on the model selected:
# Set training parameters for the model
num_steps = 4000

if chosen_model == 'efficientdet-d0':
  batch_size = 8
else:
  batch_size = 8

You can increase and decrease num_steps and batch_size according to your requirements.
Step5: Modify the Pipeline Configuration File
We need to customize the pipeline.config file with the paths to our dataset and model parameters. The pipeline.config file contains various configurations such as the batch size, number of classes, and fine-tuning checkpoints. We make these modifications by reading the template and replacing the relevant fields:
# Set file locations and get number of classes for config file
pipeline_fname = '/content/models/mymodel/' + base_pipeline_file
fine_tune_checkpoint = '/content/models/mymodel/' + model_name + '/checkpoint/ckpt-0'

def get_num_classes(pbtxt_fname):
    from object_detection.utils import label_map_util
    label_map = label_map_util.load_labelmap(pbtxt_fname)
    categories = label_map_util.convert_label_map_to_categories(
        label_map, max_num_classes=90, use_display_name=True)
    category_index = label_map_util.create_category_index(categories)
    return len(category_index.keys())
num_classes = get_num_classes(label_map_pbtxt_fname)
print('Total classes:', num_classes)
# Create custom configuration file by writing the dataset, model checkpoint, and training parameters into the base pipeline file
import re
%cd /content/models/mymodel
print('writing custom configuration file')
with open(pipeline_fname) as f:
s = f.read()
with open('pipeline_file.config', 'w') as f:
# Set fine_tune_checkpoint path
s = re.sub('fine_tune_checkpoint: ".*?"',
'fine_tune_checkpoint: "{}"'.format(fine_tune_checkpoint), s)
# Set tfrecord files for train and test datasets
s = re.sub(
'(input_path: ".*?)(PATH_TO_BE_CONFIGURED/train)(.*?")', 'input_path: "{}"'.format(train_record_fname), s)
s = re.sub(
'(input_path: ".*?)(PATH_TO_BE_CONFIGURED/val)(.*?")', 'input_path: "{}"'.format(val_record_fname), s)
# Set label_map_path
s = re.sub(
'label_map_path: ".*?"', 'label_map_path: "{}"'.format(label_map_pbtxt_fname), s)
# Set batch_size
s = re.sub('batch_size: [0-9]+',
'batch_size: {}'.format(batch_size), s)
# Set training steps, num_steps
s = re.sub('num_steps: [0-9]+',
'num_steps: {}'.format(num_steps), s)
# Set number of classes num_classes
s = re.sub('num_classes: [0-9]+',
'num_classes: {}'.format(num_classes), s)
# Change fine-tune checkpoint type from "classification" to "detection"
s = re.sub(
'fine_tune_checkpoint_type: "classification"', 'fine_tune_checkpoint_type: "{}"'.format('detection'), s)
# If using ssd-mobilenet-v2, reduce learning rate (because it's too high in the default config file)
if chosen_model == 'ssd-mobilenet-v2':
s = re.sub('learning_rate_base: .8',
'learning_rate_base: .08', s)
s = re.sub('warmup_learning_rate: 0.13333',
'warmup_learning_rate: .026666', s)
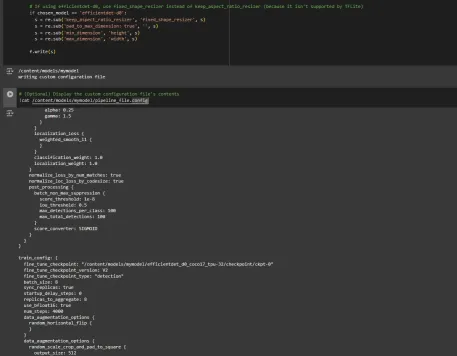
# If using efficientdet-d0, use fixed_shape_resizer instead of keep_aspect_ratio_resizer (because it isn't supported by TFLite)
if chosen_model == 'efficientdet-d0':
s = re.sub('keep_aspect_ratio_resizer', 'fixed_shape_resizer', s)
s = re.sub('pad_to_max_dimension: true', '', s)
s = re.sub('min_dimension', 'height', s)
s = re.sub('max_dimension', 'width', s)
f.write(s)
# (Optional) Display the custom configuration file's contents
!cat /content/models/mymodel/pipeline_file.config
# Set the path to the custom config file and the directory to store training checkpoints in
pipeline_file = '/content/models/mymodel/pipeline_file.config'
model_dir = '/content/training/'
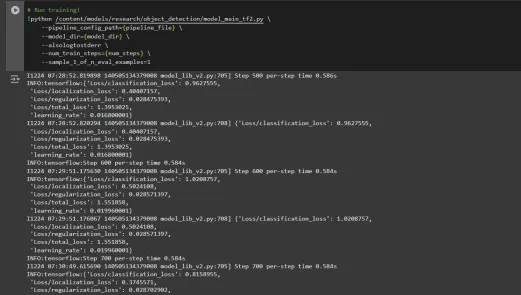
Step6: Train the Model
Now we can train the model using the custom pipeline configuration file. The training script will save checkpoints, which you can use to evaluate the performance of your model:
# Run training!
!python /content/models/research/object_detection/model_main_tf2.py \
    --pipeline_config_path={pipeline_file} \
    --model_dir={model_dir} \
    --alsologtostderr \
    --num_train_steps={num_steps} \
    --sample_1_of_n_eval_examples=1
Step7: Save the Trained Model
After training is complete, we export the trained model so it can be used for inference. We use the exporter_main_v2.py script to export the model:
!python /content/models/research/object_detection/exporter_main_v2.py \
    --input_type image_tensor \
    --pipeline_config_path {pipeline_file} \
    --trained_checkpoint_dir {model_dir} \
    --output_directory /content/exported_model

Finally, we compress the exported model into a zip file for easy downloading and then you can download the zip file containing your trained model:
import shutil
# Path to the exported model folder
exported_model_path = '/content/exported_model'

# Path where the zip file will be saved
zip_file_path = '/content/exported_model.zip'

# Create a zip file of the exported model folder
shutil.make_archive(zip_file_path.replace('.zip', ''), 'zip', exported_model_path)

# Download the zip file using Google Colab's file download utility
from google.colab import files
files.download(zip_file_path)
You can use these downloaded model files for testing it on unseen images or in your applications according to your needs.
You can refer to this:collab notebook for detailed code
Conclusion
In conclusion, this guide equips you with the knowledge and tools necessary to train an object detection model using TensorFlow’s Object Detection API, leveraging datasets from Roboflow Universe for rapid customization. By following the steps outlined, you can effectively prepare your data, configure the training pipeline, select the right model, and fine-tune it to meet your specific needs. Moreover, the ability to export and deploy your trained model opens up vast possibilities for real-world applications, whether in autonomous vehicles, medical imaging, or surveillance systems. This workflow enables you to create powerful, scalable object detection systems with reduced complexity and faster time to deployment.
Key Takeaways
- TensorFlow Object Detection API offers a flexible framework for building custom object detection models with pre-trained options, reducing development time and complexity.
- TFRecord format is essential for efficient data handling, especially with large datasets in TensorFlow, allowing fast training and minimal overhead.
- Pipeline configuration files are crucial for fine-tuning and adjusting the model to work with your specific dataset and desired performance characteristics.
- Pretrained models like efficientdet-d0 and ssd-mobilenet-v2 provide solid starting points for training custom models, with each having specific strengths depending on use case and resource constraints.
- The training process involves managing parameters like batch size, number of steps, and model checkpointing to ensure the model learns optimally.
- Exporting the model is essential for using the trained object detection model in a real-world model that is being packaged and ready for deployment.
Frequently Asked Questions
Q1: What is the TensorFlow Object Detection API?A: The TensorFlow Object Detection API is a flexible and open-source framework for creating, training, and deploying custom object detection models. It provides tools for fine-tuning pre-trained models and building solutions tailored to specific use cases.
Q2: What is the purpose of the TFRecord format in object detection workflows?A: TFRecord is a binary file format optimized for TensorFlow pipelines. It allows efficient data handling, ensuring faster loading, minimal I/O overhead, and smoother training, especially with large datasets.
Q3: What are pipeline configuration files, and why are they critical?A: These files enable seamless model customization by defining parameters like dataset paths, learning rate, model architecture, and training steps to meet specific datasets and performance goals.
Q4: How do I select the best pre-trained model for my use case?A: Select EfficientDet-D0 for a balance of accuracy and efficiency, ideal for edge devices, and SSD-MobileNet-V2 for lightweight, fast real-time applications like mobile apps.
The media shown in this article is not owned by Analytics Vidhya and is used at the Author’s discretion.
以上是用張量集檢測對象檢測的詳細內容。更多資訊請關注PHP中文網其他相關文章!

 AI內部部署的隱藏危險:治理差距和災難性風險Apr 28, 2025 am 11:12 AM
Apollo Research的一份新報告顯示,先進的AI系統的不受檢查的內部部署構成了重大風險。 在大型人工智能公司中缺乏監督,普遍存在,允許潛在的災難性結果
 構建AI測謊儀Apr 28, 2025 am 11:11 AM
傳統測謊儀已經過時了。依靠腕帶連接的指針,打印出受試者生命體徵和身體反應的測謊儀,在識破謊言方面並不精確。這就是為什麼測謊結果通常不被法庭採納的原因,儘管它曾導致許多無辜者入獄。 相比之下,人工智能是一個強大的數據引擎,其工作原理是全方位觀察。這意味著科學家可以通過多種途徑將人工智能應用於尋求真相的應用中。 一種方法是像測謊儀一樣分析被審問者的生命體徵反應,但採用更詳細、更精確的比較分析。 另一種方法是利用語言標記來分析人們實際所說的話,並運用邏輯和推理。 俗話說,一個謊言會滋生另一個謊言,最終
 AI是否已清除航空航天行業的起飛?Apr 28, 2025 am 11:10 AM
航空航天業是創新的先驅,它利用AI應對其最複雜的挑戰。 現代航空的越來越複雜性需要AI的自動化和實時智能功能,以提高安全性,降低操作
 觀看北京的春季機器人比賽Apr 28, 2025 am 11:09 AM
機器人技術的飛速發展為我們帶來了一個引人入勝的案例研究。 來自Noetix的N2機器人重達40多磅,身高3英尺,據說可以後空翻。 Unitree公司推出的G1機器人重量約為N2的兩倍,身高約4英尺。比賽中還有許多體型更小的類人機器人參賽,甚至還有一款由風扇驅動前進的機器人。 數據解讀 這場半程馬拉松吸引了超過12,000名觀眾,但只有21台類人機器人參賽。儘管政府指出參賽機器人賽前進行了“強化訓練”,但並非所有機器人均完成了全程比賽。 冠軍——由北京類人機器人創新中心研發的Tiangong Ult
 鏡子陷阱:人工智能倫理和人類想像力的崩潰Apr 28, 2025 am 11:08 AM
人工智能以目前的形式並不是真正智能的。它擅長模仿和完善現有數據。 我們不是在創造人工智能,而是人工推斷 - 處理信息的機器,而人類則
 新的Google洩漏揭示了方便的Google照片功能更新Apr 28, 2025 am 11:07 AM
一份報告發現,在谷歌相冊Android版7.26版本的代碼中隱藏了一個更新的界面,每次查看照片時,都會在屏幕底部顯示一行新檢測到的面孔縮略圖。 新的面部縮略圖缺少姓名標籤,所以我懷疑您需要單獨點擊它們才能查看有關每個檢測到的人員的更多信息。就目前而言,此功能除了谷歌相冊已在您的圖像中找到這些人之外,不提供任何其他信息。 此功能尚未上線,因此我們不知道谷歌將如何準確地使用它。谷歌可以使用縮略圖來加快查找所選人員的更多照片的速度,或者可能用於其他目的,例如選擇要編輯的個人。我們拭目以待。 就目前而言
 加固芬特的指南 - 分析VidhyaApr 28, 2025 am 09:30 AM
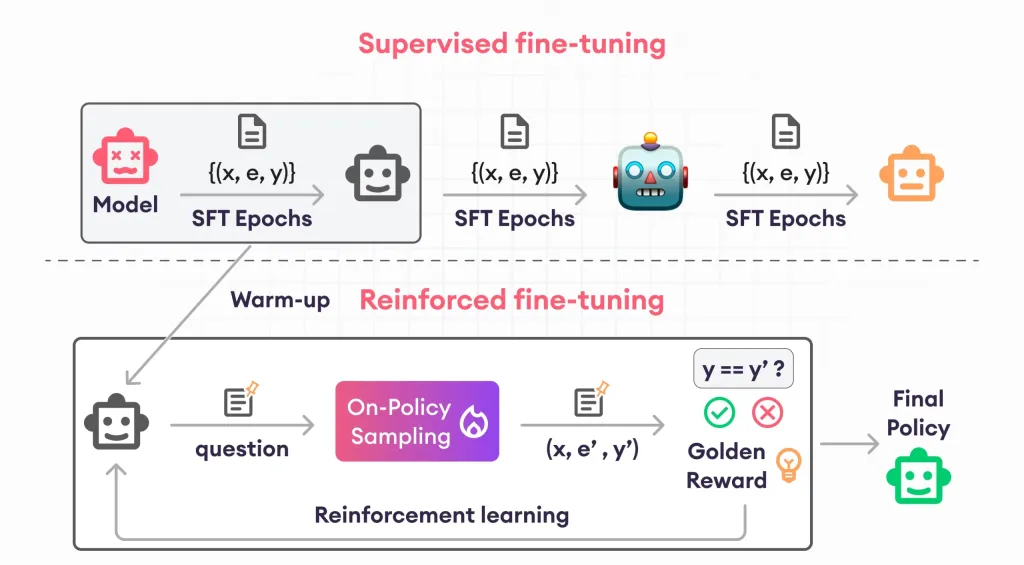
增強者通過教授模型根據人類反饋進行調整來震撼AI的開發。它將監督的學習基金會與基於獎勵的更新融合在一起,使其更安全,更準確,真正地幫助
 讓我們跳舞:結構化運動以微調我們的人類神經網Apr 27, 2025 am 11:09 AM
科學家已經廣泛研究了人類和更簡單的神經網絡(如秀麗隱桿線蟲中的神經網絡),以了解其功能。 但是,出現了一個關鍵問題:我們如何使自己的神經網絡與新穎的AI一起有效地工作


熱AI工具

Undresser.AI Undress
人工智慧驅動的應用程序,用於創建逼真的裸體照片

AI Clothes Remover
用於從照片中去除衣服的線上人工智慧工具。

Undress AI Tool
免費脫衣圖片

Clothoff.io
AI脫衣器

Video Face Swap
使用我們完全免費的人工智慧換臉工具,輕鬆在任何影片中換臉!

熱門文章
熱工具

EditPlus 中文破解版
體積小,語法高亮,不支援程式碼提示功能

記事本++7.3.1
好用且免費的程式碼編輯器

禪工作室 13.0.1
強大的PHP整合開發環境

SublimeText3 Mac版
神級程式碼編輯軟體(SublimeText3)

Atom編輯器mac版下載
最受歡迎的的開源編輯器

