


>本教程提供了使用和微調Mistral 7b語言模型的自然語言處理任務的綜合指南。 您將學會利用Kaggle進行模型訪問,執行推理,應用量化技術,微調模型,合併適配器並部署到擁抱面樞紐。
>訪問Mistral 7bMistral 7b可以通過各種平台訪問,包括擁抱臉,頂點AI,Replicate,Sagemaker Jumpstart和Baseten。 本教程的重點是利用Kaggle的“模型”功能進行簡化的訪問,消除了對手動下載的需求。
>本節演示了從kaggle和執行推理加載模型。 基本圖書館更新對於防止錯誤至關重要:
使用BITSANDBYTES使用NF4配置進行4位量化量化量增強加載速度並降低內存使用情況:
<code>!pip install -q -U transformers
!pip install -q -U accelerate
!pip install -q -U bitsandbytes</code>
>將Mistral 7b模型添加到您的Kaggle筆記本中涉及以下步驟:
<code>from transformers import AutoTokenizer, AutoModelForCausalLM, BitsAndBytesConfig, pipeline
import torch

bnb_config = BitsAndBytesConfig(
    load_in_4bit=True,
    bnb_4bit_quant_type="nf4",
    bnb_4bit_use_double_quant=True,
)</code>
>單擊右圖中的“添加模型”。 >搜索“ Mistral 7b”,選擇“ 7b-v0.1-hf”,然後添加。
- >
- 記錄目錄路徑。
庫: 使用
使用
>
transformers
<code>model_name = "/kaggle/input/mistral/pytorch/7b-v0.1-hf/1"

tokenizer = AutoTokenizer.from_pretrained(model_name)
model = AutoModelForCausalLM.from_pretrained(
        model_name,
        load_in_4bit=True,
        quantization_config=bnb_config,
        torch_dtype=torch.bfloat16,
        device_map="auto",
        trust_remote_code=True,
    )</code>
pipelineMISTRAL 7B微調
<code>pipe = pipeline(
    "text-generation",
    model=model,
    tokenizer = tokenizer,
    torch_dtype=torch.bfloat16,
    device_map="auto"
)</code>本節通過使用PEFT,4位量化和Qlora之類的技術來指導您通過>設置
<code>prompt = "As a data scientist, can you explain the concept of regularization in machine learning?"

sequences = pipe(
    prompt,
    do_sample=True,
    max_new_tokens=100,
    temperature=0.7,
    top_k=50,
    top_p=0.95,
    num_return_sequences=1,
)
print(sequences[0]['generated_text'])</code>安裝了必要的庫:>
導入相關模塊:
使用Kaggle Secrets安全管理API密鑰:guanaco-llama2-1k
基本模型,數據集和新型號名稱已定義:
數據加載
<code>%%capture
%pip install -U bitsandbytes
%pip install -U transformers
%pip install -U peft
%pip install -U accelerate
%pip install -U trl</code>
加載數據集並顯示樣本:
><code>from transformers import AutoModelForCausalLM, AutoTokenizer, BitsAndBytesConfig,HfArgumentParser,TrainingArguments,pipeline, logging from peft import LoraConfig, PeftModel, prepare_model_for_kbit_training, get_peft_model import os,torch, wandb from datasets import load_dataset from trl import SFTTrainer</code>
<code>from kaggle_secrets import UserSecretsClient
user_secrets = UserSecretsClient()
secret_hf = user_secrets.get_secret("HUGGINGFACE_TOKEN")
secret_wandb = user_secrets.get_secret("wandb")</code>
>加載Mistral 7b
<code>!huggingface-cli login --token $secret_hf
wandb.login(key = secret_wandb)
run = wandb.init(
    project='Fine tuning mistral 7B',
    job_type="training",
    anonymous="allow"
)</code>
該模型裝有4位精度:
<code>base_model = "/kaggle/input/mistral/pytorch/7b-v0.1-hf/1"
dataset_name = "mlabonne/guanaco-llama2-1k"
new_model = "mistral_7b_guanaco"</code>
加載令牌
加載和配置了令牌:
>
<code>dataset = load_dataset(dataset_name, split="train")
dataset["text"][100]</code>
添加適配器
 添加了一個lora適配器以進行有效的微調:
超參數
>培訓論點是定義的:
<code>bnb_config = BitsAndBytesConfig(
    load_in_4bit= True,
    bnb_4bit_quant_type= "nf4",
    bnb_4bit_compute_dtype= torch.bfloat16,
    bnb_4bit_use_double_quant= False,
)
model = AutoModelForCausalLM.from_pretrained(
        base_model,
        load_in_4bit=True,
        quantization_config=bnb_config,
        torch_dtype=torch.bfloat16,
        device_map="auto",
        trust_remote_code=True,
)
model.config.use_cache = False
model.config.pretraining_tp = 1
model.gradient_checkpointing_enable()</code>
SFT培訓
SFTTRAINER已配置並啟動培訓: 微調模型被保存並推到擁抱的臉上樞紐: 合併適配器 訪問微型模型
<code>!pip install -q -U transformers
!pip install -q -U accelerate
!pip install -q -U bitsandbytes</code>

保存並推動模型
<code>from transformers import AutoTokenizer, AutoModelForCausalLM, BitsAndBytesConfig, pipeline
import torch

bnb_config = BitsAndBytesConfig(
    load_in_4bit=True,
    bnb_4bit_quant_type="nf4",
    bnb_4bit_use_double_quant=True,
)</code>
模型評估
使用權重和偏見評估模型性能。提供了推理示例。
>適配器與基本模型合併,並將結果模型推向擁抱的臉。
合併的模型是通過擁抱的臉和推理加載的。
結論
以上是Mistral 7B教程:使用和微調Mistral 7b的分步指南的詳細內容。更多資訊請關注PHP中文網其他相關文章!

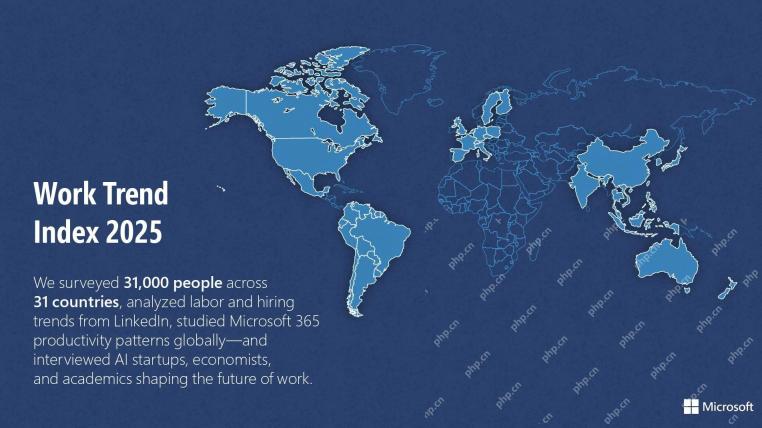 微軟工作趨勢指數2025顯示工作場所容量應變Apr 24, 2025 am 11:19 AM
由於AI的快速整合而加劇了工作場所的迅速危機危機,要求戰略轉變以外的增量調整。 WTI的調查結果強調了這一點:68%的員工在工作量上掙扎,導致BUR
 AI可以理解嗎?中國房間的論點說不,但是對嗎?Apr 24, 2025 am 11:18 AM
約翰·塞爾(John Searle)的中國房間論點:對AI理解的挑戰 Searle的思想實驗直接質疑人工智能是否可以真正理解語言或具有真正意識。 想像一個人,對下巴一無所知
 中國的'智能” AI助手回應微軟召回的隱私缺陷Apr 24, 2025 am 11:17 AM
與西方同行相比,中國的科技巨頭在AI開發方面的課程不同。 他們不專注於技術基準和API集成,而是優先考慮“屏幕感知” AI助手 - AI T
 Docker將熟悉的容器工作流程帶到AI型號和MCP工具Apr 24, 2025 am 11:16 AM
MCP:賦能AI系統訪問外部工具 模型上下文協議(MCP)讓AI應用能夠通過標準化接口與外部工具和數據源交互。由Anthropic開發並得到主要AI提供商的支持,MCP允許語言模型和智能體發現可用工具並使用合適的參數調用它們。然而,實施MCP服務器存在一些挑戰,包括環境衝突、安全漏洞以及跨平台行為不一致。 Forbes文章《Anthropic的模型上下文協議是AI智能體發展的一大步》作者:Janakiram MSVDocker通過容器化解決了這些問題。基於Docker Hub基礎設施構建的Doc
 使用6種AI街頭智能策略來建立一家十億美元的創業Apr 24, 2025 am 11:15 AM
有遠見的企業家採用的六種策略,他們利用尖端技術和精明的商業敏銳度來創造高利潤的可擴展公司,同時保持控制。本指南是針對有抱負的企業家的,旨在建立一個
 Google照片更新解鎖了您所有圖片的驚人Ultra HDRApr 24, 2025 am 11:14 AM
Google Photos的新型Ultra HDR工具:改變圖像增強的遊戲規則 Google Photos推出了一個功能強大的Ultra HDR轉換工具,將標準照片轉換為充滿活力的高動態範圍圖像。這種增強功能受益於攝影師
 Descope建立AI代理集成的身份驗證框架Apr 24, 2025 am 11:13 AM
技術架構解決了新興的身份驗證挑戰 代理身份集線器解決了許多組織僅在開始AI代理實施後發現的問題,即傳統身份驗證方法不是為機器設計的
 Google Cloud Next 2025以及現代工作的未來Apr 24, 2025 am 11:12 AM
(注意:Google是我公司的諮詢客戶,Moor Insights&Strateging。) AI:從實驗到企業基金會 Google Cloud Next 2025展示了AI從實驗功能到企業技術的核心組成部分的演變,


熱AI工具

Undresser.AI Undress
人工智慧驅動的應用程序,用於創建逼真的裸體照片

AI Clothes Remover
用於從照片中去除衣服的線上人工智慧工具。

Undress AI Tool
免費脫衣圖片

Clothoff.io
AI脫衣器

Video Face Swap
使用我們完全免費的人工智慧換臉工具,輕鬆在任何影片中換臉!

熱門文章
熱工具

記事本++7.3.1
好用且免費的程式碼編輯器

Atom編輯器mac版下載
最受歡迎的的開源編輯器

MinGW - Minimalist GNU for Windows
這個專案正在遷移到osdn.net/projects/mingw的過程中,你可以繼續在那裡關注我們。 MinGW:GNU編譯器集合(GCC)的本機Windows移植版本,可自由分發的導入函式庫和用於建置本機Windows應用程式的頭檔;包括對MSVC執行時間的擴展,以支援C99功能。 MinGW的所有軟體都可以在64位元Windows平台上運作。

禪工作室 13.0.1
強大的PHP整合開發環境

WebStorm Mac版
好用的JavaScript開發工具

