Summary of 13 Drawables in Android Part 2
,
Introduction to this section:
In this section we continue to learn about Drawable resources in Android. We learned in the previous section:
ColorDrawable;
NinePatchDrawable;
ShapeDrawable;
GradientDrawable!
These four Drawable~ In this section we continue to study the next five Drawables, which are:
BitmapDrawable;
InsertDrawable;
ClipDrawable ;
RotateDrawable;
AnimationDrawable!
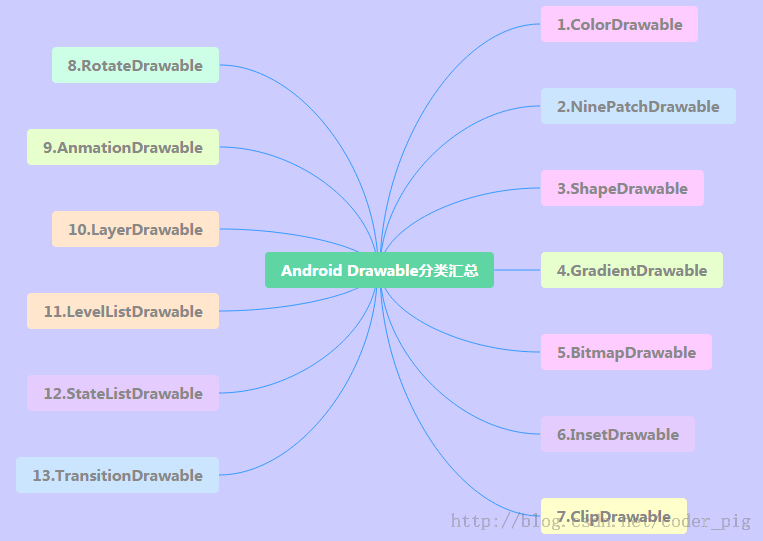
Let’s post the 13 types of Drawable maps:
Okay, let’s start this section~
1.BitmapDrawable
A kind of encapsulation of Bitmap, you can set the bitmap it wraps in the BitmapDrawable area The drawing methods include: Tile fill, stretch fill or keep the original size of the picture! Take <bitmap> as the root node! The optional attributes are as follows:
- src: Picture resource~
- antialias: Whether to support anti-aliasing
- filter: Whether to support bitmap filtering, if supported, the image can be displayed more smoothly
- dither: Whether to dither the bitmap
- gravity: If the bitmap is smaller than the container, you can set the relative position of the bitmap in the container
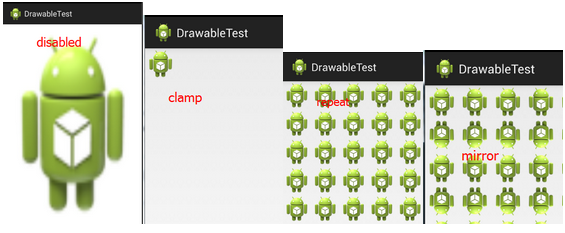
- tileMode: Specify the mode of the image tile filling container, set this If so, the gravity attribute will be ignored, with the following optional values: disabled (the entire pattern is stretched and tiled), clamp (original image size), repeat (tile),mirror(mirror tile)
Corresponding renderings:
①XML definition BitmapDrawable:
<?xml version="1.0" encoding="utf-8"?>
<bitmap xmlns:android="http://schemas.android.com/apk/res/android"
    android:dither="true"
    android:src="@drawable/ic_launcher"
    android:tileMode="mirror" />
②Java code to achieve the same effect:
BitmapDrawable bitDrawable = new BitmapDrawable(bitmap);
bitDrawable.setDither(true);
bitDrawable.setTileModeXY(TileMode.MIRROR,TileMode.MIRROR);
2.InsetDrawable
means embedding a Drawable inside another Drawable and leaving some space inside. Similar to the padding attribute of Drawable, but padding represents the margin between the content of Drawable and the Drawable itself! And InsetDrawable represents the margin between the two Drawables and the container, when the background required by the control is larger than the actual border When I was young, it was more suitable to use InsetDrawable. For example, using this can solve the problem between our custom Dialog and the screen. A spacing problem, I believe friends who have done it know that even if we set layout_margin, it is useless. This You can use this InsetDrawable at any time! Just set an insetXxx for InsetDrawable and set different The margin in the direction, and then set it as the background of the Dialog!
The relevant attributes are as follows:
- 1.drawable: The referenced Drawable, if it is empty, must have a child node of Drawable type!
- 2.visible: Set whether the Drawable has space
- 3.insetLeft,insetRight,insetTop,insetBottm: Set the left, right, top and bottom The margin of
① Use in XML:
<?xml version="1.0" encoding="utf-8"?>
<inset xmlns:android="http://schemas.android.com/apk/res/android"
    android:drawable="@drawable/test1"
    android:insetBottom="10dp"
    android:insetLeft="10dp"
    android:insetRight="10dp"
    android:insetTop="10dp" />
Use in Java code:
InsetDrawable insetDrawable = new InsetDrawable(getResources()
        .getDrawable(R.drawable.test1), 10, 10, 10, 10);
Use renderings:
Clip can be translated as cut, we can use ClipDrawable It is understood as cutting a part from the bitmap; The progress bar in Android is implemented using ClipDrawable. It determines the clipping based on the set level value. The size of the area, the root node is <clip>
The relevant properties are as follows:
:##clipOrietntion
##Usage example- : Set the cutting direction, you can set the horizontal and vertical directions
gravity- : Start cropping from that position
drawable- : The referenced drawable resource. If it is empty, it needs to have a child node of Drawable type. ps: The child node of this Drawable type: just add this statement in <clip>: This way...
Core: Modify the level value of ClipDrawable through code! The value of Level is 0~10000!
Running renderings
: Code implementation
① Define a ClipDrawable resource xml
:<?xml version="1.0" encoding="utf-8"?> <clip xmlns:android="http://schemas.android.com/apk/res/android" android:clipOrientation="horizontal" android:drawable="@mipmap/ic_bg_meizi" android:gravity="left" />②Set an ImageView in the activity_main main layout file and set src to clipDrawable!
Remember it is src, if If you write it as blackground, a null pointer will be reported!!!!
<LinearLayout xmlns:android="http://schemas.android.com/apk/res/android"
    xmlns:tools="http://schemas.android.com/tools"
    android:layout_width="match_parent"
    android:layout_height="match_parent"
    android:orientation="vertical">

    <ImageView
        android:id="@+id/img_show"
        android:layout_width="match_parent"
        android:layout_height="match_parent"
        android:src="@drawable/clip_bg" />

</LinearLayout>
③MainActivity.java sets the interception area size through setLevel:
public class MainActivity extends AppCompatActivity {

    private ImageView img_show;
    private ClipDrawable cd;
    private Handler handler = new Handler() {
        @Override
        public void handleMessage(Message msg) {
            if (msg.what == 0x123) {
                cd.setLevel(cd.getLevel() + 500);
            }
        }
    };

    @Override
    protected void onCreate(Bundle savedInstanceState) {
        super.onCreate(savedInstanceState);
        setContentView(R.layout.activity_main);
        img_show = (ImageView) findViewById(R.id.img_show);
        // 核心实现代码
        cd = (ClipDrawable) img_show.getDrawable();
        final Timer timer = new Timer();
        timer.schedule(new TimerTask() {
            @Override
            public void run() {
                handler.sendEmptyMessage(0x123);
                if (cd.getLevel() >= 10000) {
                    timer.cancel();
                }
            }
        }, 0, 300);
    }
}
Okay Yes, it's interesting. Don't ask me to get the girl's picture. There are a lot of them on Baidu~4. RotateDrawable
is used to rotate Drawable, and it is also done through setLevel For controlling rotation, the maximum value is also: 10000
The relevant properties are as follows:
- fromDegrees: Starting angle, corresponding to the lowest level value, the default is 0
- toDegrees: Ending angle, corresponding to The highest level value, the default is 360
- pivotX: Set the x coordinate of the reference point, the value is 0~1, the default is 50%, that is, 0.5
- pivotY: Set the Y coordinate of the reference point, the value is 0~1, the default is 50%, which is 0.5 ps: If the rotated image is not fully displayed, you can modify the above two values to solve the problem!
- drawable: Set the bitmap resource
- visible: Set whether the drawable is visible!
The angle diagram is as follows:
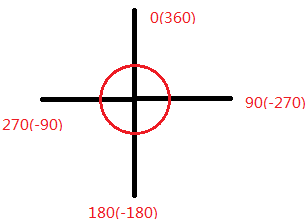
Usage example :
Running renderings:
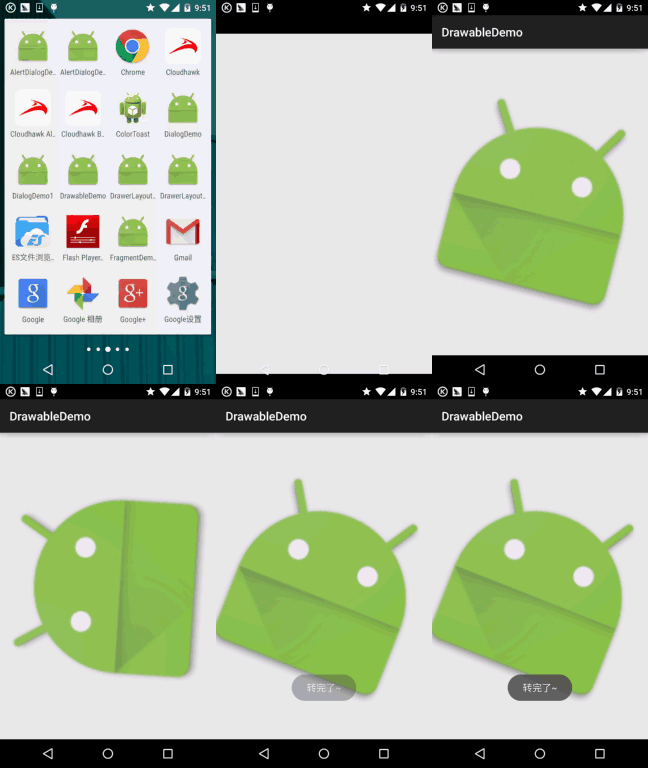
##Code implementation:
In the third Just make a little modification on the clipDrawable you click on!① Define a rotateDrawable resource file :
<?xml version="1.0" encoding="utf-8"?>
<rotate xmlns:android="http://schemas.android.com/apk/res/android"
    android:drawable="@mipmap/ic_launcher"
    android:fromDegrees="-180"
    android:pivotX="50%"
    android:pivotY="50%" />
② Modify the src in activity_main.xml to point to the above drawable That’s it, MainActivity only needs to change ClipDrawable to rotateDrawable!
public class MainActivity extends AppCompatActivity {

    private ImageView img_show;
    private RotateDrawable cd;
    private Handler handler = new Handler() {
        @Override
        public void handleMessage(Message msg) {
            if (msg.what == 0x123) {
                if (cd.getLevel() >= 10000)
                    Toast.makeText(MainActivity.this, "转完了~",
                            Toast.LENGTH_LONG).show();
                cd.setLevel(cd.getLevel() + 400);
            }
        }
    };

    @Override
    protected void onCreate(Bundle savedInstanceState) {
        super.onCreate(savedInstanceState);
        setContentView(R.layout.activity_main);
        img_show = (ImageView) findViewById(R.id.img_show);
        // 核心实现代码
        cd = (RotateDrawable) img_show.getDrawable();
        final Timer timer = new Timer();
        timer.schedule(new TimerTask() {
            @Override
            public void run() {
                handler.sendEmptyMessage(0x123);
                if (cd.getLevel() >= 10000) {
                    timer.cancel();
                }
            }
        }, 0, 100);
    }
}
5.AnimationDrawable
The last Drawable in this section , AnimationDrawable is used to implement Android mid-frame animation, which is to combine a series of Drawable, played frame by frame in a certain order; animations in Android are relatively rich, including traditional tweening animations, panning, Zooming and other effects, but here we only introduce this AnimationDrawable to implement frame animation, about alpha, scale, translate, rotate, etc. will be introduced in detail in the animation chapter later~We use <animation-list> as the root node
Related attribute methods:
oneshot: Set whether to loop playback, false means loop playback!!!duration:Frame interval time, Usually we will set it to 300 milliseconds After we obtain the AniamtionDrawable instance, we need to call its start() method to play the animation. In addition, we should pay attention to If called in the OnCreate() method, it will have no effect because the View has not yet completed initialization. We can Use a simple handler to delay animation playback! Of course there are other methods, see the following link: Several ways to run Android AnimationDrawable It is really very convenient to use AnimationDrawable to implement frame animation~
Usage example:
Running renderings:
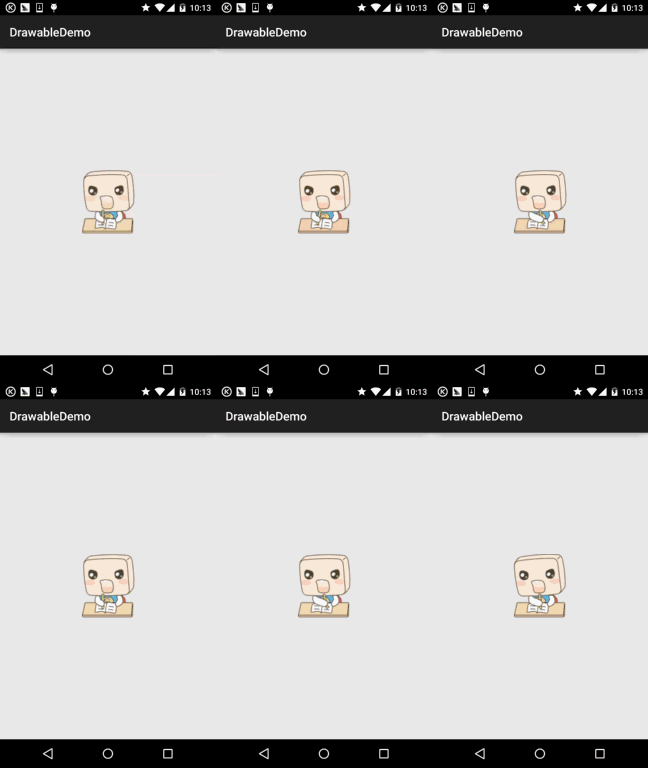
Code implementation:
①First define an xml resource file of AnimationDrawable:
<?xml version="1.0" encoding="utf-8"?>
<animation-list xmlns:android="http://schemas.android.com/apk/res/android"
    android:oneshot="false">

    <item
        android:drawable="@mipmap/ic_pull_to_refresh_loading01"
        android:duration="100" />

    <item
        android:drawable="@mipmap/ic_pull_to_refresh_loading02"
        android:duration="100" />
    <item
        android:drawable="@mipmap/ic_pull_to_refresh_loading03"
        android:duration="100" />
    <item
        android:drawable="@mipmap/ic_pull_to_refresh_loading04"
        android:duration="100" />
    <item
        android:drawable="@mipmap/ic_pull_to_refresh_loading05"
        android:duration="100" />
    <item
        android:drawable="@mipmap/ic_pull_to_refresh_loading06"
        android:duration="100" />

</animation-list>
②Activity_main.xml sets the src, and then in MainActivity:
public class MainActivity extends AppCompatActivity {

    private ImageView img_show;
    private AnimationDrawable ad;

    @Override
    protected void onCreate(Bundle savedInstanceState) {
        super.onCreate(savedInstanceState);
        setContentView(R.layout.activity_main);
        img_show = (ImageView) findViewById(R.id.img_show);
        // 核心实现代码
        ad = (AnimationDrawable) img_show.getDrawable();
        Handler handler = new Handler();
        handler.postDelayed(new Runnable() {
            @Override
            public void run() {
                ad.start();
            }
        }, 300);
    }
}
Hehe, it’s super simple. In the future, when you need to use frame animation, just use AnimationDrawable. Of course, it is only suitable for frame animations that do not require control. For example, the above is the progress bar material when the super table is pulled down to refresh. A simple frame animation made! Expand by yourself according to your own needs~
Summary of this section:
This section introduces another five Drawables. It’s very interesting, isn’t it? Let’s quickly introduce them Apply it to your actual development~ Hee hee, that’s all, thank you! In addition, a reader just sent me a private message asking me not to delete my previous articles. Well, let’s talk about it here. Only delete some duplicates, such as those sections that are similar to this one~ Of course I will also backup them! Deleted articles will be backed up~ So don’t worry!
