search
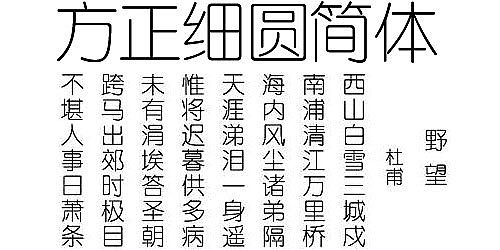
HomeWebsite Materialsfont materialFounder thin round simplified font

Founder thin round simplified font

Disclaimer

All resources on this site are contributed by netizens or reprinted by major download sites. Please check the integrity of the software yourself! All resources on this site are for learning reference only. Please do not use them for commercial purposes. Otherwise, you will be responsible for all consequences! If there is any infringement, please contact us to delete it. Contact information: admin@php.cn

Related Article

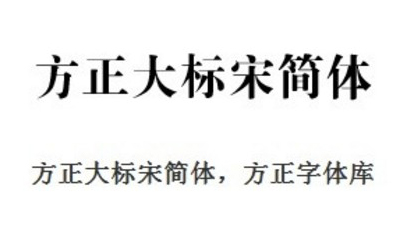
How to set the size 2 font of Founder Xiaobiao Song simplified font. How to set the size 2 font of Founder Xiaobiao Song simplified font.How to set the size 2 font of Founder Xiaobiao Song simplified font. How to set the size 2 font of Founder Xiaobiao Song simplified font.

06Aug2024

Many users like to use the Founder Xiaobiao Song Simplified font, so do you know how to set the size 2 font of the Founder Xiaobiao Song Simplified font? The article brought to you below explains how to set the size 2 font in Founder Xiaobiao Song Simplified font. Let's take a look below. How to set the size 2 font of Founder Xiaobiao Song Simplified font? The first step to set the size 2 font for Founder Xiaobiao Song Simplified Font: On the document page, select text and click Font. Step 2: When a drop-down menu appears, click on the Founder icon to display Song Simplified Chinese. Step 3: Complete the settings and click on the font size. Step 4: When a drop-down appears, click No. 2. Step 5: In this way, the text is set successfully.

How to create file labels using the simplified font Founder Xiaobiao Song. How to create file labels using the simplified font Founder Xiaobiao Song.How to create file labels using the simplified font Founder Xiaobiao Song. How to create file labels using the simplified font Founder Xiaobiao Song.

01Aug2024

Presumably all of the users here are familiar with the Founder Xiaobiao Song Simplified font, but do you know how to create file labels with the Founder Xiaobiao Song Simplified font? The article brought to you below describes the method of creating file labels using the Founder Xiaobiao Song Simplified font. Users who are interested in this can take a look below. How to create file labels using Founder Xiaobiao Song Simplified font? How to create file labels using the simplified font of Founder and Small Standard Song. The picture below shows the effect after inputting the simplified Chinese font of Founder and Small Standard Song directly into the text box. You can see that some of the dots above the word "文" are not displayed. First, use Founder's small standard Simplified Song to input the tag content in a blank document, adjust the font size, and then move the cursor to the middle of every two words and press the Enter key to make the text vertical. Select all vertical text,

How to set the second size font in Founder Xiaobiao Song Simplified Font_How to set the second size font in Founder Xiaobiao Song Simplified FontHow to set the second size font in Founder Xiaobiao Song Simplified Font_How to set the second size font in Founder Xiaobiao Song Simplified Font

08Jun2024

Step one: On the document page, select text and click font. Step 2: When a drop-down menu appears, click on the Founder icon to display Song Simplified Chinese. Step 3: Complete the settings and click on the font size. Step 4: When a drop-down appears, click No. 2. Step 5: In this way, the text is set successfully.

How to create file labels using Founder Xiaobiao Song simplified font_How to create file labels using Founder Xiaobiao Song simplified fontHow to create file labels using Founder Xiaobiao Song simplified font_How to create file labels using Founder Xiaobiao Song simplified font

10Jun2024

First, use Founder's small standard Simplified Song to input the label content in a blank document, adjust the font size, and then move the cursor to the middle of every two words and press the Enter key to make the text vertical. Select all vertical text, click the [Table] drop-down menu button in the [Insert] tab of the toolbar, and select [Convert Text to Table] in the pop-up menu. After the dialog box pops up, there is no need to change the settings. Click the OK button to close the dialog box. You can see the effect in Figure 2 below. Right-click on the selection to pop up the menu and select [Borders and Shading]. After the dialog box pops up, use the mouse to click on the center line border pointed by the red arrow in Figure 1 below. When the center line disappears, click the OK button to close the dialog box. At this time, the center line of the table has completely disappeared, leaving only a large border. Move mouse to right

How to change the font in Niannian's account How to change the font in Niannian's accountHow to change the font in Niannian's account How to change the font in Niannian's account

28Jun2024

Click the [Toolbar] icon in the upper right corner of the page. Click the [Material Management] menu in the toolbar. Click the [Font] menu on the material management page to proceed to the next step. Finally choose your favorite font.

How to import fonts in ps_Operation steps to import fonts in psHow to import fonts in ps_Operation steps to import fonts in ps

02Jun2024

1. First download the desired font from the Internet and open [This PC]. 2. Then enter the [C:Windows] location and open the [fonts] folder there. 3. Then put the downloaded font file into the [Fonts] folder. 4. Then open PS and click the [T]-shaped text tool on the left. 5. Finally, click the font arrow above to find the imported font material in the drop-down menu.

How to change the font in Niannian account How to change the fontHow to change the font in Niannian account How to change the font

27Jun2024

In the world full of creativity and personality of Niannian's account, the operation of changing fonts is like a wonderful magic transformation. When you choose to change fonts, it seems to open a door to endless artistic possibilities. How to change fonts 1. Click the [Toolbar] icon in the upper right corner of the page. 2. Click the [Material Management] menu in the toolbar. 3. Click the [Font] menu on the material management page and go to the next step. 4. Finally, choose the font you like.

How to create a black and white line drawing comic effect using cutout. Tutorial on how to create a black and white line drawing comic effect using cutout.How to create a black and white line drawing comic effect using cutout. Tutorial on how to create a black and white line drawing comic effect using cutout.

01Jun2024

1. First, open the material library button under the media menu in the upper left corner of the clip, search for character-related videos and add them to the track. 2. Then, open the comic column under the special effects menu, and select the black and white line drawing special effects to add. 3. Next, in the text Search the comic style font in the menu, select a style and add it to the video track 4. Finally, after entering the text, change the font to Dreamer format, and finally open the text editing panel, modify the parameters as shown below, and add the timeline track Just align with the material

See all articles