search
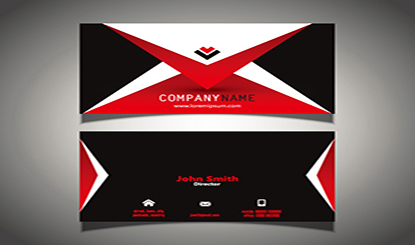
HomeWebsite MaterialsVector materialBlack and red vector business card design

Black and red vector business card design

Disclaimer

All resources on this site are contributed by netizens or reprinted by major download sites. Please check the integrity of the software yourself! All resources on this site are for learning reference only. Please do not use them for commercial purposes. Otherwise, you will be responsible for all consequences! If there is any infringement, please contact us to delete it. Contact information: admin@php.cn

Related Article

Free material download: iOS 8 vector UI material kit_html/css_WEB-ITnoseFree material download: iOS 8 vector UI material kit_html/css_WEB-ITnose

24Jun2016

Free material download: iOS 8 vector UI material kit

Free download! Twitter Bootstrap V3 vector interface material_html/css_WEB-ITnoseFree download! Twitter Bootstrap V3 vector interface material_html/css_WEB-ITnose

24Jun2016

Free download! Twitter Bootstrap V3 vector interface material

How to import AI materials into PPTHow to import AI materials into PPT

18Apr2024

Use AI to open vector material. Select the material and right-click [Ungroup]. Select the material and press [Ctrl+C] to open the PPT. Press [Cttl+Alt+V] to select the material and press [Ctrl+Shift+G] twice in succession. In the imported material The final effect of deleting the first frame is as shown in the figure

How to create silhouette text in CorelDRAW Production method tutorialHow to create silhouette text in CorelDRAW Production method tutorial

09Feb2024

CorelDRAW is a very easy-to-use picture design software. It has many powerful functions that can help users design a variety of beautiful and creative pictures and text. Today, let us take a look at how to create silhouette text. Most of these text effects are made with silhouettes of small animals or plants, so we need to prepare this type of vector material. Let’s take a look at the details! The specific operations are as follows: 1. Open the CorelDRAW software and substitute the vector material. If it is not a vector image, click [Tracing Bitmap] to convert it. 2. Use the [Pen Tool] to circle the part where you want to replace the text. 3. Select the silhouette material and the drawn curve. , click Intersect, extract the tail and click Simplify to remove the tail from the original material. 4. Input

Red Magic 9 Pro + Transformers Bumblebee limited edition mobile phone appearance announced: black and yellow contrast + deuterium front transparent designRed Magic 9 Pro + Transformers Bumblebee limited edition mobile phone appearance announced: black and yellow contrast + deuterium front transparent design

28Mar2024

According to news on March 27, the Red Magic 9Pro + Hornet limited edition mobile phone will be released at 10:00 on March 29. The official information about the appearance of this phone has been announced. According to reports, this mobile phone adopts a classic black and yellow contrast color + Red Magic Deuterium Front transparent design. The body has a carbon fiber texture and mechanical texture, and is printed with the BUMBLEBEE title, cold-engraved Autobot LOGO, B127 Bumblebee Autobot code name and other elements. Referring to the previous generation Bumblebee limited edition model, the phone is also expected to be equipped with customized content such as Transformers Bumblebee theme UI. The parameters of the Red Magic 9Pro+ standard version of the mobile phone are as follows: SoC: Qualcomm Snapdragon 8Gen3 Screen: 6.8 inches 2480x1116 resolution 120Hz screen RAM: 16GB Storage space: 256GB/

Detailed steps for batch importing vector material images into PPTDetailed steps for batch importing vector material images into PPT

26Mar2024

1. Search for vector icons, as long as they are in ai or eps format. 2. Open ai, double-click the blank space to import the material. 3. Select a material. As can be seen from the picture, each character is grouped together. We choose to right-click to cancel the grouping. 4. After canceling the grouping, select a small icon individually and copy it with ctrl+c. 5. We go to the PPT interface, press ctrl+alt+v to paste selectively, and select the enhanced metafile. Paste the image below. 6. It’s not over yet. The image is not editable. We right-click and select Group-Ungroup. In the pop-up window, we select Yes. 7. Open the selection pane, and you can see that the graphic is composed of multiple small vector graphics. 8. At this time, you can modify the graphic, such as changing the clothes to yellow.

Introduction to the method of designing 3D text LOGO in mayaIntroduction to the method of designing 3D text LOGO in maya

12Apr2024

1. Open the AI ​​vector file of the LOGO and save it as an Illustrator3.0 version file. 2. Drag this file into the opened maya. 3. Switch MAYA to the Surfaces module, as shown in the picture, or shortcut key F4. 4. Open Surfaces→BevelPlus→Set Extrudedistance (thickness) to the thickness you want→select the curve→click Apply. At this point the curve becomes a three-dimensional model. 5. Adjust material→Light→Render→Finish.

How to make woodcut vector drawings with AI-How to make woodcut vector drawings with AIHow to make woodcut vector drawings with AI-How to make woodcut vector drawings with AI

06May2024

1. First, in the ai software, click the file menu and insert the picture material. 2. Then, click the mouse to select the picture. In the artistic effect column of the effect menu, find and open the woodcut option. 3. Then, change the color scale, edge, etc. Change the simplification and edge fidelity parameters to 6, 10, and 2, and click the OK button to save. The editor has shared the method of making woodcut vector images with AI here. Don’t miss it.

See all articles