WordPress general settings
In this chapter, we will look at General Settings in WordPress. WordPress General Settings are used to set the basic configuration settings for your site. In the settings management screen, it is the default settings screen.
Here are the steps to access General Settings -
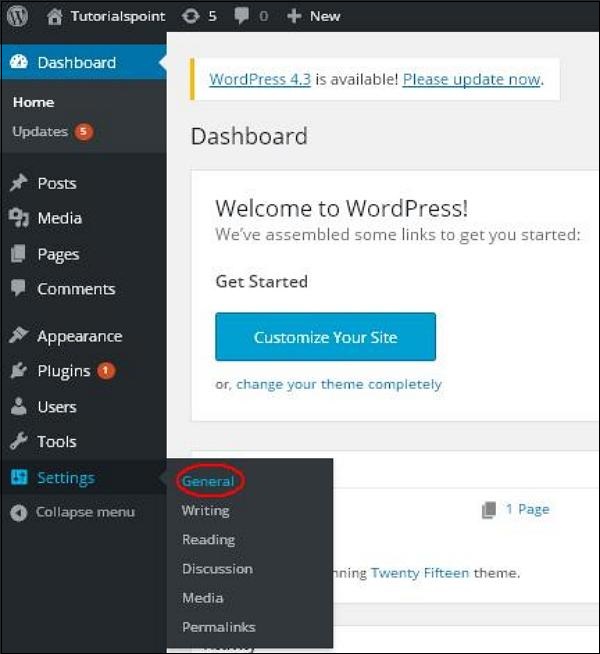
Step 1 - Click on the Settings → General option in WordPress.

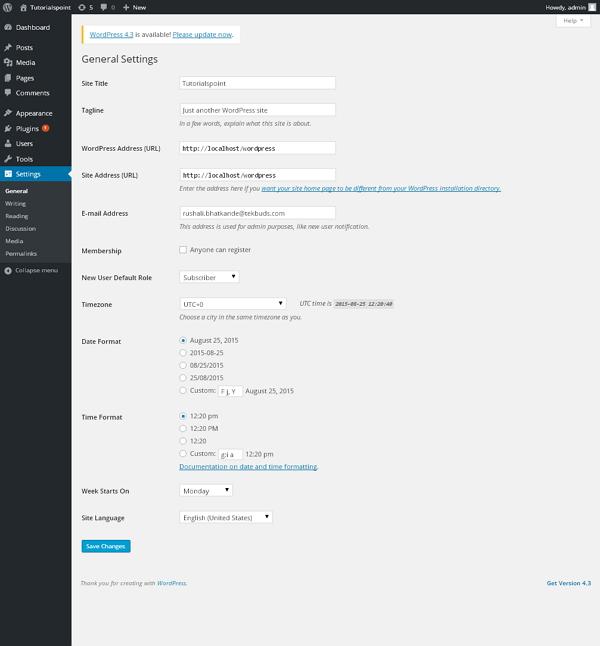
Step 2 - Display the General Settings page as shown in the following snapshot.

The following are details for the fields on the General Settings page.
Site Title - Displays the name of the site in the template title.
Tagline - Displays a short sentence about your website.
WordPress Address (URL) - This is the URL of the WordPress directory where all your core application files reside.
Website Address (URL) - Enter the URL of the website you would like the website to display on your browser.
E-mail Address - Enter your email address which will help with password recovery or any updates.
Membership - When this checkbox is checked, anyone can register an account on your site.
New User Default Role - Set a default role for newly registered users or members.
Timezone - Set the time zone based on a specific city.
Date Format - Set the date format you need to display on your website.
Time Format - Set the time format you need to display on the website.
Week Starts On - Select the day of the week you wish to start on your WordPress calendar. By default, it is set to Monday.
Site Language - Set the language for your WordPress dashboard.
Step 3 - After filling in all the information about the general settings, click the Save Changes button. It saves all general setup information.


