WordPress editor user
In this chapter, we will look at how to edit users in WordPress.
Here are the simple steps to edit a user in WordPress.
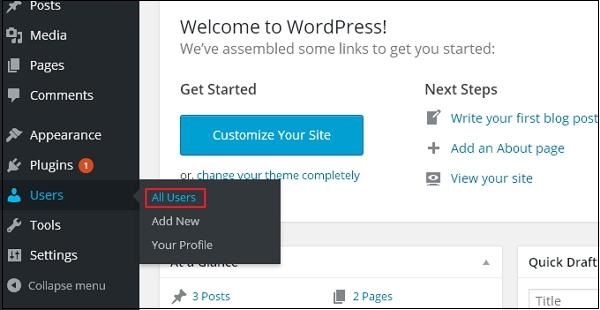
Step (1) - Click Users → All Users.

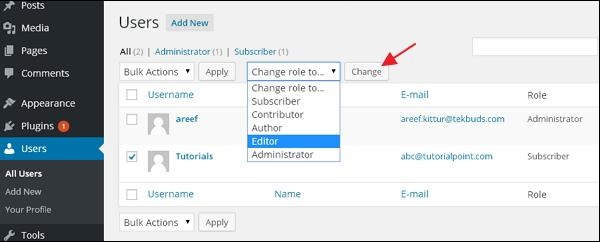
Step (2) - You will see a list of users.

There are two more tabs on the toolbar:
Administrator - A list of administrators will be displayed.
Subscriber - A list of subscribers will be displayed.
When we click on the Change Role box, a drop-down list will appear, as shown in the screenshot above.
Subscriber - A person who can only manage their profile.
Contributor - A person who can write and supervise their own messages, but cannot publish them.
Author - A person who can publish and manage their own information.
Editor - A person who can publish and manage messages, including messages from other users.
Administrator - A person who has access to all administrative functions within a single website.
Click the checkbox for user name to change the user's role. Then, click the change button and the user's role will change accordingly.
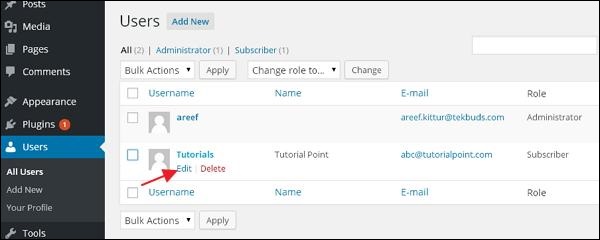
Step (3) - Click on the Edit option as shown in the following screen to edit the user.

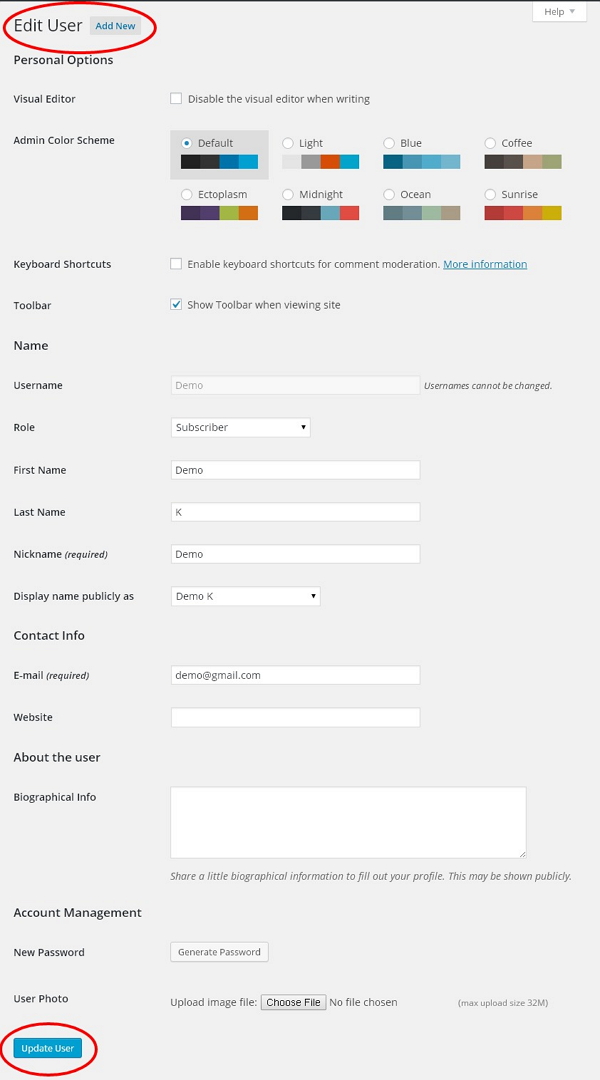
Step (4) - Display the Edit User page. You can edit or modify all fields as needed, then click Update User to save your changes.


