WordPress add user


In this chapter, we will look at how to add users to your WordPress blog or website. You will receive an email notification when a user registers on your WordPress blog or website, so you always know when a new user has registered, and you can then go into your dashboard and edit the user's role.

Here are the simple steps to add a user in WordPress.

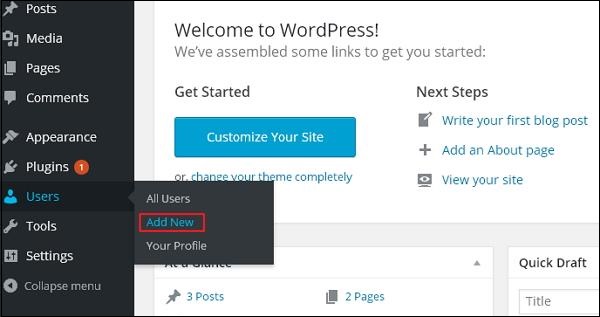
Step (1) - Click Users → Add New in WordPress.

wordpress-add-users-step1.jpg

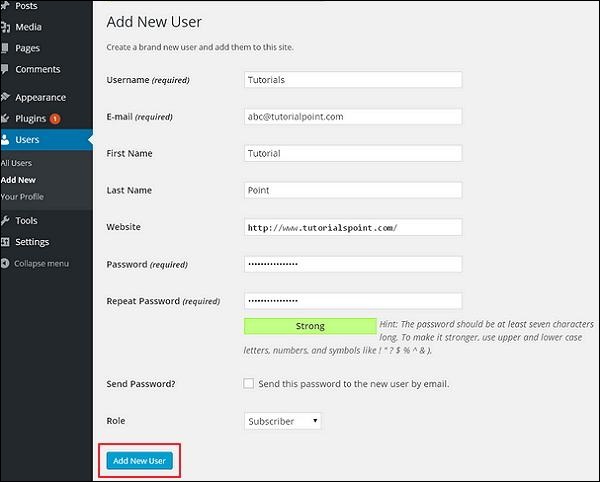
Step (2) - You can fill in the user details on the Add New User page. Complete all required fields (shown in the screen below) to proceed.

wordpress-add-users-step2.jpg
  • Username (required) - Enter a unique username that you would like to appear on the site.

  • Email (required) - Enter a valid email address. This is the email address from which users receive notifications from this site.

  • Name - Enter the user's name.

  • Last Name - Enter the user's last name.

  • Website - Enter the URL of the user's website.

  • Password (required) - Enter your password.

  • Repeat password (required) - Repeat the same password as the previous password to authenticate.

  • Send Password - Send password to new user via email checkbox. The user will receive an email with a new password.

  • Role - Select a specific role from the drop-down list, i.e. Subscriber, Contributor, Author, Editor or Administrator.

Click the Add New User button to add a user to your user list.

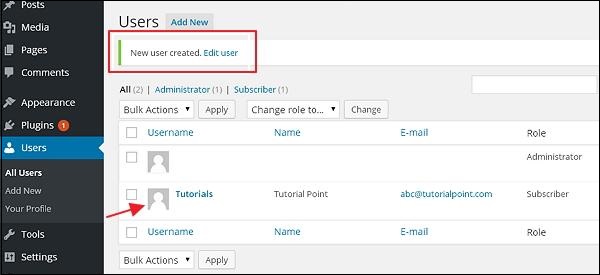
Step (3) - You can view the user list to see if the user has been added. The message will appear as New User Created as shown in the following screen.

wordpress-add-users-step3.jpg