
 Article Tags


How to put single quotes in word
1. You can get it by typing on the keyboard in English mode. ''(The key position is different on each keyboard, usually near the Enter key or to the right of the colon and semicolon keys) Please note: the typed single quotes are different from the usual ones. They are directly vertical without turning. This is because You entered English using half-width punctuation, just change it to full-width punctuation. The method is to use the mouse to click on the periods and commas on the input method indicator bar to change the small solid dots into large hollow dots. 2. Use smart input method. The following is the rendering obtained by the editor using Sogou Pinyin and Qq Pinyin to input [danyinhao]. 3. Insert in word. Insert--Symbol--Punctuation mark, select left single quote or right single quote.
Apr 26, 2024 am 10:10 AM
Steps to set and cancel read-only mode in Word
1. Open a Word document that needs to be set up. 2. Select [Review] in the options bar → click to open the settings window of [Restrict Editing]. 3. Select the [Do not allow any changes (read-only)] option in [Edit Settings]. 4. Click [Yes, start forced protection] to pop up the password setting window. After entering the password, click [OK] to complete the setting. Others cannot change this Word document arbitrarily. Cancel read-only mode: 1. Open the document that needs to be edited but has set read-only mode, enter any characters, and there will be a prompt that cannot be edited in the lower left corner. 2. Select [Review] in the options bar → click to open the settings window of [Restrict Editing]. 3. Select the [Stop Protection] option to pop up the password input window, enter the set password, and click OK
Apr 26, 2024 am 10:10 AM
How to convert a word table to an Excel table without changing the layout
Take the following word table as an example. First press F12 Save As to save the Word document as a web page. Open Excel, open the web table you just saved, and all the formatting of the table will be retained. You can then save the table in Xls format. If you want to transfer the Excel table to Word so that the layout is not messy, you can first select the entire table and copy it. In Paste Special in Word, select the Excel worksheet object to copy the Excel table to Word.
Apr 26, 2024 am 10:10 AM
How to create a classroom lesson plan template in Word
1. As a lesson plan, it is not only for yourself to see, but may also be for others or superiors to see. Therefore, you must write down the students/classes, date, time, courses and other information. 2. Create teaching objectives and analyze the key points and difficulties. The goals here cannot be too general, they must be visual, operable, and testable for completion. 3. It is necessary to sort out the knowledge points, which should be clearer than the teaching objectives, and set a certain teaching time to prevent slowing down the teaching process. 4. The formulation of teaching content is the important content of the lesson plan. The teaching content must be organized. For example, we divide it into several parts. What knowledge points should be mastered in each part should be marked. 5. If the word part is added, you can also make a special
Apr 26, 2024 am 10:07 AM
How to adjust character spacing in wps2019
Open wps2019, enter the text you want to edit, drag the mouse to select the text you want to adjust the character spacing, right-click the selected text, and select the [Font] menu item in the pop-up menu. At this time, the font window of wps2019 will open. In the window, we click the [Character Spacing] tab. In the opened character spacing window, we can see a [Spacing] setting item, click the drop-down button, and select the [Wide] menu item in the pop-up menu. Next, in the subsequent value setting box, adjust the value of the spacing. During the adjustment process, you can view the effect of the adjustment through the preview window below. Finally, we can compare the effect of adjusting the character spacing and not adjusting the spacing.
Apr 26, 2024 am 10:07 AM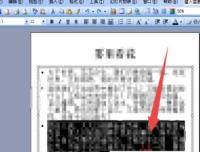
Introduction to the method of line spacing adjustment in Power Point2003
First, select the paragraphs in your presentation that you want to adjust. Click the [Format] command in the menu bar. Click to select the [Line Spacing] command. Find the units row after the segment, open the drop-down list and change it to points. Enter the value in front. Finally, click OK.
Apr 26, 2024 am 10:04 AM
How to delete word history
Open the word2003 window, click the [Tools] → [Options] menu command in the menu bar to open the [Options] dialog box. Switch to the [General] tab in the opened [Options], cancel the [List recently used files] checkbox, and click the [OK] button. Press the key combination [CtrlAlt-] in the word document window (the [-] sign is the key to the left of the [=] sign, not the key on the small keyboard). At this time, the cursor will become a [—] black horizontal line cursor. Use the horizontal cursor to click the [File] menu and click the name of the Word document you want to delete to delete it (the cursor can only delete one record at a time).
Apr 26, 2024 am 10:04 AM
How to make a large PPT turntable_a few steps
First we make a large turntable pointer. We first insert an arrow shape with any color. Then we duplicate this arrow, flip it so that it faces the opposite direction of the first arrow, and set its fill to no fill to hide it. Finally combine the two shapes together. Then we add a rotation animation to the pointer. The specific operation is to customize the animation, [Add Animation]-[Emphasis]-[Spiral Support], and then the duration is 0.2 seconds. Then check the box above to automatically set the slide animation effect to 0 seconds. The slideshow option is to loop. Finally, we add the copywriting on the large plate, and the turntable lottery effect is completed. Press F5 to start the show, and press 1 to pause the pointer. How about a homemade big carousel lottery?
Apr 26, 2024 am 10:04 AM
Detailed method of making multi-line file header in word2007
To combine four (multiple) rows into one, click [Insert → Table] in the word2007 menu bar, click the three-purpose arrow in the table drop-down, select 4×2 to insert into the table, and then enter the names of each unit in the first column of the table. Enter the word File or Notification in the second column. First select the first column of tables, set the font, font style and font size, and then adjust the line spacing according to the actual situation. Select the entire table, click [Home → Paragraph] in the menu bar, in the opened Paragraph [Window], in [Spacing] under the [Indent and Spacing] tab, click the drop-down triangle to the right of [Line Spacing] , select [Fixed Value], select the appropriate point size in [Set Value], and click [OK]. Then select the second column of cells, right-click the mouse, and select [Merge Cells] to merge
Apr 26, 2024 am 10:01 AM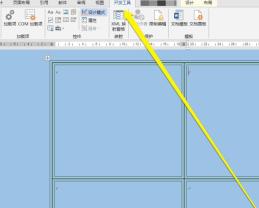
Detailed steps to add MediaPlayer control in word
1. After entering the word interface, click Development Tools in the toolbar. 2. After clicking the Development Tools button, on the Development Tools page, click the Old Tools button. 3. After clicking the old tool button, click the other control buttons. 4. After clicking the other controls button, enter the page of other controls. 5. On the page of other controls, find the MediaPlayer control icon. 6. After finding the MediaPlayer control, click OK, and the MediaPlayer control icon will appear in the word interface. 7. At this time, to add related media, you need to add it in the properties.
Apr 26, 2024 am 10:01 AM
Introduction to the method of sorting references in word papers in ascending alphabetical order
Convert references to tables: Select all references-->Click Insert on the toolbar, Table, and Convert Text to Table-->In the pop-up dialog box, select the paragraph mark for the text split position option, and finally click OK to convert to sheet. Select the reference table and sort it in ascending order: Select the table --> Click the Layout tab --> Click Sort --> In the pop-up dialog box, select ascending order, and default to others. Finally, click OK to sort successfully. Please note: The table in WPS text does not have a sorting function. You can copy the references to the WPS table for sorting and then copy them back to the original document. Convert table to text: Select the table --> click Convert to text -->
Apr 26, 2024 am 09:58 AM
A simple way to add an automatic calculator to a word document
1. After opening Word, click the Start tab and select the [Options] menu item in the pop-up menu. 2. In the word options window that opens, click the [Customize Ribbon] sidebar on the left. 3. At this time, select the [Command not in the Ribbon] menu item in the [Select a command from the following location] drop-down menu on the right. 4. Click the [New Tab] button at the bottom of the right window. 5. Right-click on the new tab and select the [Rename] menu item in the pop-up menu. 6. Rename the new tab in the pop-up window, for example: Calculator. 7. Find the [Calculate] menu item on the left, then click the [Add] button to add it to the [Calculator] tab just created. 8. Enter the equations that need to be calculated in word later.
Apr 26, 2024 am 09:58 AM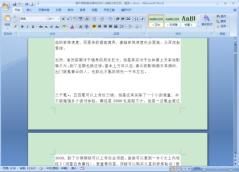
How to quickly merge word documents
Open one of the documents you want to merge in Word. Click [Insert], [Object], and [Text in File] in sequence. Find other files that need to be inserted, and then press the [Insert] button.
Apr 26, 2024 am 09:55 AM
Detailed method to open macro in word2013
1. First open word2013 and click [File] on the menu bar. 2. After clicking [File] on the menu bar, the word system settings page will open. Here, select [Trust Center] in the menu list on the left. 3. After opening the [Trust Center] page, click the [Trust Center Settings...] button on the right. 4. Click the [Trust Center Settings...] button to open the [Trust Center] settings dialog box. 5. Open the settings dialog box of [Trust Center], as shown in the figure. Here, select [Macro Settings] in the function list on the left. 6. After opening the [Macro Settings] option, some macro settings are set in this option. The default state of the macro settings is [Disable all macros and issue notifications]. Because we need to turn on macros, we select [Macro Settings].
Apr 26, 2024 am 09:55 AM
Hot tools Tags

Undresser.AI Undress
AI-powered app for creating realistic nude photos

AI Clothes Remover
Online AI tool for removing clothes from photos.

Undress AI Tool
Undress images for free

Clothoff.io
AI clothes remover

Video Face Swap
Swap faces in any video effortlessly with our completely free AI face swap tool!

Hot Article
What's New in Windows 11 KB5054979 & How to Fix Update Issues
How to fix KB5055523 fails to install in Windows 11?
How to fix KB5055518 fails to install in Windows 10?
Strength Levels for Every Enemy & Monster in R.E.P.O.
Blue Prince: How To Get To The Basement
Hot Tools

vc9-vc14 (32+64 bit) runtime library collection (link below)
Download the collection of runtime libraries required for phpStudy installation

VC9 32-bit
VC9 32-bit phpstudy integrated installation environment runtime library

PHP programmer toolbox full version
Programmer Toolbox v1.0 PHP Integrated Environment

VC11 32-bit
VC11 32-bit phpstudy integrated installation environment runtime library

SublimeText3 Chinese version
Chinese version, very easy to use

