Rumah >hujung hadapan web >tutorial css >css实现凸字形状的代码实例
css实现凸字形状的代码实例
- 不言asal
- 2018-08-18 17:02:283011semak imbas
本篇文章给大家带来的内容是关于css实现凸字形状的代码实例,有一定的参考价值,有需要的朋友可以参考一下,希望对你有所帮助。
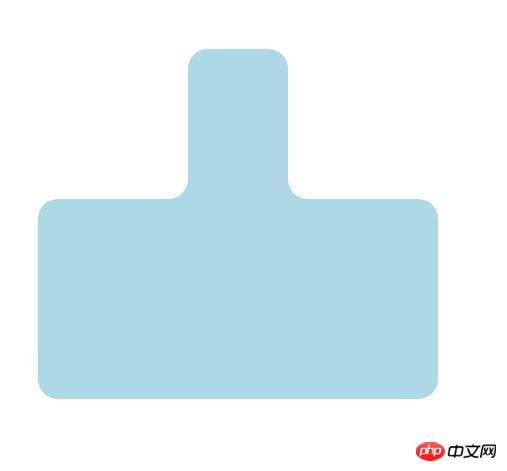
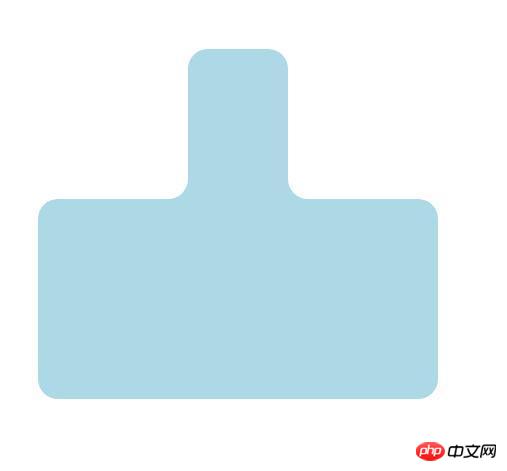
昨天看到有人想做凸字型框,今天用几分钟做了一下,发现还蛮巧妙的,分享一下
最终效果如下所示

代码在这儿:
   <div class="box">
        <span class="big"></span>
        <span class="top"></span>
        <span class="topR"></span>
    </div>
body {
display: flex;
justify-content: center;
align-items: center;
.box {
position: relative;
width: 400px;
height: 400px;
top: 200px;
color: lightblue;
.big {
position: absolute;
width: 400px;
height: 200px;
border-radius: 20px;
background-color: currentColor;
bottom: 0;
}
.top {
position: absolute;
width: 100px;
left: calc((400px - 100px)/2);
height: 150px;
border-radius: 20px 20px 0 0;
background-color: currentColor;
top: 50px;
}
.top::before {
content: "";
position: absolute;
background-color: lightblue;
height: 48px;
width: 100px;
left: -100px;
top: 102px;
}
.top::before {
content: "";
position: absolute;
background-color: lightblue;
height: 48px;
width: 100px;
left: -100px;
top: 102px;
}
.top::after {
content: "";
position: absolute;
background-color: #fff;
border-radius: 0 0 20px 0;
height: 48px;
width: 100px;
left: -100px;
top: 102px;
}
.topR {
position: absolute;
background-color: lightblue;
height: 48px;
width: 100px;
right: 50px;
top: 152px;
}
.topR::after {
content: "";
position: absolute;
background-color: #fff;
border-radius: 0 0 0 20px;
height: 48px;
width: 100px;
left: 0;
top: 0;
}
}
}一开始我以为只要上下两个圆角矩形拼接就行,NO NO NO,其实两个圆角相交处还有圆角,一看这个圆角就知道,可以使用白色的圆角矩形覆盖,那么问题来了:
白色的圆角矩形覆盖之后,中间会形成空隙,这个空隙需要蓝色填满。所以思路是这样的:
一、先建立上下两个圆角矩形:
HTML:
 4407ea8b79b53c22b11ee33ab422c2d554bdf357c58b8a65c66d7c19c8e4d114
 ea688be2fd7bd7caa3c227747863de4254bdf357c58b8a65c66d7c19c8e4d114
二:在上面的圆角矩形左右各加一个蓝色色的圆角矩形,与上下两个矩形相切,但是长度和宽度都不能超过上下两个大矩形

三:再在后来添加的小蓝色矩形块儿上,各增加一个大小一致的白色矩形覆盖,分别设置右下圆角与左下圆角,代码如下:
border-radius: 0 0 20px 0;
border-radius: 0 0 0 20px;
OK,大功告成!一个凸型框就制作好啦。
相关推荐:
Atas ialah kandungan terperinci css实现凸字形状的代码实例. Untuk maklumat lanjut, sila ikut artikel berkaitan lain di laman web China PHP!
Kenyataan:
Kandungan artikel ini disumbangkan secara sukarela oleh netizen, dan hak cipta adalah milik pengarang asal. Laman web ini tidak memikul tanggungjawab undang-undang yang sepadan. Jika anda menemui sebarang kandungan yang disyaki plagiarisme atau pelanggaran, sila hubungi admin@php.cn
Artikel sebelumnya:css外观属性有哪些?css外观属性的介绍Artikel seterusnya:如何使用CSS实现一只鸭子头(附代码)

