Rumah >hujung hadapan web >Tutorial H5 >HTML5画布Canvas坐标轴转换、图案填充、渐变与阴影
HTML5画布Canvas坐标轴转换、图案填充、渐变与阴影
- 黄舟asal
- 2017-02-27 15:34:553052semak imbas
上一篇文章我们了解了一些canvas基本图形绘制
下面我们再来看一些相关操作
坐标轴变换
我们画布中默认的坐标轴与浏览器坐标轴相同
x正半轴朝右
y正半轴朝下
但是我们可以手动设置画布坐标轴变换
首先还是会获取“画布”和“画笔”
<canvas id="myCanvas" width=500 height=500></canvas>
var canvas = document.getElementById('myCanvas'),
    ctx = canvas.getContext('2d');
先来在画布中画一个正方形
ctx.fillStyle = '#f40';
ctx.fillRect(100, 100, 300, 300);
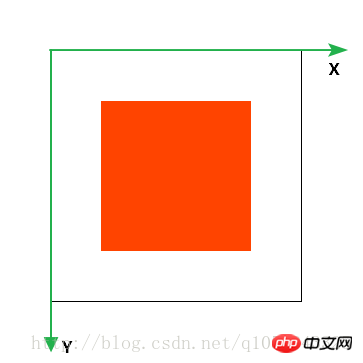
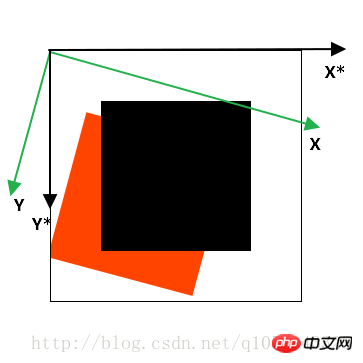
在图中我标记了画布的坐标轴
平移
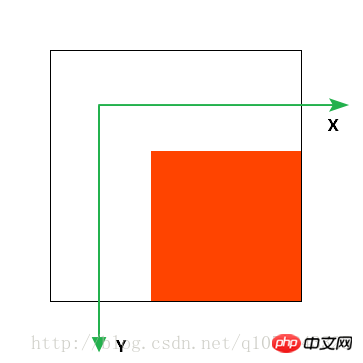
使用translate(dx, dy)方法可以平移坐标轴
参数为x轴平移距离和y轴平移距离
ctx.translate(100, 100);
ctx.fillStyle = '#f40';
ctx.fillRect(100, 100, 300, 300);
缩放
使用scale(sx, sy)方法可以扩大坐标轴
参数为x轴和y轴的缩放因子
坐标也会等比缩放
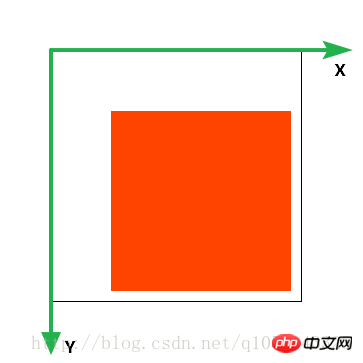
ctx.scale(1.2, 1.2);
ctx.fillStyle = '#f40';
ctx.fillRect(100, 100, 300, 300);
旋转
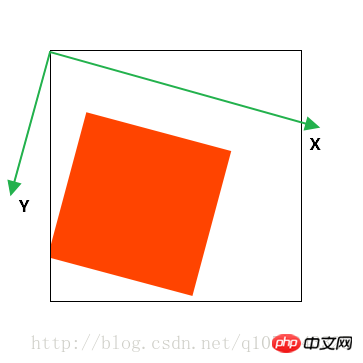
使用rotate(deg)方法可以旋转坐标轴
ctx.rotate(Math.PI/12);
ctx.fillStyle = '#f40';
ctx.fillRect(100, 100, 300, 300);
保存与恢复
在改变坐标轴之前
我们使用save()可以保存之前的画布坐标轴
然后使用restore()可以让坐标轴恢复到之前的样子
ctx.save(); //保存之前的正常坐标轴ctx.rotate(Math.PI/12);
ctx.fillStyle = '#f40';
ctx.fillRect(100, 100, 300, 300);
ctx.restore();//恢复到正常坐标轴ctx.fillStyle = '#000';
ctx.fillRect(100, 100, 300, 300);
还有两个方法变换坐标轴了解即可
setTransform(a, b, c, d, e, f)
这个方法会重置坐标轴后再进行变换
transform(a, b, c, d, e, f)
这个方法是在之前坐标轴的基础上进行变换
这两个方法都是替换为变换矩阵
a c e
b d f
0 0 1
和CSS3的图形变换类似
参数分别表示:水平缩放、水平倾斜、垂直倾斜、垂直倾斜、垂直缩放、水平移动、垂直移动
图案填充
现在我先在页面中添加一个图片元素
<img src="./images/lamp.gif">

我们可以将这个图片填充到我们的画布中
使用createPattern(img/canvas/video, “repeat”/”no-repeat”/”repeat-x”/”repeat-y”)
var img = document.getElementsByTagName('img')[0];var pt = ctx.createPattern(img, 'repeat');
ctx.fillStyle = pt;
ctx.fillRect(0, 0, 500, 500);
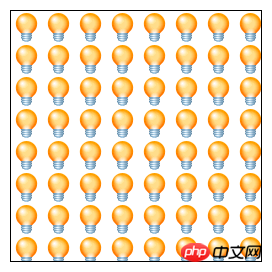
它返回了CanvasPattern对象
定义了填充规则
除了img标签外,我们还可以填充canvas和video元素
使用方法是一样的
渐变
与CSS3中的渐变类似
canvas中的渐变也分为线性渐变和径向渐变
和图案填充的类似,需要定义我们的渐变规则
线性渐变
createLinearGradient(x1, y1, x2, y2)
表示定义从一点到另一点的线性渐变
返回一个CanvasGradient()对象
上面有addColorStop()用来定义我们的渐变色
0就是起始点,1是终点
var lGradient = ctx.createLinearGradient(0, 0, 0, 250);
lGradient.addColorStop(0, '#000');
lGradient.addColorStop(1, '#fff');
ctx.fillStyle = lGradient;
ctx.fillRect(0, 0, 500, 250);
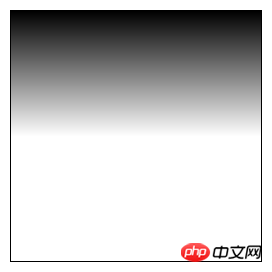
注意定义的渐变必须要在渐变区域里才能够显示
径向渐变
createRadialGradient(x1, y1, r1, x2, y2, r2)
相比线性渐变,多了两个点的半径参数
除此之外使用方法和上面是一样的
就不多做解释了
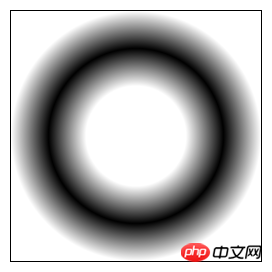
比如说我们可以绘制一个渐变同心圆
var rGradient = ctx.createRadialGradient(250, 250, 100, 250, 250, 250);
rGradient.addColorStop(0, '#fff');
rGradient.addColorStop(0.5, '#000');
rGradient.addColorStop(1, '#fff');
ctx.fillStyle = rGradient;
ctx.fillRect(0, 0, 500, 500);
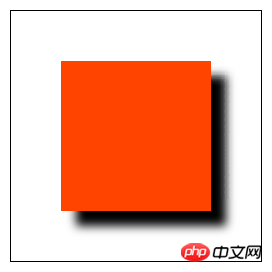
阴影
类比于CSS3中的box-shadow属性
在canvas中我们使用
shadowColor 定义阴影颜色
shadowOffsetX/Y 控制阴影偏移量
shadowBlur 定义阴影模糊半径
要注意的是
阴影的偏移量不受坐标系变换影响
ctx.shadowColor = '#000';
ctx.shadowOffsetX = 30;
ctx.shadowOffsetY = 30;
ctx.shadowBlur = 30;
ctx.fillStyle= '#f40';
ctx.fillRect(100, 100, 300, 300);
设置阴影相关属性后才可以使用fillRect绘制带阴影的矩形
以上就是HTML5画布Canvas坐标轴转换、图案填充、渐变与阴影 的内容,更多相关内容请关注PHP中文网(www.php.cn)!

