날짜 및 시간 구성요소(1부)
이 섹션 소개:
이 섹션에서는 Android가 시간을 표시하기 위해 제공하는 몇 가지 컨트롤을 제공합니다. TextClock, AnalogClock, Chronometer 그리고 실제로는 설명하지 않을 오래된 DigitalClock이 있습니다! 좋아요, 이제 이 섹션을 시작하겠습니다!
1.TextClock(TextClock)
TextClock은 DigitalClock을 대체하기 위해 Android 4.2(API 17) 이후 출시된 컨트롤입니다!
TextClock은 현재 날짜와 시간을 문자열 형식으로 표시할 수 있으므로 Android 4.2 이후의 TextClock 사용을 권장합니다.
이 컨트롤은 24비트 Android 시스템에서 사용하는 것이 좋습니다. TextClock은 두 가지 형식을 제공합니다. 하나는 24진수로 시간과 날짜를 표시하는 것이고, 다른 하나는 12진수로 시간과 날짜를 표시하는 것입니다. 대부분의 사람들은 기본 설정을 좋아합니다.
TextClock에서 제공하는 is24HourModeEnabled() 메서드를 호출하여 시스템이 24자리 시간 표시를 사용하고 있는지 확인할 수 있습니다! 24자리 모드:
- 시간을 얻지 못하면 먼저 getFormat24Hour()를 통해 값을 반환합니다.
- 획득에 실패하면 getFormat12Hour()를 통해 반환 값을 획득합니다.
- 위 획득에 실패하면 다음을 사용합니다.
또한 get 메소드에 해당하는 다음 메소드를 제공합니다:
| 속성 이름 | Related Method | Description |
|---|---|---|
| android:format12Hour | setFormat12Hour(CharSequence) | 12시간 형식을 설정합니다 |
| android:format24Hour | setFormat24Hour(CharSequence) | 24시간 형식을 설정합니다. 형식 |
| android: timeZone | setTimeZone( String) | 시간대 설정 |
사실 우리는 내부의 CharSequence인 시간 형식의 정의에 더 많은 시간을 할애합니다! 일반적으로 사용되는 작성 방법과 결과는 다음과 같습니다.
‐ ' s ' ' s를 ' s ' s로 ' ‐ ‐ ‐''''''''''''를 Android로: "android:format12Hour="MM/dd/yy h:mmaa"/> ;
<TextClock
' t ' s ' ' s ' s ' t t- t- t d , android:layout_width=로 "wrap_content"
android ; content"
android:format12Hour="E , MMMM dd, yyyy h:mmaa"/> dd, yyyy h:mmaa"/> ;
<TextClock
android:layout_width="wrap_content"
안드로이드 :layout_height="wrap_content"
android:format12Hour="주목할 만한 날: 'M/d/yy"/>
실행 결과:
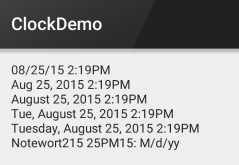
PS:또한 minsdk는 17보다 크거나 같아야 합니다!
2.AnalogClock(아날로그 시계)
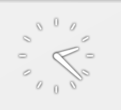
은 아래 사진과 같습니다.
공식 홈페이지를 보면
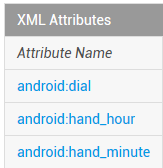
3가지 속성을 순서대로 볼 수 있습니다: 테이블 배경, 테이블 시침, 시간의 경우 맞춤설정할 수 있습니다.
예제 코드는 다음과 같습니다:
Android: 레이아웃_폭 = "100dp"
Android: 레이아웃_높이 = "100dp"
Android: 다이얼 = "@mip MAP/IC_C_BG "
android:hand_hour="@mipmap/zhen_shi"
android:hand_ Minute="@mipmap/zhen_fen" />
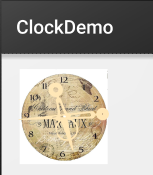
실행 결과:
3.크로노미터(타이머)
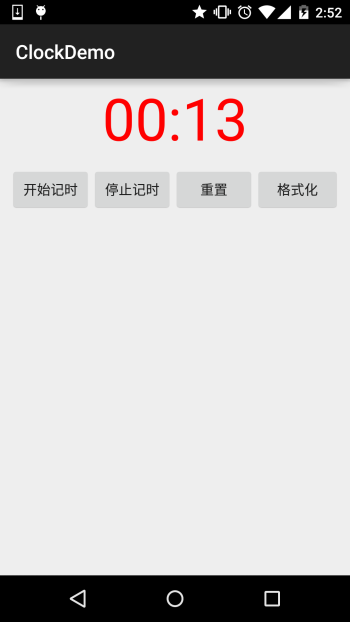
제목 그대로 간단한 타이머이므로 바로 사용 예:
사용 예:
구현 코드:
레이아웃 코드:
<LinearLayout xmlns:android="http://schemas.android.com/apk/res/android"
xmlns:tools="http://schemas.android.com/tools"
android:layout_width= "match_parent"
android:layout_height="match_parent"
android:orientation="vertical"
tools:context=".MainActivity">
<크로노미터
android:id="@+id/chronometer"
안드로이드 :layout_width="fill_parent"
android:layout_height="wrap_content"
android:gravity="center"
android:textColor="#ff0000"
android:textSize="60dip" />
<LinearLayout
안드로이드: layout_width="fill_parent"
android:layout_height="wrap_content"
android:layout_margin="10dip"
android:orientation="horizontal">
<Button
android:id="@+id/btnStart"
android :layout_width="fill_parent"
android:layout_height="wrap_content"
android:layout_weight="1"
android:text="开始记时" />
& lt;Button
android:id="@+id/ btnStop"
android:layout_width="fill_parent"
android:layout_height="wrap_content"
android:layout_weight="1"
android:text="停止记时" />
<버튼
android:id="@+id/btnReset"
android:layout_width="fill_parent"
android:layout_height="wrap_content"
android:layout_weight="1"
android:text="중置" />
< ;Button
android:id="@+id/btn_format"
android:layout_width="wrap_content"
android:layout_height="wrap_content"
android:text="格式化" />
</LinearLayout>
</LinearLayout>
MainActivity.java
public 클래스 MainActivity는 AppCompatActivity를 확장하여 View.OnClickListener,Chronometer.OnChronometerTickListener를 구현합니다{
private 크로노미터 크로노미터;
private 버튼 btn_start,btn_ stop,btn_base,btn_format;
@Override
protected void onCreate(Bundle savedInstanceState) {
super.onCreate(savedInstanceState);
setContentView(R.layout.activity_main);
initView();
}
private void initView() {
크로노미터 = (크로노미터) findViewById(R.id .chronometer);
btn_start = (버튼) findViewById(R.id.btnStart);
btn _stop = (버튼) findViewById(R.id.btnStop);
btn_base = (버튼) findViewByI d(R.id.btnReset);
btn_format = (버튼) findViewById(R.id.btn_format);
chronometer.setOnChronometerTickListener(this);
btn_start.setOnClickListener(this);
btn_stop.setOnClickListener(this);
btn_base.setOnClickListener(this);
btn_format.setOnClickListener(this);
}
@Override
public void onClick(View v) {
스위치(v.getId()){
케이스 R.id.btnStart:
chronometer.start();//시작 타이밍
사례 R.id.btnReset:
chronometer.setBase(SystemClock.elapsedRealtime());//Reset
~ Break;
}
}
@Override
public void onChronometerTick(크로노미터 크로노미터) {
문자열 시간 = chronometer.getText().toString();
> ~
스크린샷 실행:
섹션 요약:
이 섹션에서는 길이에서 알 수 있듯이 TextClock, AnalogClock 및 Chronometer의 세 가지 구성 요소를 간략하게 소개합니다. 사실 저는 이런 것들을 많이 사용하지 않고 거의 사용하지 않습니다... 알아두면 좋고 사용법도 매우 간단합니다... 이상입니다, 이번 편은 여기까지입니다~감사합니다


